
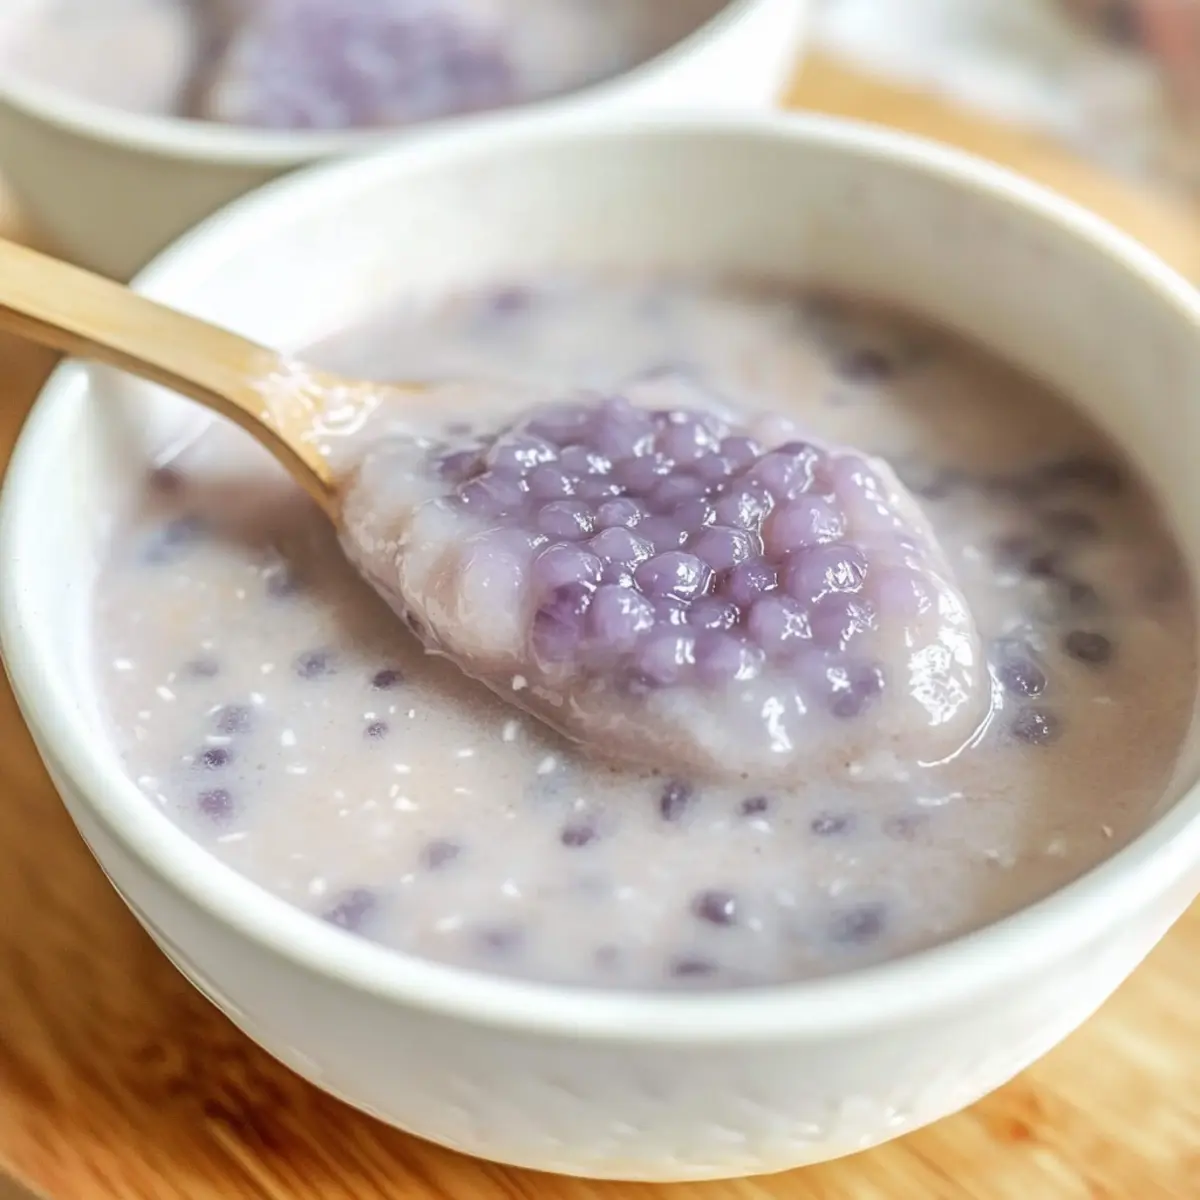
As I wandered through the vibrant markets of Asia, I stumbled upon a dessert that instantly captivated my taste buds: Taro Coconut Sago. This simple yet luxurious dish, made with just five ingredients, perfectly marries the creamy essence of coconut milk with the subtle nuttiness of taro, resulting in a comforting treat that’s hard to resist. The delightful chewiness from the tapioca pearls adds a sensational texture, making it a satisfying choice for those moments when a sweet craving strikes. Plus, its quick preparation means you can whip up this delightful Asian dessert in no time, whether you’re hosting friends or treating yourself. Curious to learn how to make this refreshing dish that’s sure to impress? Let’s dive in!
Why is Taro Coconut Sago So Special?
Creamy Texture: This dessert boasts an incredibly smooth and luscious mouthfeel, thanks to the coconut milk and tender taro.
Simplicity: With just five ingredients, anyone—from novice cooks to seasoned chefs—can create this enchanting treat with ease.
Unique Flavor: The blend of taro’s gentle nuttiness and the richness of coconut milk makes every bite a delightful experience.
Versatile Serving: Whether served warm or chilled, Taro Coconut Sago is perfect for any occasion, appealing to various palates.
Quick Preparation: Ready in under 30 minutes, it’s a fantastic choice for spontaneous dessert cravings or gatherings with friends.
Trust me, once you try this Taro Coconut Sago, you’ll be eager to share the recipe, just like my favorites, such as Chicken Curry Coconut or Baked Cod Coconut.
Taro Coconut Sago Ingredients
For the Base
- Tapioca Pearls – Provides chewy texture and is essential for the creamy Taro Coconut Sago.
- Taro – Adds earthy flavor and creaminess; remember to wear gloves to avoid skin irritation.
- Coconut Milk – Creates a smooth, rich base; can replace with other non-dairy milks for a different flavor.
For the Sweetness
- Rock Sugar – Offers mild sweetness; white granulated sugar can be used as a substitute but use less due to its potency.
For Cooking
- Water – Essential for cooking the tapioca pearls and taro; adjust based on pot size and desired consistency.
Step‑by‑Step Instructions for Taro Coconut Sago
Step 1: Prepare Tapioca Pearls
Begin by bringing 5 cups of water to a rolling boil in a medium pot. Once boiling, add in the tapioca pearls, then reduce the heat to a simmer. Cook the pearls for about 15 minutes, stirring occasionally until they turn translucent. Afterward, cover the pot and let them rest for an additional 10-15 minutes, then strain and rinse under cold water to stop the cooking process.
Step 2: Prep Taro
While the tapioca pearls are cooking, prepare the taro. Carefully peel the taro root with a knife or vegetable peeler, wearing gloves to avoid skin irritation. Cut the taro into uneven cubes, about one-inch pieces, which will release their flavors and create a creamy texture as they cook. Set the cubed taro aside for the next step.
Step 3: Cook Taro
In a large pot, combine the cubed taro, rock sugar, and enough water to cover the ingredients. Bring the mixture to a boil over medium-high heat. Once boiling, reduce the temperature to a gentle simmer, covering the pot. Let it cook for approximately 20 minutes, checking occasionally until the taro is tender and easily pierced with a fork.
Step 4: Finish Dessert
Stir in the coconut milk into the cooked taro mixture and continue to simmer for an additional 5 minutes. The dessert will start to thicken, creating that luscious creamy base for your Taro Coconut Sago. Taste and adjust the sweetness if desired, adding more rock sugar if you prefer a sweeter dessert.
Step 5: Combine
After cooking, drain the previously prepared tapioca pearls and gently fold them into the warm taro coconut mixture. Ensure they are well incorporated, allowing every chewy pearl to be enveloped in the creamy goodness. You can serve this delightful dish hot for a comforting dessert or chill it overnight for a refreshing treat.
How to Store and Freeze Taro Coconut Sago
Fridge: Store Taro Coconut Sago in an airtight container for up to 3 days to maintain freshness. This will help preserve its creamy texture and delightful flavors.
Freezer: While not recommended for long-term freezing, you can freeze the dessert for up to a month. However, the texture may change upon thawing, so reheat gently to improve texture.
Reheating: To serve, simply warm the refrigerated or thawed Taro Coconut Sago on the stove over low heat, stirring gently. You could also add a splash of coconut milk to restore creaminess.
Serving Tips: Enjoy this refreshing dessert chilled or warm, and feel free to add fresh fruits or nuts as toppings to enhance the experience!
What to Serve with Creamy Taro Coconut Sago
Relish in the harmony of flavors and textures as we explore delightful accompaniments for your luscious dessert.
-
Mango Sticky Rice: The sweetness of ripe mango and the chewy texture of sticky rice create a tropical experience that beautifully complements the creamy dessert.
-
Crispy Spring Rolls: The light crunch of spring rolls filled with fresh vegetables offers a delightful contrast, making every bite an exciting adventure.
-
Green Tea: A warm cup of green tea provides a subtle earthy note that balances the richness of Taro Coconut Sago, enhancing its natural flavors.
-
Sesame Balls: These chewy treats filled with sweet red bean paste add an extra layer of sweetness alongside the creamy goodness of Taro Coconut Sago.
-
Fried Bananas: The caramelized exterior of fried bananas paired with the dessert guarantees a joyful texture contrast, inviting nostalgia with every bite.
-
Coconut Jelly: A smooth, coconut-flavored jelly brings a refreshing coolness that echoes the flavors in Taro Coconut Sago while keeping your palate refreshed.
By combining these delightful pairings, you’ll have a feast that is both comforting and exciting, perfect for sharing with family and friends or simply enjoying by yourself.
Expert Tips for Taro Coconut Sago
• Taste Balance: Ensure you add the coconut milk gradually and taste throughout; you can always adjust sweetness later if needed.
• Perfectly Cooked Taro: Use a fork to check if the taro is fully tender; it should easily break apart to ensure a creamy texture in your Taro Coconut Sago.
• Keep It Chewy: Rinse tapioca pearls well after cooking to prevent them from sticking together; this maintains their delightful chewiness in the final dish.
• Serving Temperature: Experiment with serving it warm or chilled; both options offer a unique experience in tasting this dessert.
• Storing Leftovers: If not consumed right away, store Taro Coconut Sago in an airtight container in the refrigerator, best enjoyed within three days.
Make Ahead Options
These Taro Coconut Sago are perfect for busy weeknights and meal prep enthusiasts! You can prepare the tapioca pearls and taro in advance, storing them separately in airtight containers. The tapioca pearls can be refrigerated for up to 3 days, while the cooked taro mixture will also hold quality in the fridge for up to 3 days. To maintain the creamy texture of the Taro Coconut Sago, reheat the taro mixture gently in a pot and stir in the coconut milk just before serving, adjusting sweetness as desired. By prepping these components ahead of time, you can whip up this delightful dessert in a matter of minutes, offering restaurant-quality results with minimal effort!
Taro Coconut Sago Variations & Substitutions
Feel free to get creative with your Taro Coconut Sago by exploring these delightful variations that add exciting twists and flavors!
- Dairy-Free: Use almond milk or oat milk instead of coconut milk for a non-dairy alternative that still delivers creaminess.
- Sweetener Swap: Use honey or maple syrup in place of rock sugar for a different sweetness profile that pairs beautifully with the taro.
- Nutty Boost: Stir in a spoonful of almond or peanut butter for an added nutty flavor that complements the dessert’s richness.
- Flavor Infusion: Add a splash of vanilla extract or pandan essence while cooking for an aromatic enhancement that elevates the dish.
- Fruit Toppings: Garnish with sliced fresh mango or berries to add a burst of freshness and vibrant colors, making your dessert even more appealing.
- Herbal Hint: Consider infusing your sago with a few sprigs of fresh mint during the cooking process for a refreshing herbal twist that brightens each bite.
- Crispy Texture: Top with toasted coconut flakes or nuts for a delightful crunch that contrasts the creamy base of the dessert.
- Spice Touch: A hint of cinnamon or cardamom sprinkled on top can elevate the flavors, offering a warm spice note that’s irresistible.
No matter how you choose to customize your Taro Coconut Sago, each variation brings something unique to this already delightful dessert. Enjoy it on its own or as a charming accompaniment to dishes like Chili Chicken Bowl, and watch how it impresses friends and family alike!
Taro Coconut Sago Recipe FAQs
How do I choose ripe taro?
When selecting taro, look for firm roots with smooth skin and minimal dark spots. Avoid any taro that feels soft or has significant blemishes, as these may indicate spoilage. Fresh taro should have a slightly earthy aroma, showcasing its rich flavor.
How should I store Taro Coconut Sago?
Store your Taro Coconut Sago in an airtight container in the refrigerator for up to 3 days. This will help maintain its delicious creamy texture and delightful flavors. Make sure to let it cool completely before sealing to avoid condensation, which can affect the dessert.
Can I freeze Taro Coconut Sago?
Yes, you can freeze Taro Coconut Sago, but keep in mind that the texture may change upon thawing. To freeze, portion the dessert into airtight containers and place them in the freezer for up to a month. When ready to enjoy, thaw it overnight in the refrigerator, and gently reheat on the stove over low heat, adding a splash of coconut milk if needed to restore its creaminess.
What should I do if my tapioca pearls are too sticky?
If your tapioca pearls become sticky, the best solution is to rinse them under cold water right after cooking. This washes off excess starch and separates the pearls, helping them maintain their chewy texture in the Taro Coconut Sago. Alternatively, stir them with a drizzle of oil to prevent them from clumping together.
Is this dessert suitable for people with allergies?
Taro Coconut Sago is generally safe for those without allergies to the ingredients. However, it does contain coconut milk, which can trigger allergies in some individuals. Always check with guests about allergies before serving, and consider using alternatives like almond milk for a nut-friendly version.
Can I make substitutions in this recipe?
Absolutely! You can substitute rock sugar with white granulated sugar, though it’s sweeter, so you may need to adjust the amount used. Additionally, if you’re looking for a non-dairy option, try almond milk or oat milk in place of coconut milk. Remember, each modification may slightly alter the flavor, but the joy of cooking is in experimenting!
Creamy Taro Coconut Sago: Your New Favorite Asian Dessert
Ingredients
Equipment
Method
- Bring 5 cups of water to a rolling boil in a medium pot. Add the tapioca pearls, reduce heat to a simmer, and cook for about 15 minutes until translucent. Cover and let rest for 10-15 minutes, then strain and rinse under cold water.
- Peel the taro root with a knife or vegetable peeler, wearing gloves. Cut taro into uneven 1-inch cubes and set aside.
- Combine cubed taro, rock sugar, and enough water to cover in a large pot. Boil over medium-high heat, reduce to a simmer and cook for 20 minutes or until taro is tender.
- Stir in coconut milk into the cooked taro mixture and simmer for an additional 5 minutes until the dessert thickens.
- Drain previously prepared tapioca pearls and gently fold into the taro coconut mixture. Serve warm or chill overnight.
Leave a Reply