
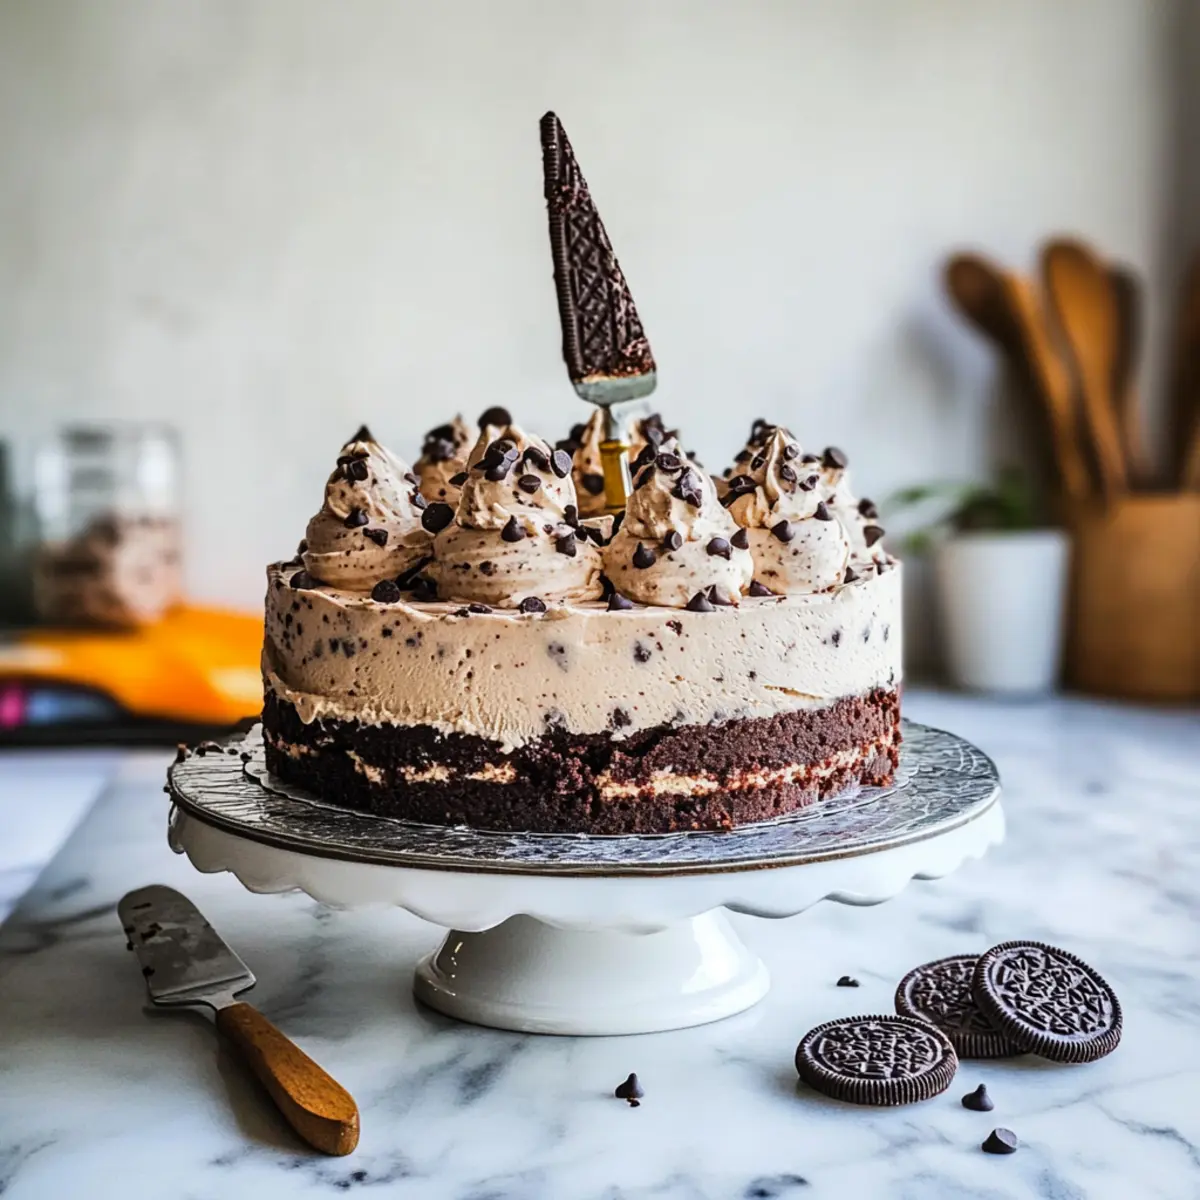
The sound of laughter and the excited chatter of family gathered around the table is the perfect backdrop for my Oreo Brookie Ice Cream Cake. This show-stopping dessert will undoubtedly steal the spotlight at your next summer gathering. With luscious layers of fudgy brownies, creamy chocolate chip cookie ice cream, and rich Oreo goodness, it’s like having your favorite flavors wrapped up in one delightful slice. The best part? You can whip it up in a snap using no-bake options or store-bought ingredients, making it a fantastic treat without the fuss. It’s a crowd-pleaser that’s not just about taste; it’s also a fun experience to create, allowing you to customize it with your favorite candies. Ready to impress your friends and family? Let’s dive into crafting this sweet masterpiece together!
Why is this dessert so special?
Indulgent, delightful layers: The Chocolate Oreo Cookie Ice Cream Cake is a celebration of flavors that expertly combines fudgy brownies with creamy ice cream. No-bake convenience: Perfect for busy summer days, this recipe is an effortless way to create a stunning dessert without the oven! Customizable: Use your favorite candies or try different ice cream flavors like mint chocolate chip for a twist. Audience favorite: This cake is sure to be a hit at gatherings, bringing smiles to both kids and adults alike. For a delicious icing on the cake, consider drizzling some homemade chocolate sauce over the top, just like in our Whipped Hot Chocolate recipe!
Chocolate Oreo Cookie Ice Cream Cake Ingredients
• Discover how easy it is to create this Chocolate Oreo Cookie Ice Cream Cake!
For the Cake Base
- Chocolate Cake (16 ounces) – Use a homemade or store-bought option for a moist foundation.
- Oreos or Chocolate Sandwich Cookies – Great for both the base and garnish; feel free to swap with other cookies for a different flavor.
For the Brownie Layer
- Boxed Brownie Mix – Adds a fudgy richness; homemade brownies can also be used for an extra personal touch.
For the Ice Cream Layers
- Vanilla Ice Cream (2 quarts or 8 cups) – Must be softened for easy spreading; it’s the creamy star of this cake.
- Chocolate Chip Cookie Ice Cream – This adds an extra burst of flavor and texture; use store-bought for quick assembly.
For the Chocolate Sauce
- Chocolate Sauce (1 cup) – Enhances the cake’s flavor; can be store-bought or you can make your own for an indulgent touch.
- Dark Chocolate (4 ounces) – Use in homemade chocolate sauce for an added depth of flavor.
- Butter (1 tablespoon) – Necessary for preparing the rich chocolate sauce.
Optional Toppings
- Crushed Oreos – Sprinkle on top for extra crunch before serving; they elevate the visual appeal and taste.
- Whipped Cream – Consider adding layers of this light topping between ice cream layers for added fluffiness.
Now you’re all set with the ingredients for your Chocolate Oreo Cookie Ice Cream Cake! Let’s get ready to create this stunning dessert that will surely impress your guests.
Step‑by‑Step Instructions for Chocolate Oreo Cookie Ice Cream Cake
Step 1: Prepare the Chocolate Cake
Start by baking a chocolate cake according to your favorite recipe or using a store-bought one. If homemade, allow it to cool for about 30 minutes on a wire rack until it’s completely set. This cooling step is crucial, as it will provide a sturdy base for your Chocolate Oreo Cookie Ice Cream Cake.
Step 2: Make the Brownie Layer
While the cake cools, prepare the brownie mix as directed on the package. Once combined, pour the batter into a greased baking dish and bake for 20-25 minutes at 350°F (175°C). The brownies should appear set but fudgy—insert a skewer to check; it should come out with a few moist crumbs.
Step 3: Cool and Freeze the Brownies
After baking, allow the brownies to cool in the pan for about 10-15 minutes. Once cool enough to handle, transfer them to the refrigerator for at least 30 minutes to firm up. This chilling will help the brownie layer to hold its shape when layered into the Chocolate Oreo Cookie Ice Cream Cake.
Step 4: Layer the Cake Base
Once everything is cool, carefully remove the chocolate cake from the pan and place it at the base of a springform pan. This pan will help keep your layers intact. To enhance the flavor, you can drizzle a little chocolate sauce over the cake layer for added richness.
Step 5: Spread the Vanilla Ice Cream
Next, take your softened vanilla ice cream and spread a generous layer of it over the chocolate cake. Use a spatula to ensure an even layer and smooth out the surface. This layer should be about 1-2 inches thick, adding delicious creaminess to the Chocolate Oreo Cookie Ice Cream Cake.
Step 6: Add the Brownie Layer
Carefully cut the chilled brownies into squares and layer them over the vanilla ice cream. Try to arrange them so they cover the ice cream completely, creating a solid fudgy layer. You can press them down gently to ensure they stick together, adding to the richness of our dessert.
Step 7: Top with More Ice Cream
Once the brownie layer is in place, bring out the softened vanilla ice cream again and spread another layer on top of the brownies. Aim for the same thickness as before. This delightful layering of flavors is what makes the Chocolate Oreo Cookie Ice Cream Cake so indulgent!
Step 8: Freeze the Cake
Carefully cover the springform pan with plastic wrap or foil, and place it in the freezer. Allow the entire cake to freeze for at least 4 hours or up to 12 hours for best results. This will ensure the layers are well-fused and the cake holds its shape when sliced.
Step 9: Drizzle with Chocolate Sauce
Once the cake is firmly set, remove it from the freezer and carefully take off the springform. Drizzle homemade or store-bought chocolate sauce over the top, allowing it to create a decadent, glossy finish that screams indulgence.
Step 10: Add Crushed Oreos and Serve
Finally, sprinkle crushed Oreos on top for that extra crunch and chocolatey goodness. Slice the cake into rich servings, and serve chilled for a refreshing treat that’s sure to impress. The Chocolate Oreo Cookie Ice Cream Cake is ready to elevate your summer gathering!
Make Ahead Options
These Chocolate Oreo Cookie Ice Cream Cakes are perfect for meal prep enthusiasts! You can prepare the cake base and brownie layer up to 24 hours in advance, allowing you to focus on the fun assembly later. Simply bake the chocolate cake and make the brownies, then let them cool completely before refrigerating them. When you’re ready to finish the dessert, just layer the softened vanilla ice cream and brownies as instructed. To maintain quality, ensure the cake is securely wrapped in plastic before freezing, which preserves its delightful flavors and textures. This way, you’ll have a stunning creation ready to impress your guests with minimal last-minute effort!
Chocolate Oreo Cookie Ice Cream Cake Variations
Feel free to let your creativity shine by customizing this delectable dessert to fit your taste preferences!
- Candy Bar Swap: Replace Oreos with crushed candy bars like Snickers or Milky Way for a delightful twist.
- Ice Cream Flavor Remix: Experiment with ice cream flavors such as cookies and cream or mint chocolate chip for unexpected flavors.
- Nutty Addition: Layer in some chopped nuts like pecans or walnuts for an enjoyable crunch that enhances the texture.
- Whipped Cream Layers: Incorporate layers of whipped cream between the ice cream for added lightness and creaminess.
- Fruit Explosion: Add fresh fruit like strawberries or bananas for a refreshing contrast to the rich chocolate and cream.
- Heat it Up: Introduce a touch of spice with cinnamon or a dash of cayenne pepper in the brownie mix for an exciting kick.
- Gluten-Free Option: Use a gluten-free brownie mix along with gluten-free cookies to accommodate dietary preferences.
- Simple Chocolate Fix: Try an easy homemade chocolate sauce from our French Chocolate Flan recipe for an added indulgent touch that everyone will love!
What to Serve with Chocolate Oreo Cookie Ice Cream Cake
This delightful dessert deserves companions that enhance its indulgent flavors and create a memorable meal experience.
-
Fresh Berries: Juicy strawberries or raspberries add a refreshing tartness, perfectly balancing the rich sweetness of the cake.
-
Whipped Cream: A dollop of chilled whipped cream brings lightness and creaminess to every slice, creating a heavenly texture contrast.
-
Chocolate Sauce: Drizzling extra chocolate sauce over your serving not only elevates the dessert’s elegance but amplifies the chocolatey goodness.
-
Mint Chocolate Chip Ice Cream: Serve alongside this mint confection for a refreshing twist. The cool mint flavor enhances the richness of the ice cream cake.
-
Coffee or Espresso: A warm cup of coffee or espresso cuts through the sweetness, delivering a comforting pairing that awakens the senses.
-
Ice Cold Milk: It’s a classic combination! A tall glass of cold milk makes every bite of the Chocolate Oreo Cookie Ice Cream Cake even more enjoyable.
-
Nutty Cookies: Consider serving with almond or hazelnut cookies. Their crunchy texture and nutty profile harmonize beautifully with the smooth layers of the cake.
Indulge in these pairings for a delightful summer dessert experience that leaves everyone asking for seconds!
How to Store and Freeze Chocolate Oreo Cookie Ice Cream Cake
-
Fridge: Store any leftovers in an airtight container for up to 3 days. While it’s best enjoyed fresh, refrigeration will maintain some of its texture.
-
Freezer: Wrap the Chocolate Oreo Cookie Ice Cream Cake tightly in plastic wrap and aluminum foil to prevent freezer burn. It can be stored in the freezer for up to 2 weeks.
-
Reheating: There’s no need to reheat this cake, but if it’s frozen, allow it to thaw in the refrigerator for about 1-2 hours before serving for the best texture.
-
Slice Individually: For convenient serving, consider slicing the cake into individual portions before freezing. Just wrap each slice in plastic wrap, and they’ll be ready for a sweet treat anytime!
Expert Tips for Chocolate Oreo Cookie Ice Cream Cake
-
Ice Cream Consistency: Ensure the ice cream is perfectly softened. This will make spreading it over the cake base much easier, resulting in a smooth layer.
-
Brownie Baking Time: Watch the brownies closely while baking. Overbaking can lead to a dry texture, while fudgy brownies should pull away from the edges but remain moist in the center.
-
Layer Stability: After pouring the brownie layer, chill it thoroughly to help maintain structure when layered in the Chocolate Oreo Cookie Ice Cream Cake. A firm brownie holds up better.
-
Freezing Duration: Don’t rush the freezing process. Aim for at least 8 hours to ensure the cake sets properly, which will make slicing easier and maintain the cake’s elegant layers.
-
Custom Toppings: Get creative with the toppings! Consider adding whipped cream, fresh berries, or even a dusting of cocoa powder to make your dessert visually stunning and add extra flavors.
Chocolate Oreo Cookie Ice Cream Cake Recipe FAQs
What kind of Oreos should I use for this recipe?
Absolutely! Regular Oreos or any chocolate sandwich cookies work perfectly as the base layer and for garnish. If you’re looking for a twist, feel free to experiment with flavored varieties or even different brands like peanut butter or mint Oreos!
How long can I store the Chocolate Oreo Cookie Ice Cream Cake in the fridge or freezer?
You can store leftovers in the refrigerator for up to 3 days, but for longer freshness, wrap the cake tightly in plastic wrap and aluminum foil to keep it protected from freezer burn. In the freezer, it can last for up to 2 weeks, but it’s best enjoyed within the first week for optimal flavor and texture.
Can I freeze the Chocolate Oreo Cookie Ice Cream Cake?
Yes, you can! After assembling the cake, cover it with plastic wrap and foil, then place it in the freezer. Allow it to freeze for 4-12 hours until firm. To serve, just remove it from the freezer and let it sit for about 15-20 minutes before slicing for easier cutting.
What if my brownies turn out too dry?
No worries! If your brownies end up being dryer than you want, you can enhance them when layering by adding some chocolate sauce or a dollop of whipped cream between the layers. Just remember, when baking, try to remove them from the oven when the skewer comes out with a few moist crumbs for that perfect fudgy texture.
Is this recipe safe for people with nut allergies?
Great question! This recipe is inherently nut-free, as none of the main ingredients contain nuts. However, you should always check the labels on your brownie mix and ice cream for any potential cross-contamination, especially with store-bought items. For peace of mind, consider making your brownies from scratch to ensure they are allergy-safe!
Chocolate Oreo Cookie Ice Cream Cake
Ingredients
Equipment
Method
- Start by baking a chocolate cake according to your favorite recipe or using a store-bought one. Allow it to cool for about 30 minutes on a wire rack.
- While the cake cools, prepare the brownie mix as directed on the package and pour the batter into a greased baking dish. Bake for 20-25 minutes at 350°F (175°C).
- Allow the brownies to cool in the pan for 10-15 minutes and then freeze for at least 30 minutes.
- Once everything is cool, remove the chocolate cake from the pan and place it at the base of a springform pan. Drizzle chocolate sauce over the cake layer.
- Spread a generous layer of softened vanilla ice cream over the chocolate cake.
- Carefully cut the chilled brownies into squares and layer them over the vanilla ice cream.
- Spread another layer of softened vanilla ice cream on top of the brownies.
- Cover the springform pan with plastic wrap or foil and place it in the freezer for at least 4 to 12 hours.
- Drizzle chocolate sauce over the top once the cake is firmly set.
- Sprinkle crushed Oreos on top for that extra crunch and serve chilled.
Leave a Reply