
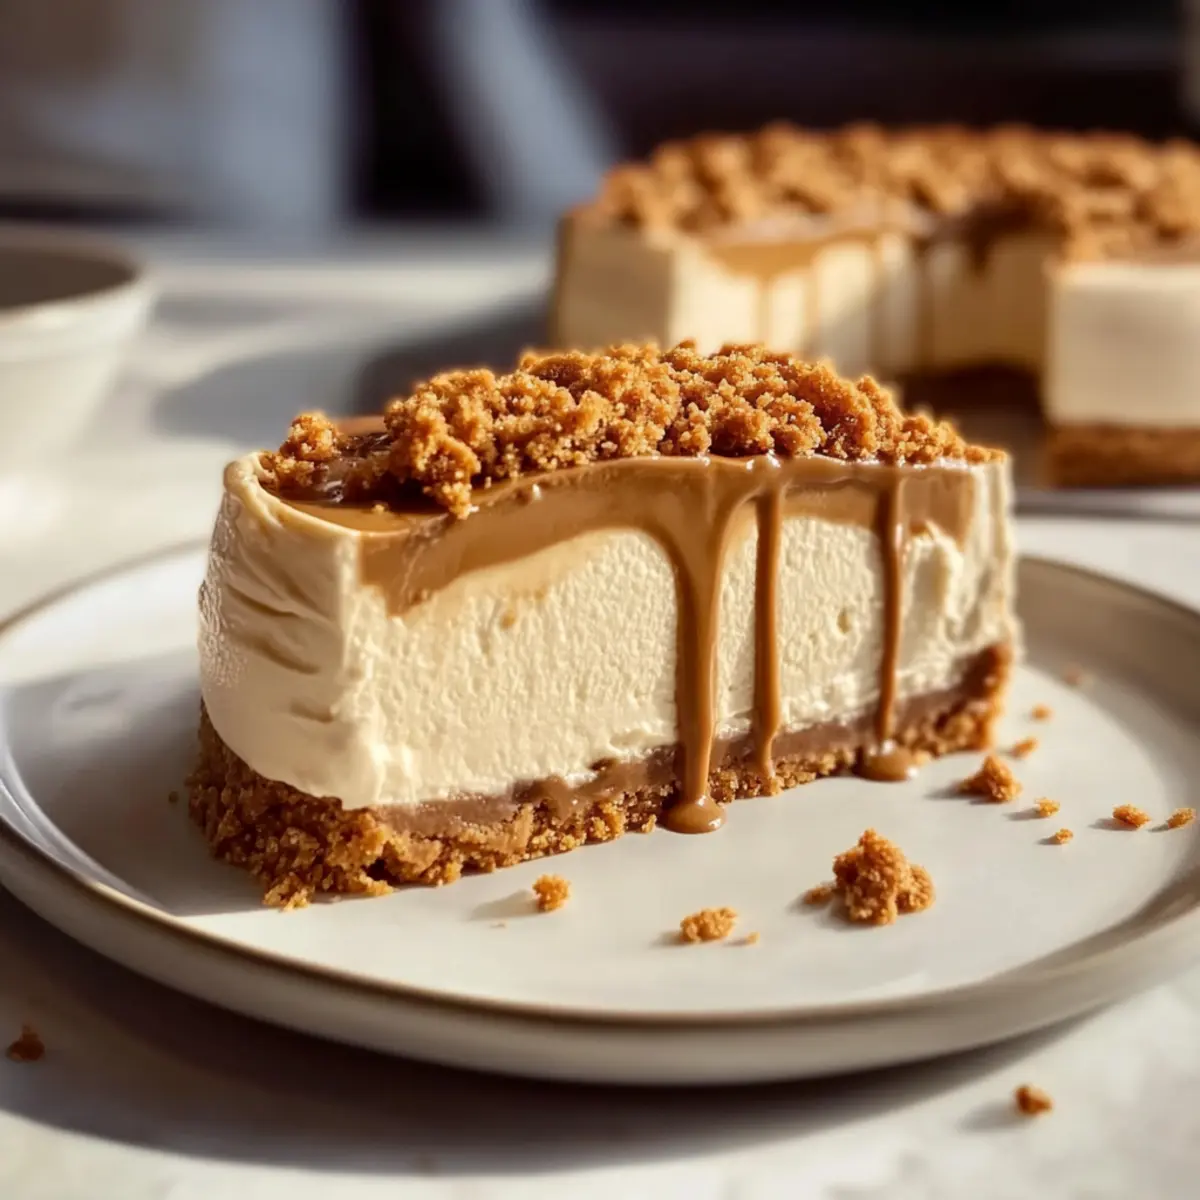
“Have you ever found yourself craving something sweet, yet not wanting to bother with the oven? That’s how I stumbled upon this No Bake Biscoff Cheesecake, a dessert that’s as easy to make as it is delightful to eat! With its creamy texture and the irresistible flavor of Biscoff cookies, it’s perfect for those hot summer days or whenever you need a quick indulgence that requires no baking. Not only is this cheesecake a showstopper among dessert lovers, but it’s also a make-ahead treat that can simplify holiday gatherings. Plus, the best part? You can customize it with your favorite toppings! So, are you ready to dive into this sweet adventure and impress your friends and family with your culinary skills?”
Why Not Try This No Bake Cheese Cake?
Effortless Indulgence: Creating this No Bake Biscoff Cheesecake requires no baking skills, making it perfect for everyone, from beginners to seasoned chefs.
Decadent Flavor: The combination of Biscoff cookies and cookie butter delivers a uniquely rich and spiced flavor that will leave you craving more.
Perfect for Any Occasion: Whether it’s a summer gathering or a cozy dinner, this cheesecake is a stunning dessert that is sure to impress.
Time-Saving Delight: Made in advance and chilled, it allows you to focus on your guests or other dishes, just like our Chicken Cheese Bake does.
Customizable Options: With a variety of topping ideas, including fresh fruits or a dollop of whipped cream, you can easily tailor it to suit any preference or occasion.
No Bake Biscoff Cheesecake Ingredients
For the Crust
• Biscoff Cookies – A deliciously sweet base that brings a spiced flavor; can substitute with any sandwich cookies if needed.
• Melted Butter – Binds the cookie crumbs together for a sturdy crust; coconut oil works as a dairy-free alternative.
For the Filling
• Cream Cheese – The main component for the filling that adds richness; use full-fat brick-style cream cheese to prevent lumps.
• Biscoff Cookie Butter – Infuses the cheesecake with an irresistible flavor; almond or peanut butter can be used as substitutes.
• Powdered Sugar – Sweetens the filling while ensuring a smooth texture; adjust to taste for your preferred sweetness.
• Vanilla Extract – Adds depth to enhance the overall flavor; opt for pure extract for the best results.
• Heavy Whipping Cream – Provides lightness to the filling; ensure it’s cold for ideal whipping.
Optional Toppings
• Melted Biscoff Cookie Butter – Enhances flavor and appearance when drizzled on top.
• Crushed Biscoff Cookies – Adds a delightful crunch and visual appeal as a garnish.
Feel free to explore this No Bake Biscoff Cheesecake and enjoy an effortless dessert that’s bound to steal the spotlight!
Step‑by‑Step Instructions for No Bake Biscoff Cheesecake
Step 1: Prepare the Crust
Begin by finely crushing about 200 grams of Biscoff cookies in a food processor until they resemble wet sand. Next, mix the crumbs with 100 grams of melted butter until combined. Press this mixture firmly into the bottom of a 9-inch springform pan, ensuring an even layer. Chill the crust in the refrigerator for at least 30 minutes to help it set firmly.
Step 2: Make the Filling
In a large mixing bowl, use an electric mixer to beat 400 grams of room temperature cream cheese until it’s smooth and creamy. Gradually add 200 grams of Biscoff cookie butter along with 100 grams of powdered sugar and 1 teaspoon of vanilla extract. Mix everything together until fully blended, creating a luscious filling for your No Bake Biscoff Cheesecake.
Step 3: Whip the Cream
In a separate chilled bowl, pour in 300 milliliters of cold heavy whipping cream. Beat the cream with an electric mixer until stiff peaks form, which should take about 3-5 minutes. Be careful not to over-whip, as you want a smooth and airy texture that will enhance the cheesecake filling’s lightness.
Step 4: Combine Mixtures
Gently fold the whipped cream into the cream cheese mixture using a spatula. Start by adding a third of the whipped cream to the mixture to lighten it, then gradually incorporate the remaining whipped cream until fully combined. This step is crucial for achieving the desired fluffy texture of the No Bake Biscoff Cheesecake.
Step 5: Assemble the Cheesecake
Once the filling is well combined, spoon it over the chilled crust in the springform pan. Use a spatula to smooth the top evenly. Cover the cheesecake with plastic wrap and refrigerate for a minimum of 6 hours, or ideally overnight. This chilling time allows the flavors to meld and the cheesecake to set properly.
Step 6: Final Touches
Before serving the No Bake Biscoff Cheesecake, melt an additional 100 grams of Biscoff cookie butter and drizzle it over the top for a glossy finish. If desired, sprinkle some crushed Biscoff cookies over the cheesecake for added texture and visual appeal. Slice and enjoy this delightful dessert with friends and family!
No Bake Biscoff Cheesecake Variations
Feel free to get creative with your No Bake Biscoff Cheesecake for a personalized touch that will excite your taste buds!
- Chocolate Swirl: Melt some chocolate and gently fold it into the filling for a luscious, rich flavor. The combination of chocolate and Biscoff is simply divine!
- Mini Cheesecakes: Use muffin tins to create adorable individual servings. These mini versions are perfect for parties and easy to share.
- Fruit Toppings: Top your cheesecake with fresh berries or sliced bananas for a burst of freshness. This adds delightful color and enhances the cheesecake’s sweetness.
- Spicy Twist: Mix a pinch of cinnamon or nutmeg into the filling for a warm, spiced flavor. It’s a fantastic way to elevate the traditional taste!
- Frozen Delight: Freeze the cheesecake for a firmer, ice cream-like texture. Just let it sit at room temperature for a few minutes before slicing for the best serving experience.
- Nutty Crunch: Add chopped nuts, like walnuts or almonds, on top for an extra crunch. This texture contrast makes every bite satisfying.
- Layer It Up: Create a layered dessert by alternating between cheesecake and a chocolate mousse. It’s a show-stopping way to impress your guests!
- Whipped Cream Finish: Add a dollop of freshly whipped cream on each slice just before serving. It provides a light and airy contrast to the creamy cheesecake.
No matter how you choose to customize your No Bake Biscoff Cheesecake, the deliciousness will shine through! For other delightful dessert inspirations, don’t forget to check out our Strawberry Swirl Cheesecake or Salted Caramel Cheesecake for more indulgent options. Happy baking!
What to Serve with No Bake Biscoff Cheesecake
Elevate your dessert experience by pairing your delectable cheesecake with delightful accompaniments that perfectly complement its rich and creamy flavors.
-
Fresh Berries: The tartness of strawberries or raspberries cuts through the richness, adding a refreshing burst of flavor.
-
Whipped Cream: A dollop of light, fluffy whipped cream adds an airy contrast to the dense cheesecake, making each bite even more enjoyable.
-
Chocolate Sauce: Drizzling warm chocolate sauce over the cheesecake enhances its indulgence, creating a decadent chocolate and cookie butter experience.
-
Coffee or Espresso: The robust flavor of coffee balances the sweetness, creating a perfect pairing for dessert lovers. Serve alongside for a delightful after-dinner treat.
-
Toasted Nuts: A sprinkle of toasted almonds or hazelnuts adds a delightful crunch, providing a lovely textural contrast to the creamy cheesecake.
-
Coconut Flakes: Sweetened or unsweetened coconut flakes sprinkled on top can introduce a tropical flair, offering a sweet chewiness that enchants both the eyes and the palate.
Make Ahead Options
These No Bake Biscoff Cheesecake desserts are perfect for busy home cooks looking to save time! You can prepare the crust and filling up to 24 hours in advance. Simply crush the Biscoff cookies, mix with melted butter, and press into your springform pan; refrigerate the crust to set. For the filling, mix together the cream cheese, cookie butter, powdered sugar, and vanilla, then fold in whipped cream. Store the filling in an airtight container in the fridge. When you’re ready to serve, spoon the filling onto the chilled crust, refrigerate for at least 6 hours or overnight, then add your final touches like melted cookie butter and crushed cookies for a delightful finish!
How to Store and Freeze No Bake Biscoff Cheesecake
Fridge: Store your cheesecake in an airtight container or cover it with plastic wrap. It will stay fresh for up to 2 days. Avoid adding fresh toppings until just before serving.
Freezer: For longer storage, freeze the No Bake Biscoff Cheesecake for up to 1 month. Make sure to wrap it well in plastic wrap and foil to prevent freezer burn.
Thawing: Thaw the cheesecake overnight in the fridge before serving. This ensures a smooth and creamy texture upon enjoying your delicious dessert.
Reheating: There’s no need to reheat this cheesecake, as it’s best served chilled or slightly frozen for that delightful texture!
Expert Tips for No Bake Biscoff Cheesecake
- Room Temperature Cream Cheese: Let cream cheese sit at room temperature to prevent lumps and ensure a smooth, creamy filling for your No Bake Biscoff Cheesecake.
- Fold Gently: When incorporating whipped cream, fold gently to maintain airiness; vigorous mixing can deflate the mixture and lead to a denser cheesecake.
- Chill Enough: Be patient! Refrigerate the cheesecake for at least 6 hours or overnight to achieve the perfect texture and flavor.
- Optimize Filling Consistency: Whip the cream just until stiff peaks form; over-whipping can create graininess, affecting the cheesecake’s smoothness.
- Springform Pan Magic: Using a springform pan makes it easier to release and slice the cheesecake, ensuring a beautiful presentation for guests.
No Bake Biscoff Cheesecake Recipe FAQs
What type of Biscoff cookies should I use?
Absolutely! Use regular Biscoff cookies for the best flavor and texture. If you can’t find them, feel free to substitute with other similar sandwich cookies. Just ensure they are crispy enough to form a sturdy crust.
How should I store the No Bake Biscoff Cheesecake?
You can store your cheesecake in an airtight container or simply cover it with plastic wrap. It will remain fresh in the refrigerator for up to 2 days. To preserve its taste and texture, avoid adding any fresh toppings until you’re ready to serve.
Can I freeze the No Bake Biscoff Cheesecake?
Very! You can freeze your cheesecake for up to 1 month. To do this, wrap it tightly in plastic wrap and then in aluminum foil to prevent freezer burn. When you’re ready to enjoy it, thaw the cheesecake overnight in the refrigerator for the best texture.
What should I do if my whipped cream deflates while mixing?
If you notice your whipped cream begins to deflate, it may be due to over-mixing. Gently fold the whipped cream into the cream cheese mixture rather than stirring. If it has already deflated, you can try re-whipping a small batch of cream and folding it in to regain some lightness.
Is this cheesecake suitable for people with allergies?
I often recommend being cautious! The No Bake Biscoff Cheesecake contains dairy and gluten, so it may not be suitable for those with lactose intolerance or celiac disease. Consider using gluten-free cookies and dairy alternatives, like almond cream cheese or coconut cream, for those with allergies.
Can I customize the toppings for the No Bake Biscoff Cheesecake?
Absolutely! The more the merrier when it comes to toppings. You can add fresh fruits like strawberries or raspberries for a tart contrast, or drizzle it with melted chocolate or caramel sauce for extra sweetness. Creative options will elevate your dessert presentation!
Irresistible No Bake Biscoff Cheesecake for Effortless Indulgence
Ingredients
Equipment
Method
- Finely crush Biscoff cookies in a food processor until they resemble wet sand. Mix with melted butter until combined and press into a 9-inch springform pan. Chill for at least 30 minutes.
- In a large mixing bowl, beat cream cheese until smooth. Gradually add Biscoff cookie butter, powdered sugar, and vanilla extract, mixing until fully blended.
- In a separate chilled bowl, beat cold heavy whipping cream until stiff peaks form, about 3-5 minutes.
- Gently fold the whipped cream into the cream cheese mixture.
- Spoon the filling over the chilled crust and smooth the top. Cover and refrigerate for a minimum of 6 hours.
- Melt Biscoff cookie butter and drizzle over the cheesecake. Sprinkle with crushed Biscoff cookies before serving.
Leave a Reply