
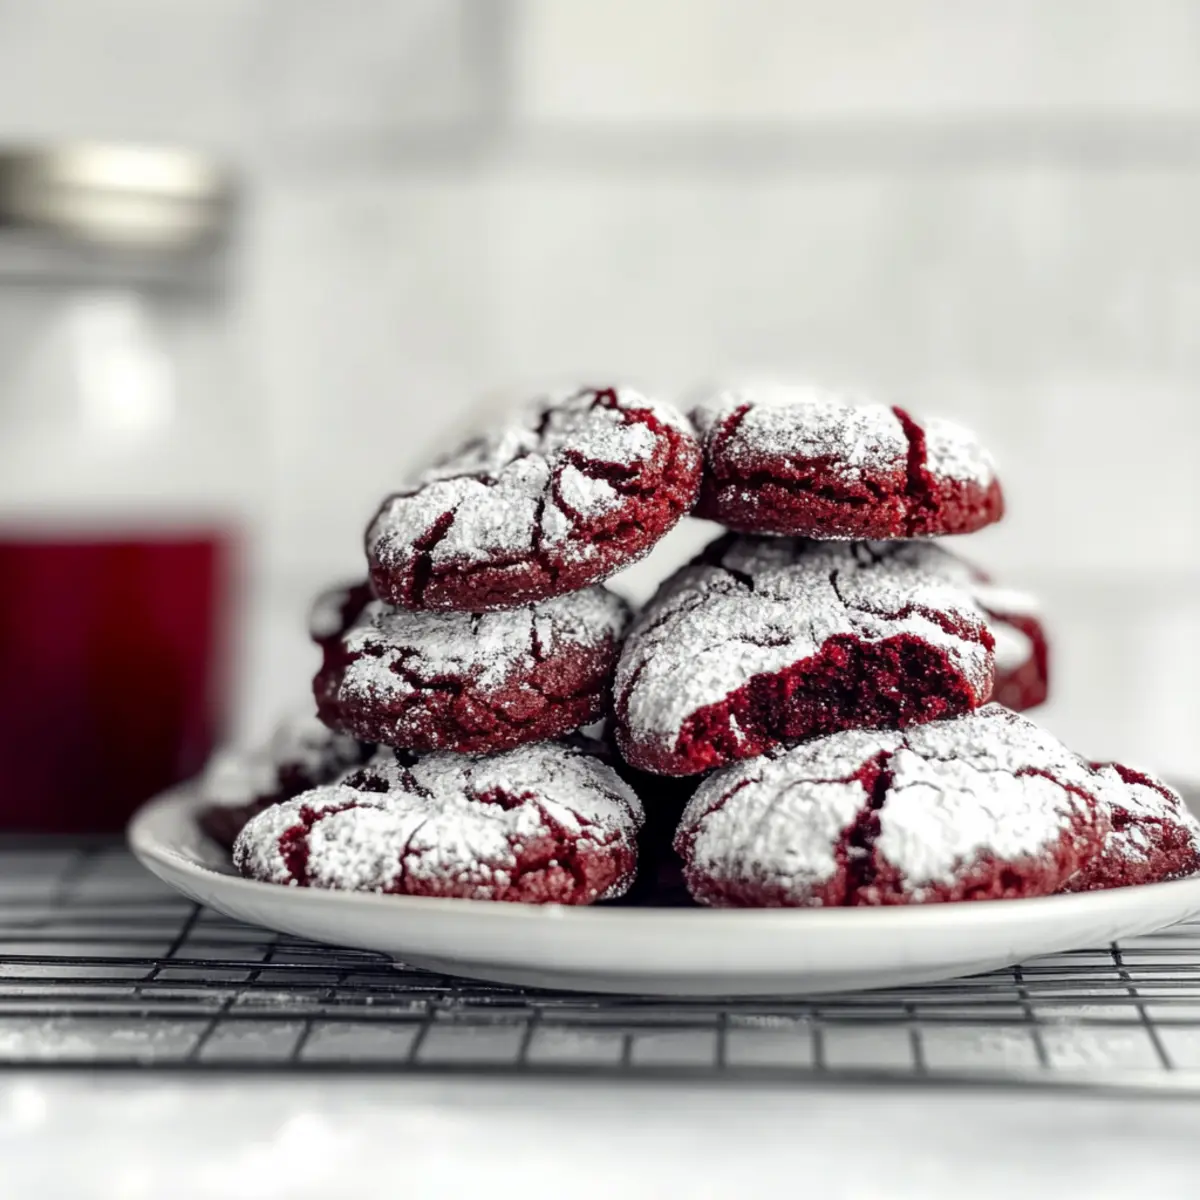
As I unwrapped a fresh batch of cookies, the enchanting aroma filled my kitchen, evoking holiday memories wrapped in laughter and warmth. Today, I’m thrilled to share my recipe for Fudgy Red Velvet Crinkle Cookies, a festive treat that captures the spirit of the season! These delightful cookies are quick to whip up, taking just 30 minutes from start to finish, making them a perfect choice for those bustling holiday days. With their striking red color and signature crackled tops, they not only look stunning on any dessert table but also boast a rich, fudgy texture that’s sure to delight your taste buds. Whether you’re planning a cookie exchange or simply want to leave a sweet surprise for Santa, these irresistible cookies are bound to become a holiday favorite. Curious how to make these delectable bites? Let’s dive into the magic of baking!
Why Are These Cookies So Special?
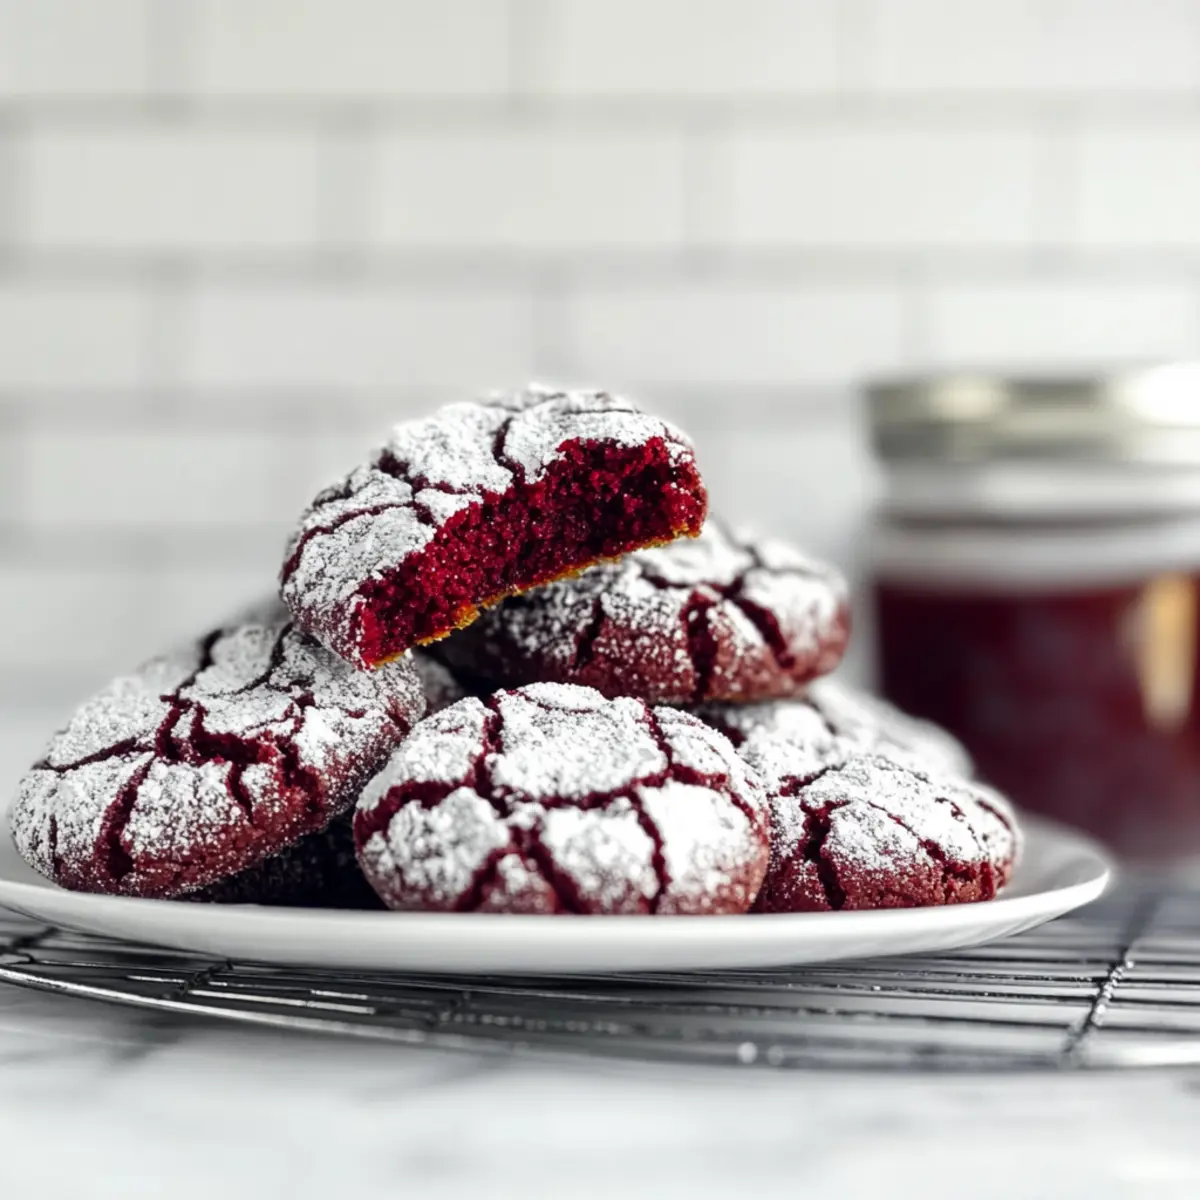
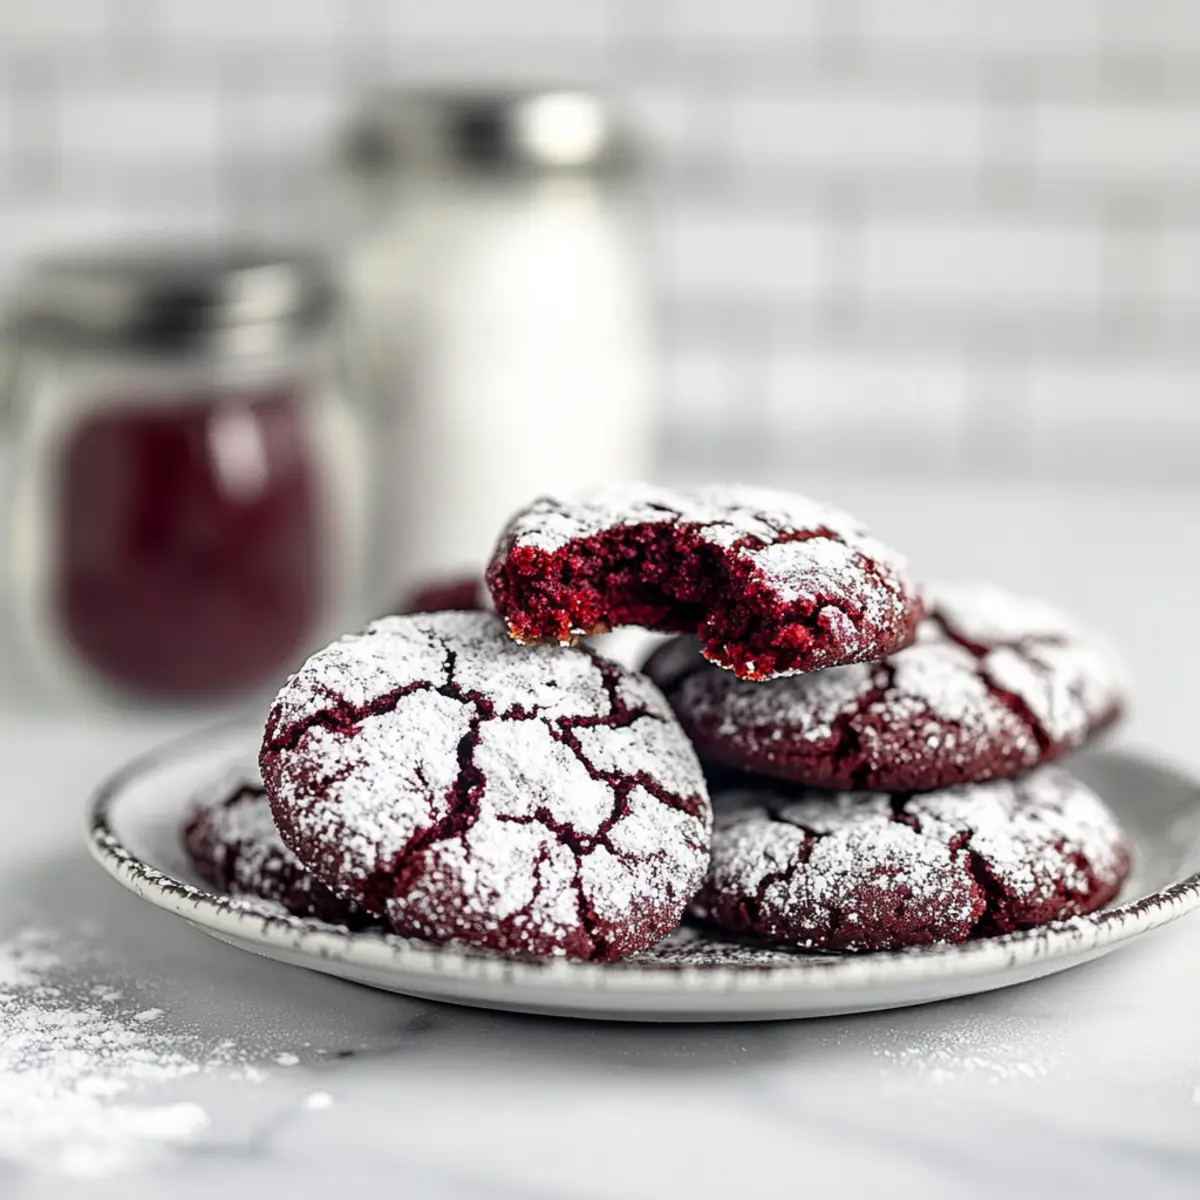
Irresistible Texture: These Fudgy Red Velvet Crinkle Cookies are incredibly rich and chewy, with a delightful brownie-like consistency that melts in your mouth.
Quick and Easy: Ready in just 30 minutes, this recipe is perfect for busy holiday schedules. You’ll spend less time in the kitchen and more time enjoying the festivities!
Vibrant Color: Their stunning red hue makes them a showstopper on any dessert table, adding a festive touch to your holiday gatherings.
Versatile Treat: Enjoy them as they are or mix in white chocolate chips for added sweetness. For a seasonal twist, try a splash of peppermint extract!
Crowd-Pleaser: Perfect for cookie exchanges or gifting, these cookies are sure to impress your friends and family with their delicious flavor and eye-catching appearance.
Pair them with a glass of milk or hot cocoa for the ultimate indulgence. Get ready to fall in love with every bite!
Red Velvet Crinkle Cookies Ingredients
• A must-have for a festive treat!
For the Cookie Base
• Unsalted Butter – Provides richness and moisture; if using salted butter, reduce added salt.
• Light Brown Sugar – Adds sweetness with a caramel-like essence; dark brown sugar can be used for a deeper flavor.
• Granulated Sugar – Essential for sweetness and cookie structure; no substitutes are suggested.
• Large Eggs – Binds the ingredients together; use room temperature eggs for better mixing.
• Vanilla Extract – Enhances the cookie’s flavor; almond extract can be swapped for a unique twist.
• Professional Red Food Coloring – Gives the cookies their iconic vibrant hue; adjust if using a non-professional brand.
• All-Purpose Flour – Forms the cookie structure; consider gluten-free flour for a lighter version.
• Cocoa Powder – Provides a subtle chocolate flavor; Dutch-processed creates a richer taste.
• Baking Powder – Essential for leavening; ensure it’s fresh for the best results.
• Salt – Balances sweetness; no substitutions unless avoiding sodium.
For the Coating
• Granulated Sugar – Adds sweetness and initial crunch during baking; coat the dough balls thoroughly.
• Powdered Sugar – Provides that signature crinkle appearance; ensure a full coating for best visual results.
Get ready to bake a batch of these stunning Red Velvet Crinkle Cookies that shine on any holiday dessert table!
Step‑by‑Step Instructions for Red Velvet Crinkle Cookies
Step 1: Preheat the Oven
Begin by preheating your oven to 350°F (175°C). While the oven warms up, line a baking sheet with parchment paper, ensuring a non-stick surface for your cookie masterpieces. This step sets the stage for your Red Velvet Crinkle Cookies to bake evenly and achieve that lovely crackled top.
Step 2: Cream the Sugars and Butter
In a large mixing bowl, combine the softened unsalted butter, light brown sugar, and granulated sugar. Using an electric mixer, beat the mixture on medium speed until it becomes light and fluffy, about 3 to 5 minutes. This process introduces air into the dough, resulting in a delightfully textured cookie.
Step 3: Incorporate the Eggs and Flavorings
Next, add in the large eggs, one at a time, beating well after each addition to fully incorporate. Stir in the vanilla extract and professional red food coloring, mixing until the color is uniform. This vibrant hue not only enhances the visual appeal but also marks the deliciousness of your Red Velvet Crinkle Cookies.
Step 4: Combine Dry Ingredients
In a separate bowl, sift together the all-purpose flour, cocoa powder, baking powder, and salt. Gradually add this dry mixture to the wet ingredients, mixing on low speed until just combined. Be careful not to overmix; a few floury streaks are perfectly fine, as they will blend in during the next steps.
Step 5: Form the Cookie Dough
Once your dough is mixed, use a cookie scoop or your hands to roll the dough into uniform balls, about an inch in diameter. This will ensure your Red Velvet Crinkle Cookies bake evenly. For an easier rolling experience, consider chilling the dough for about 30 minutes if it feels too sticky.
Step 6: Coat the Dough Balls
Take each ball of dough and roll it first in granulated sugar, followed by a generous coating of powdered sugar. The granulated sugar will provide that initial crunch, while the powdered sugar gives the cookies their signature crinkle effect. Ensure each dough ball is fully coated for the best visual outcome.
Step 7: Bake the Cookies
Place the coated dough balls onto your prepared baking sheet, spacing them about an inch apart to allow for spreading. Bake in the preheated oven for 10 minutes, keeping an eye on them. They should puff up and develop a crackled top, while still remaining soft and gooey in the center.
Step 8: Cool and Serve
Once baked, remove the cookies from the oven and let them cool on the baking sheet for about 5 minutes. This allows them to firm up slightly before transferring them to a wire rack. Serve your delightful Red Velvet Crinkle Cookies warm, or store them in an airtight container for later enjoyment!
What to Serve with Fudgy Red Velvet Crinkle Cookies
Experience the joy of creating a festive spread that perfectly complements the rich sweetness of your cookies!
-
Creamy Vanilla Ice Cream: A scoop of vanilla ice cream creates a delicious contrast, enhancing the fudgy texture with its cool creaminess. It’s a match made in dessert heaven!
-
Rich Hot Cocoa: Pair your cookies with a steaming cup of rich hot cocoa, adding a sweet, chocolatey warmth to each bite that just feels like a cozy hug.
-
Fresh Berries: Vibrant strawberries or raspberries add a tart note that balances the sweetness, delighting your taste buds and adding a pop of color to your plate.
-
Festive Fruit Salad: A mix of seasonal fruits brightens the dessert table, and its natural sweetness elevates the flavors in the cookies while providing a refreshing contrast.
-
Peppermint Tea: This soothing beverage introduces a hint of peppermint that beautifully accentuates the flavors, creating a calming after-dinner experience that’s perfect for the holidays.
-
Coffee or Espresso: A bold cup of coffee or a shot of espresso enhances the cocoa notes in the cookies, making every bite even richer and more decadent—perfect for any adult gathering!
-
Chocolate Drizzle: Drizzling a little melted chocolate over your cookies adds extra indulgence, making them even more irresistible while enhancing their visual appeal.
Elevate your holiday gatherings with these delicious pairings, ensuring each bite of your Red Velvet Crinkle Cookies is as delightful as the occasion itself!
Expert Tips for Red Velvet Crinkle Cookies
-
Quality Ingredients: Use high-quality unsalted butter and professional red food coloring for the best flavor and appearance in your Red Velvet Crinkle Cookies.
-
Avoid Overmixing: Be careful not to overmix the dough after adding the dry ingredients. A few flour streaks are okay to prevent tough cookies!
-
Spread and Spacing: Ensure you space the cookie dough balls about an inch apart on the baking sheet. This allows them to spread beautifully without merging.
-
Perfect Coating: Roll the dough balls thoroughly in both granulated and powdered sugar for that signature crinkle effect—this step is essential for visual appeal!
-
Watch the Baking Time: Keep a close eye on your cookies while they bake. They should be soft in the center and slightly puffed when you take them out.
-
Storage Tips: Store finished cookies in an airtight container to keep them moist, or freeze them for up to three months to enjoy later!
Make Ahead Options
These Fudgy Red Velvet Crinkle Cookies are ideal for meal prep, allowing you to enjoy the holiday baking experience without the last-minute rush! You can prepare the cookie dough up to 24 hours in advance; simply chill it in the refrigerator, which helps to enhance the flavors as well. If you’d like, you can also roll the dough into balls and coat them in sugar before refrigerating—this method ensures that they stay just as delicious when baked. When you’re ready to bake, place the chilled dough on your baking sheet and pop them in the oven as directed, resulting in freshly baked cookies that will delight your family and friends with minimal effort!
Red Velvet Crinkle Cookies Variations
Feel free to unleash your creativity and customize these delightful cookies with these fun variations!
- Classic Chocolate: Omit red food coloring for a delicious chocolate crinkle cookie that everyone will love.
- Chocolate Chip Boost: Add white or dark chocolate chips to the dough for an extra sweet surprise in every bite.
- Peppermint Twist: Stir in a tablespoon of peppermint extract for a festive holiday flavor that adds a refreshing zing.
- Nuts for Crunch: Incorporate finely chopped walnuts or pecans into the dough for a satisfying crunch and added texture.
- Zest of Orange: Add a teaspoon of orange zest for a citrusy brightness that complements the chocolate beautifully.
- Spicy Kick: Mix in a pinch of cayenne pepper or chili powder for a warm, spicy twist that balances the sweetness wonderfully.
- Caramel Drizzle: Top the cooled cookies with a drizzle of salted caramel for an indulgent touch that elevates their deliciousness.
- Vegan Delight: Swap the eggs for flaxseed meal and use vegan butter or coconut oil for a delightful vegan version!
Each variation opens up a world of delicious possibilities! Consider exploring other tasty recipes, like Soft Batch Cookies or Salted Caramel Cheesecake Cookies, to add to your baking adventure!
How to Store and Freeze Red Velvet Crinkle Cookies
Room Temperature: Store cookies in an airtight container at room temperature for up to 1 week to maintain their chewy texture and delightful flavor.
Fridge: If you prefer your cookies chilled, they can be kept in the fridge for up to 2 weeks in an airtight container; just remember they’ll firm up a bit.
Freezer: Freeze baked cookies in a single layer on a baking sheet until solid, then transfer to a freezer bag, where they can be stored for up to 3 months.
Reheating: To enjoy warm cookies, simply reheat them in the microwave for 10-15 seconds or place them in a 350°F oven for about 5 minutes. Enjoy your scrumptious Red Velvet Crinkle Cookies!
Red Velvet Crinkle Cookies Recipe FAQs
How do I choose the best ingredients for my Red Velvet Crinkle Cookies?
Absolutely! For the best results, choose unsalted butter for a balanced flavor. Look for light brown sugar that’s soft and free of lumps for ease of mixing. The red food coloring should ideally be a professional grade for vibrancy; this can significantly affect the final look of your cookies. When selecting eggs, always go for room temperature to ensure better incorporation into the batter.
What’s the best way to store Red Velvet Crinkle Cookies?
To keep your cookies fresh, store them in an airtight container at room temperature for about 3 to 4 days. If you need longer storage, they can last in the fridge for up to 2 weeks. Make sure to layer them with parchment paper to prevent sticking.
Can I freeze the Red Velvet Crinkle Cookies?
Yes, you can freeze these delicious cookies! Allow them to cool completely, then arrange them in a single layer on a baking sheet and freeze until solid—this should take about 1-2 hours. Once frozen, transfer them to a freezer-safe bag or container, where they can be stored for up to 3 months. When you’re ready to enjoy, simply thaw them at room temperature or warm them up in the oven at 350°F for about 5 minutes.
What should I do if my cookie dough is too sticky to handle?
Very! If your dough feels too sticky, don’t worry—this is a common hurdle. You can either chill the dough in the refrigerator for about 30 minutes or add a little bit of extra flour, a tablespoon at a time, until it reaches a manageable consistency. Another helpful tip is to lightly grease your hands with cooking oil before rolling the dough into balls, which can make the process smoother!
Are there any dietary considerations for these cookies, like allergens?
Certainly! This recipe contains common allergens like eggs and gluten. For individuals with gluten intolerance, I recommend substituting the all-purpose flour with a gluten-free blend designed for baking. If you’re making these treats for someone with egg allergies, you can substitute each egg with a flaxseed egg (1 tablespoon of ground flaxseed mixed with 2.5 tablespoons of water, let sit for 5 minutes). Always be sure to check your ingredients to accommodate any specific dietary needs.
How long do cookies stay fresh after baking?
Cookies retain their optimal freshness for about a week when stored properly at room temperature. However, for the best taste and texture, I recommend enjoying them within the first few days after baking—generally, that’s when they have the softest centers and the sweetest taste!

Fudgy Red Velvet Crinkle Cookies for Your Holiday Table
Ingredients
Equipment
Method
- Preheat your oven to 350°F (175°C) and line a baking sheet with parchment paper.
- In a large mixing bowl, cream together the unsalted butter, light brown sugar, and granulated sugar until light and fluffy, about 3 to 5 minutes.
- Incorporate the eggs one at a time, mixing well after each addition. Stir in vanilla extract and food coloring until uniform.
- Sift together the flour, cocoa powder, baking powder, and salt in a separate bowl, then gradually mix into the wet ingredients until just combined.
- Roll the dough into uniform balls, about an inch in diameter. Chill for 30 minutes if too sticky.
- Coat each ball in granulated sugar, then roll in powdered sugar thoroughly.
- Place on the prepared baking sheet, spaced about an inch apart. Bake for 10 minutes until puffed and cracked.
- Let cool on the baking sheet for 5 minutes before transferring to a wire rack.
Leave a Reply