
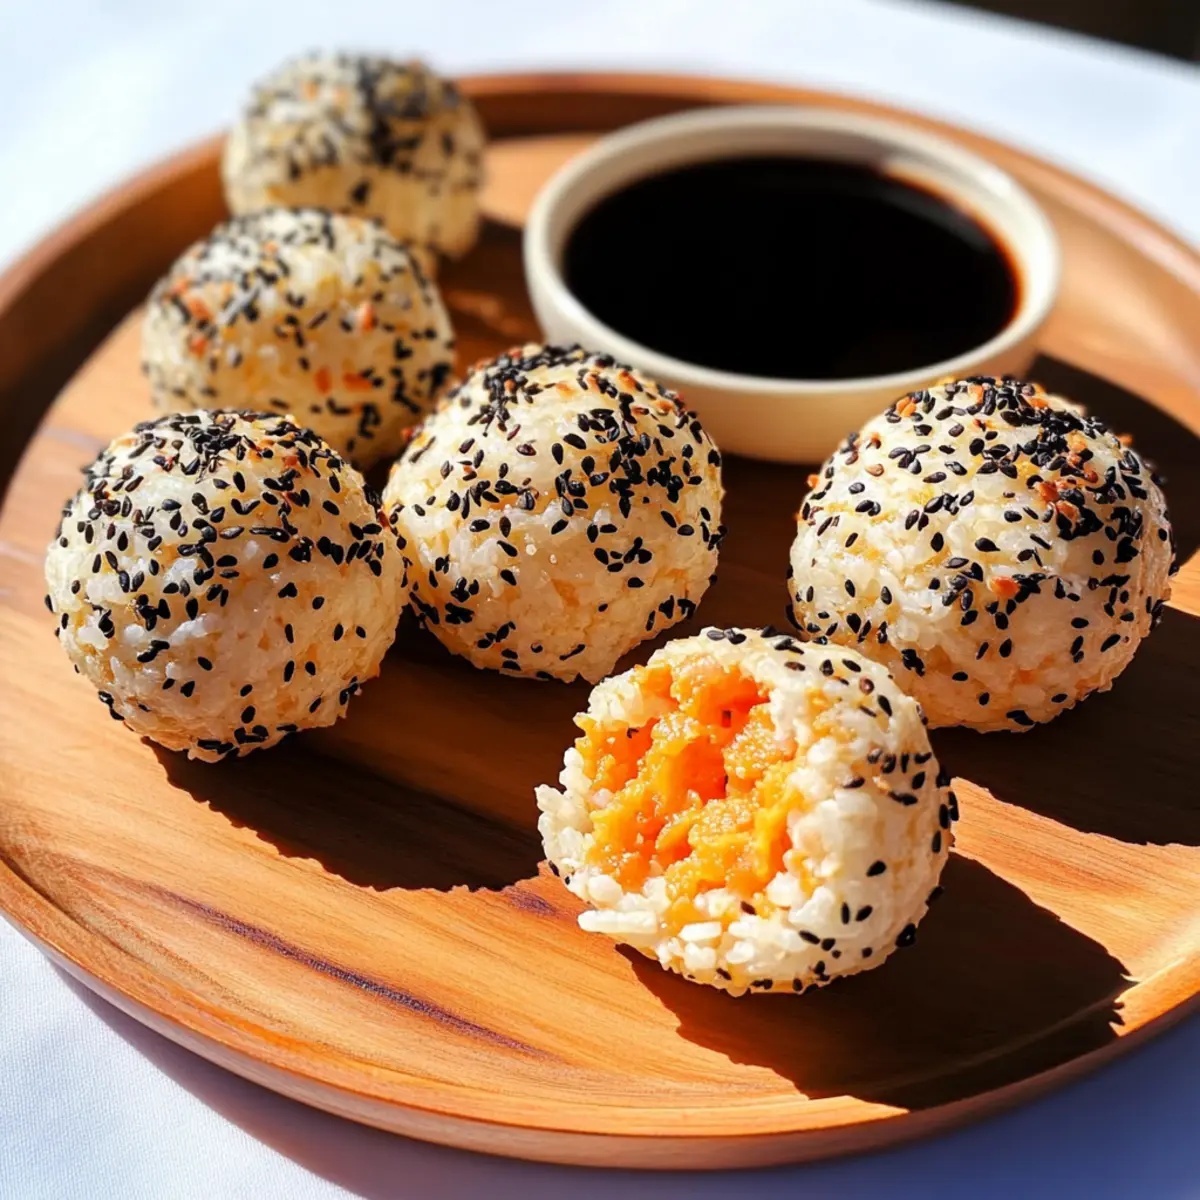
Overheard from the kitchen: “You mean I can have sushi in a bite-sized ball?” That’s when I knew I had to share my Sweet Potato Sushi Inspired Rice Balls with you. These little gems are not just a feast for the eyes but also a healthy, plant-based delight perfect for any occasion. Whip them up in under 30 minutes, making them ideal for surprise guests or meal prep for the week ahead. The comforting sweetness of roasted sweet potato nestled inside a perfectly seasoned rice ball is a delightful twist on traditional sushi. Plus, they’re completely customizable—think avocado or even a zesty pickle twist! Are you ready to dive into this delicious adventure?
Why will you fall for these rice balls?
Quick and Easy: You’ll be amazed at how simple it is to create these delicious Sushi Inspired Rice Balls in just under 30 minutes. Perfect for a weekday snack or meal prep!
Healthy Twist: Packed with nutritious sweet potatoes and flavored with hoisin sauce, these plant-based bites are a guilt-free indulgence.
Customizable: Want a different flavor? Swap sweet potato for avocado, mushrooms, or your favorite vegetables for a unique spin!
Perfect for Sharing: These delightful morsels make great appetizers or snacks for parties, sure to impress friends and family alike!
Crowd-Pleaser: No sushi experience needed—everyone from kids to adults will love biting into these flavorful rice balls. Enjoy with a side of soy sauce or spicy mayo for an extra kick! Discover more great snack ideas like Butterfinger Balls Decadent or Broccoli Cheese Balls for varied flavors.
Sushi Inspired Rice Balls Ingredients
For the Rice Balls
- Cooked White Rice – Acts as the main structure for the rice balls, providing a sticky base. Use leftover rice for ease; sushi rice is ideal for better stickiness.
- Hoisin Sauce – Adds sweetness and depth of flavor. Replace with teriyaki sauce if desired.
- Rice Vinegar – Enhances flavor and acidity in the rice mixture. Can substitute with apple cider vinegar.
- Nori Sheet (crumbled) – Provides umami flavor and a touch of oceanic taste akin to traditional sushi. Omit if unavailable; use toasted sesame seeds for a different texture.
For the Filling
- Sweet Potato (cooked, cut into 1-inch cubes) – Provides a creamy, sweet center. Other vegetables like mashed avocado or tofu can be used as substitutes.
For Coating
- Black Sesame Seeds – Adds nuttiness and texture when coating the rice balls. Use white sesame seeds or omit if desired.
These Sushi Inspired Rice Balls offer a delicious twist on traditional sushi, perfect for a plant-based snack or meal prep!
Step‑by‑Step Instructions for Sushi Inspired Rice Balls
Step 1: Prepare the Rice Mixture
In a medium pan over medium heat, combine 2 cups of cooked white rice with 3 tablespoons of hoisin sauce, 1 tablespoon of rice vinegar, and 1 crumbled nori sheet. Stir the mixture well for about 2-3 minutes until everything is evenly coated and fragrant. The rice should appear glossy and slightly sticky, perfect for shaping into rice balls.
Step 2: Cool the Rice
Once combined, transfer the rice mixture to a bowl and let it cool for about 10 minutes. This cooling process is essential as it allows the rice to be manageable and easier to form into balls. You want the rice to be warm but not hot; this makes shaping with your hands a lot more comfortable.
Step 3: Shape the Rice Balls
Using a small saucer, scoop 1 to 2 tablespoons of the cooled rice mixture and gently press it into a firm shape. Create a small divot in the center, making space for the filling. Ensure the rice is packed tightly but not overly compacted, which helps to achieve perfectly shaped Sushi Inspired Rice Balls.
Step 4: Add the Filling
Take a cube of cooked sweet potato, measuring about 1 inch, and place it into the divot you created in the rice. Carefully top it with another spoonful of rice, sealing the sweet potato inside. With wet hands, mold the rice around the filling, forming it into a smooth and firm ball. Repeat this process for the remaining rice and filling.
Step 5: Grill the Rice Balls
Heat a non-stick frying pan over medium heat and place the shaped rice balls into the pan. Allow them to grill for about 3-4 minutes on each side, or until they turn golden brown and crispy. Make sure to roll the rice balls gently to achieve an even toasting without breaking them apart.
Step 6: Coat the Rice Balls
Once toasted to perfection, remove the rice balls from the frying pan and immediately roll them in black sesame seeds for added texture and flavor. Ensure each ball is coated evenly, enhancing their taste and presenting a visually appealing finish.
Step 7: Serve and Enjoy
Transfer your beautiful Sushi Inspired Rice Balls to a serving plate. Serve them warm with a side of soy sauce for dipping, ideal for enhancing their comforting flavors. These delightful snacks make for a perfect appetizer, shareable treat, or part of your meal prep on busy days!
Expert Tips for Sushi Inspired Rice Balls
-
Cool the Rice: Allow your rice mixture to cool for about 10 minutes before shaping. Too hot rice can burn your hands, making it difficult to form the balls.
-
Keep Hands Wet: Wet your hands while shaping the rice balls to prevent sticking. This helps you create smoother, well-formed Sushi Inspired Rice Balls!
-
Pack Tightly: Compress the rice balls firmly enough to hold their shape without overworking the rice, which can lead to a gluey texture.
-
Experiment with Fillings: Don’t be afraid to mix it up! Besides sweet potato, try using cooked mushrooms, seasoned tofu, or even pickled vegetables for a tasty surprise.
-
Watch the Heat: Ensure your frying pan is at medium heat to avoid burning the rice balls while grilling. Aim for golden brown and crispy, not charred!
Storage Tips for Sushi Inspired Rice Balls
- Room Temperature: Let the rice balls cool completely before storing to prevent condensation. They can sit out for up to 2 hours, but it’s best to refrigerate them for longer freshness.
- Fridge: Keep your Sushi Inspired Rice Balls in an airtight container in the refrigerator. They will stay fresh for up to 2-3 days, perfect for meal prep.
- Freezer: For long-term storage, freeze the rice balls in a single layer on a baking sheet, then transfer to a freezer bag. They can be stored for up to 2 months.
- Reheating: Reheat rice balls in a non-stick pan over medium heat for 5-6 minutes, or until warmed through and crispy again. Enjoy them with a side of soy sauce for dipping!
Sushi Inspired Rice Balls Variations
Customize your Sushi Inspired Rice Balls to match your taste buds and imagination!
-
Vegetable Medley: Replace sweet potato with a mix of sautéed mushrooms, bell peppers, and zucchini for a hearty twist. Each bite will burst with vibrant flavors!
-
Avocado Delight: Swap sweet potato for creamy avocado for a fresh, rich alternative. The creaminess perfectly pairs with the rice, creating a delightful crunch.
-
Pickled Pleasure: Use pickled vegetables, such as ginger or radish, in place of sweet potato for an exciting tang. This adds a zesty surprise that will make your taste buds dance!
-
Spicy Kick: Mix a spoonful of Sriracha or chili paste into the rice mixture to spice things up. The heat will elevate your sushi-inspired creation to a whole new level.
-
Nutty Addition: Incorporate crushed peanuts or walnuts into your filling for an added crunch. The texture contrasts beautifully with the soft rice balls, providing a delightful surprise in every bite.
-
Sweet Surprise: Try adding a small cube of mango or pineapple as a sweet center. This tropical twist enhances the overall experience and brings a refreshing burst of flavor!
-
Herb Infusion: Chop some fresh herbs, like cilantro or basil, into the rice mixture for a fragrant lift. Each ball becomes a garden of flavor, making it a unique and delicious snack.
-
Sesame Coating Twist: Instead of using black sesame seeds, try a coating of panko breadcrumbs for a crispy shell. This adds a delightful crunch that complements the tender rice ball perfectly.
Feel free to mix and match these variations—and don’t forget to check out other delightful bites like Bang Fried Rice or the indulgent Broccoli Cheese Balls to expand your culinary adventures!
Make Ahead Options
Perfect for busy home cooks, these Sushi Inspired Rice Balls can be prepped in advance, saving you precious time during your week. You can prepare the rice mixture and mold the rice balls up to 24 hours ahead of time. To do this, cook and combine the ingredients as directed, then shape the rice balls and store them in an airtight container in the refrigerator. This will prevent them from drying out and maintain their delightful texture. When you’re ready to enjoy them, simply grill the rice balls as instructed for 3-4 minutes on each side until golden brown. It’s an effortless way to have a quick snack or meal ready to serve at a moment’s notice!
What to Serve with Sushi Inspired Rice Balls?
Elevate your meal experience with vibrant sides that harmonize beautifully with these delicious and creative bites.
- Crispy Seaweed Salad: A light and refreshing option that adds an umami flavor, enhancing the sushi experience without overwhelming the palate.
- Edamame: These steamed green soybeans are protein-packed and offer a satisfying crunch, making for a perfect sidekick to your rice balls.
- Miso Soup: Warm and comforting, this broth complements the flavors of the rice balls while providing a soothing contrast with its gentle umami essence.
Imagine serving these rice balls alongside a vibrant cucumber salad tossed with sesame dressing; it brings a crisp, tangy balance that elevates the overall dish.
- Pickled Vegetables: A burst of acidity transforms the meal! The sharpness of pickles cuts through the richness of the rice balls, awakening your taste buds.
- Spicy Mayo Dip: Creamy and tangy, dip your rice balls into this zesty sauce for an enjoyable flavor explosion in every bite.
- Green Tea: This calming beverage rounds out the meal, refreshing the palate and complementing the simple yet rich tastes of your dish.
Don’t forget a sweet finish! Pair them with fresh mango slices or mochi ice cream for a delightful dessert experience.
Sushi Inspired Rice Balls Recipe FAQs
What type of rice is best for Sushi Inspired Rice Balls?
Absolutely! For these rice balls, using sushi rice or any short-grain rice is ideal because it becomes wonderfully sticky when cooked, allowing you to mold the balls easily. However, if you have leftover white rice on hand, that will work just as well! Just ensure it’s somewhat sticky for the best results.
How should I store leftover Sushi Inspired Rice Balls?
For any leftovers, wait until the rice balls are completely cool before storing them. Place them in an airtight container in the refrigerator where they can stay fresh for up to 2-3 days. This way, you can enjoy them as a quick snack or part of meal prep!
Can I freeze Sushi Inspired Rice Balls?
Yes, you can freeze them! To do so, arrange the shaped rice balls in a single layer on a baking sheet and place them in the freezer for about 2 hours until frozen solid. Once firm, transfer them to a freezer bag, and they’ll last for up to 2 months. When you’re ready to enjoy them, simply reheat them on medium heat for 5-6 minutes in a non-stick pan until warmed through.
What should I do if my rice balls fall apart while cooking?
No worries if this happens! This can occur if the rice isn’t sticky enough or if the balls are packed too loosely. To prevent this, ensure you’re using the right type of sticky rice and compress the balls gently yet firmly while shaping them. If they still fall apart while grilling, try lowering the heat slightly and allow them to grill longer on each side to create a firmer crust.
Are Sushi Inspired Rice Balls suitable for those with dietary restrictions?
Definitely! These rice balls can be made vegetarian and plant-based, perfect for those looking to avoid animal products. However, if you have specific allergies, I recommend checking the labels of hoisin sauce and any other condiments you use, as they may contain ingredients like peanuts or soy. Additionally, you can customize the filling to suit your dietary needs, like using mashed avocado or cooked veggies if sweet potatoes aren’t your thing.
How do I know if my sweet potatoes are ripe for filling?
Look for sweet potatoes that are firm and free from dark spots or blemishes! When you cut them, the flesh should be vibrant and smooth. Cooking them until tender but not mushy is key, so they create that delightful, creamy filling without losing their structure. Enjoy the cooking process and taste testing along the way!
Sushi Inspired Rice Balls: Easy Plant-Based Snack Delight
Ingredients
Equipment
Method
- In a medium pan over medium heat, combine 2 cups of cooked white rice with 3 tablespoons of hoisin sauce, 1 tablespoon of rice vinegar, and 1 crumbled nori sheet. Stir the mixture well for about 2-3 minutes until everything is evenly coated and fragrant.
- Transfer the rice mixture to a bowl and let it cool for about 10 minutes.
- Using a small saucer, scoop 1 to 2 tablespoons of the cooled rice mixture and gently press it into a firm shape. Create a small divot in the center for the filling.
- Take a cube of cooked sweet potato, measuring about 1 inch, and place it into the divot you created in the rice. Top it with another spoonful of rice, sealing the sweet potato inside.
- Heat a non-stick frying pan over medium heat and place the shaped rice balls into the pan. Allow them to grill for about 3-4 minutes on each side, or until they turn golden brown and crispy.
- Once toasted to perfection, remove the rice balls from the frying pan and immediately roll them in black sesame seeds.
- Transfer your Sushi Inspired Rice Balls to a serving plate and serve warm with a side of soy sauce for dipping.
Leave a Reply