
As I pulled a tray of golden 4-Ingredient Garlic Rolls from the oven, the rich, buttery aroma filled my kitchen, inviting everyone to gather around the table. These effortless rolls are not just a side dish; they’re a warm hug for your taste buds, perfect for accompanying pasta or roasted chicken. Whether you’re hosting a cozy dinner or simply want to level up your weeknight meals, these easy garlic rolls require minimal effort with maximum flavor. With their fluffy texture and a delightful hint of Parmesan, they’re sure to become a household favorite—ideal for those who crave comfort without the fuss. Ready to indulge in a simple yet delightful bite? Let’s dive into the recipe!
Why are Garlic Rolls Irresistible?
Ease of Preparation: These garlic rolls require just four simple ingredients, making them a quick and hassle-free choice for busy home cooks.
Irresistible Aroma: The moment you pull them from the oven, the heavenly scent of garlic and melted butter will have your family and friends flocking to the kitchen.
Perfect Pairing: These rolls are the ideal companion to pasta dishes like Lemon Garlic Shrimp or roasted meats, elevating any meal from ordinary to extraordinary.
Versatile Customization: Feel free to add your own twist by incorporating herbs or different types of cheese; the options are endless! Every batch can be a little different, yet equally delicious.
Crowd-Pleasing Delight: No one can resist these fluffy, buttery treats that steal the show at any gathering. Prepare to see them disappear off the table faster than you can say “garlic rolls”!
Garlic Rolls Ingredients
• To create these delicious garlic rolls, gather these simple ingredients.
For the Rolls
- Frozen Dinner Rolls – Use thawed rolls for the fluffiest texture; Rhodes Rolls are a convenient choice.
- Butter (1 tbsp, melted) – This adds richness and helps the garlic stick beautifully; substitute with olive oil for a dairy-free option.
For the Garlic Mixture
- Garlic (2 cloves, minced) – Fresh garlic provides a robust flavor, but garlic powder can stand in if needed (use about 1/2 teaspoon).
- Grated Parmesan Cheese (2 tbsp) – This imparts a salty, nutty flavor that enhances the rolls; you can also swap it for any grated cheese or omit for a dairy-free version.
Step‑by‑Step Instructions for Garlic Rolls
Step 1: Preheat the Oven
Begin by preheating your oven to 350°F (175°C). This ensures that your garlic rolls bake evenly and develop that beautiful golden color. As the oven warms up, you can prepare the pan and thaw the dinner rolls to get ready for the next steps.
Step 2: Prepare the Pan
Lightly grease a 9×13-inch baking pan with non-stick spray or a bit of butter. This step is key for preventing the garlic rolls from sticking. Once the pan is greased, arrange your thawed dinner rolls inside without crowding them, allowing enough space for them to rise beautifully.
Step 3: Let Them Rise
Cover the rolls with a clean kitchen towel and place them in a warm, draft-free area. Let them rise until nearly doubled in size, which usually takes about 1.5 to 2 hours. You’ll know they’re ready when they look puffy and soft, signaling a perfect texture for your delicious garlic rolls.
Step 4: Make the Garlic Butter
While the rolls are rising, combine 1 tablespoon of melted butter and 2 cloves of minced garlic in a small mixing bowl. Stir well until the minced garlic is fully incorporated into the butter. The aroma of garlic will start to fill your kitchen, hinting at the delicious garlic rolls to come.
Step 5: Brush the Rolls
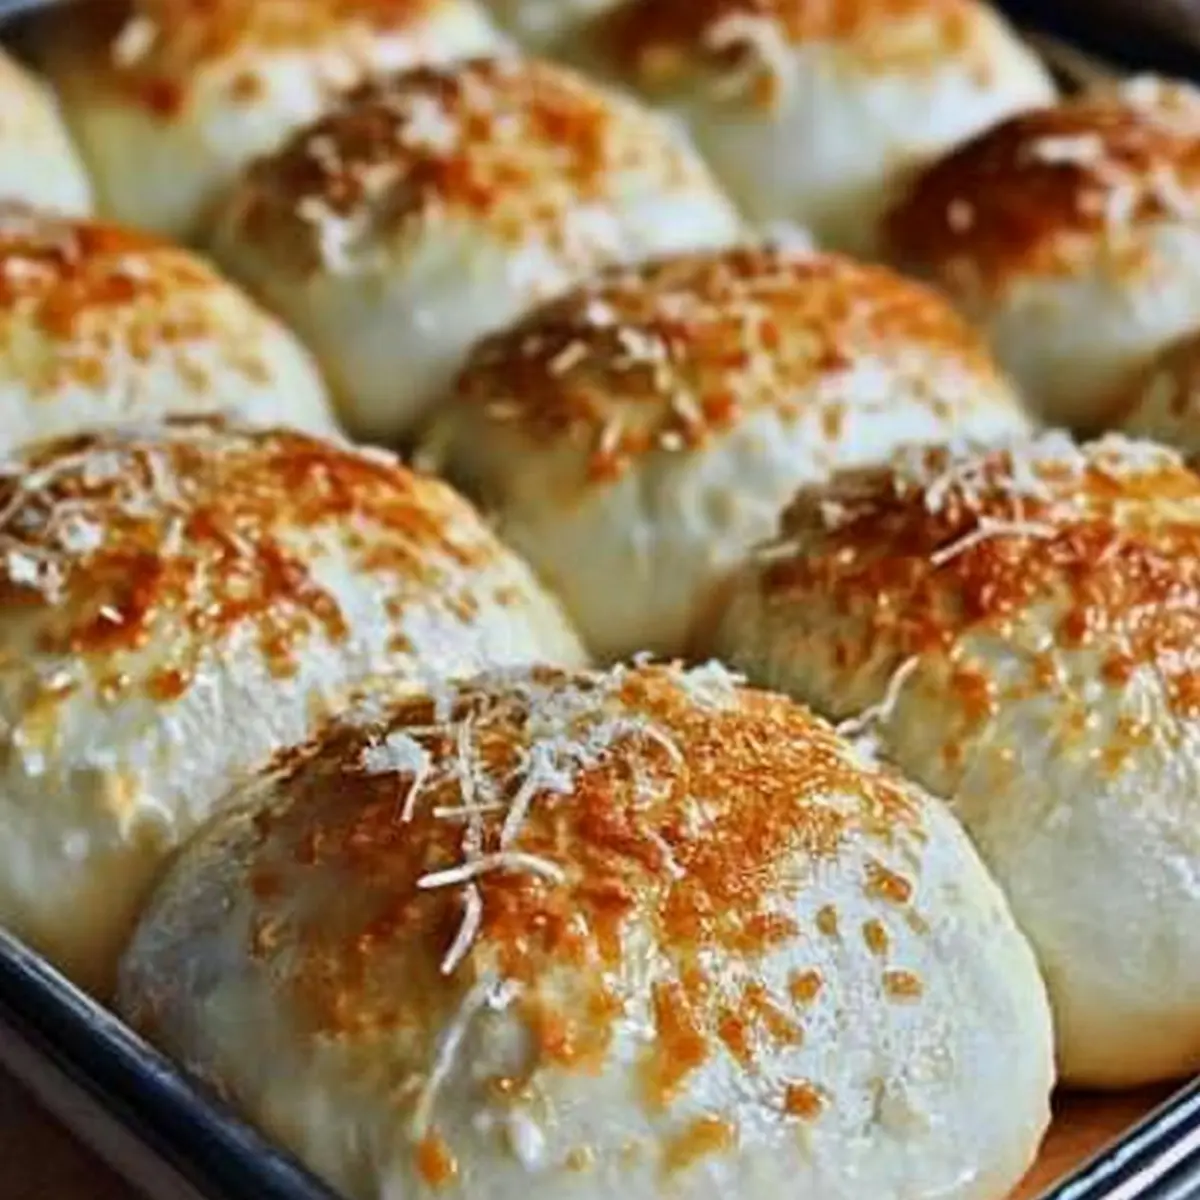
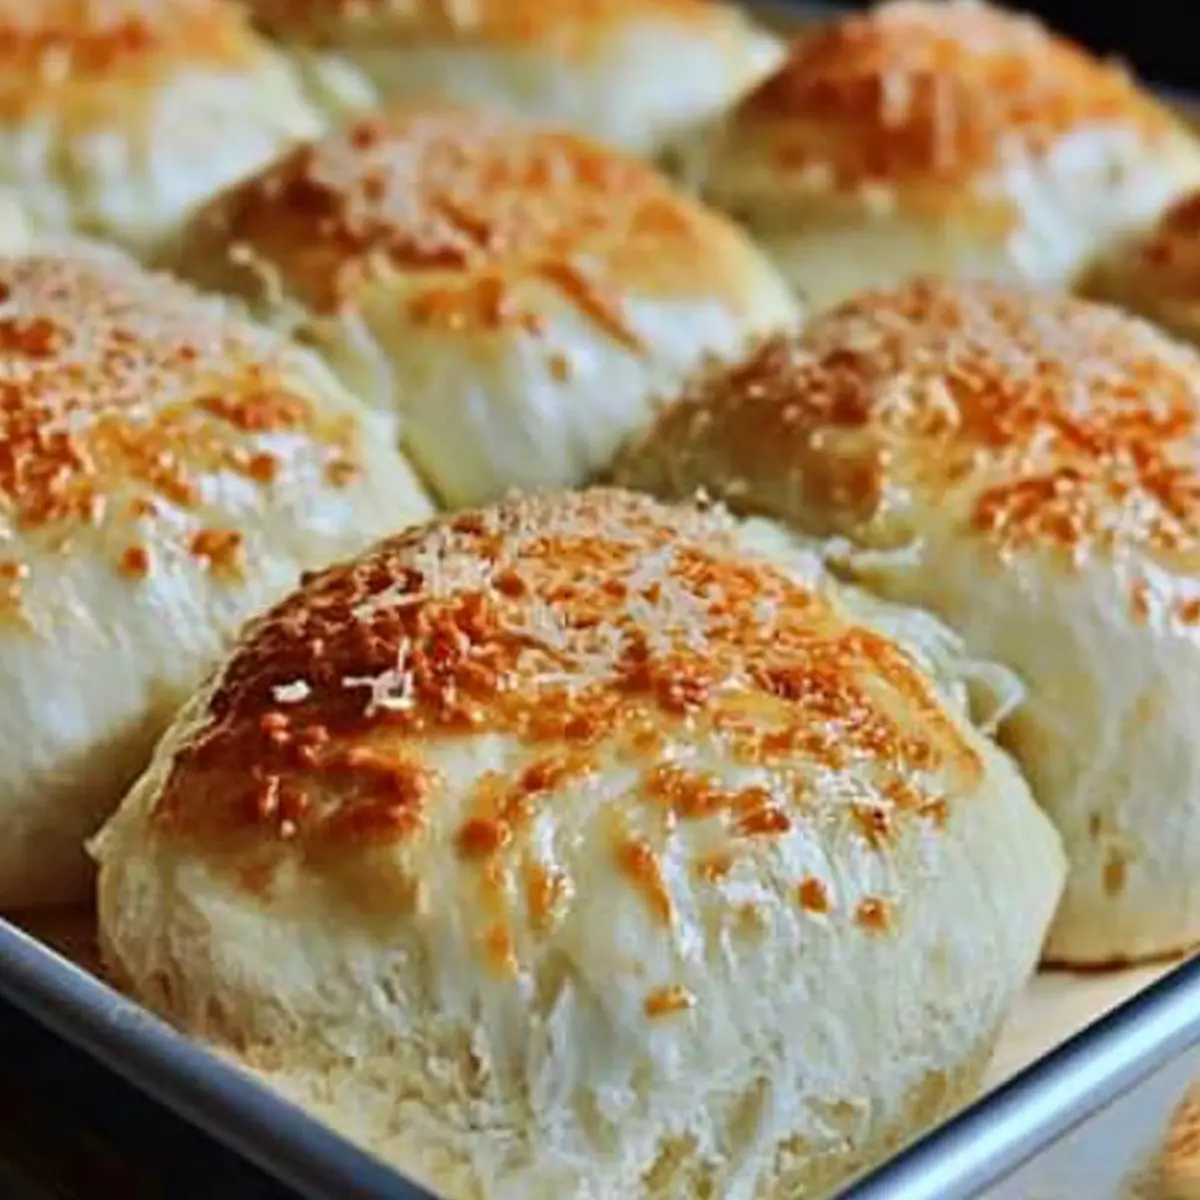
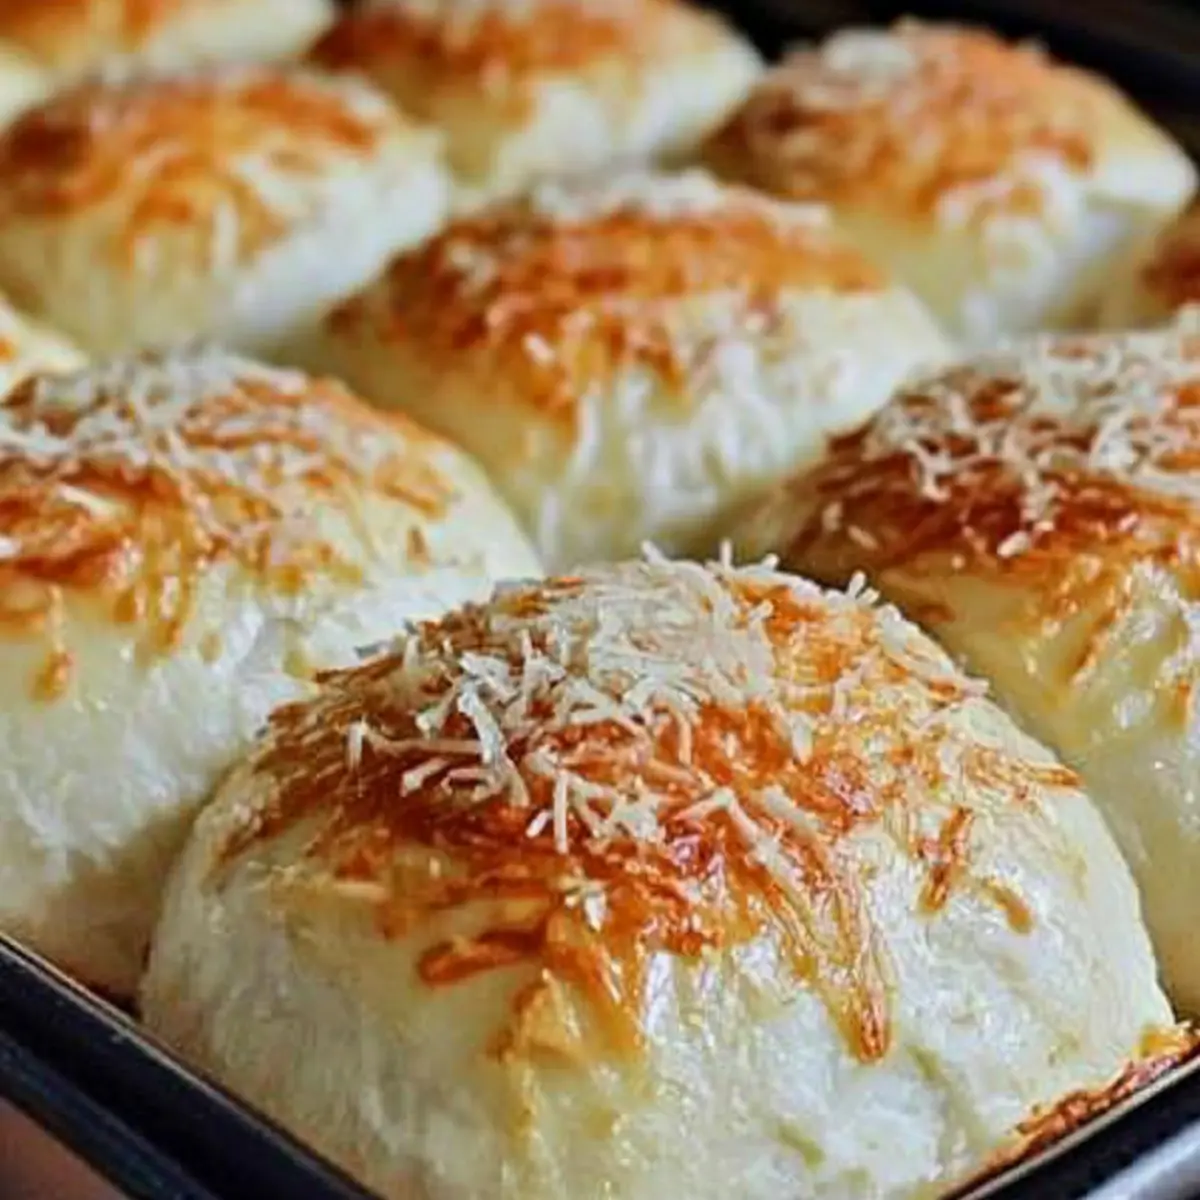
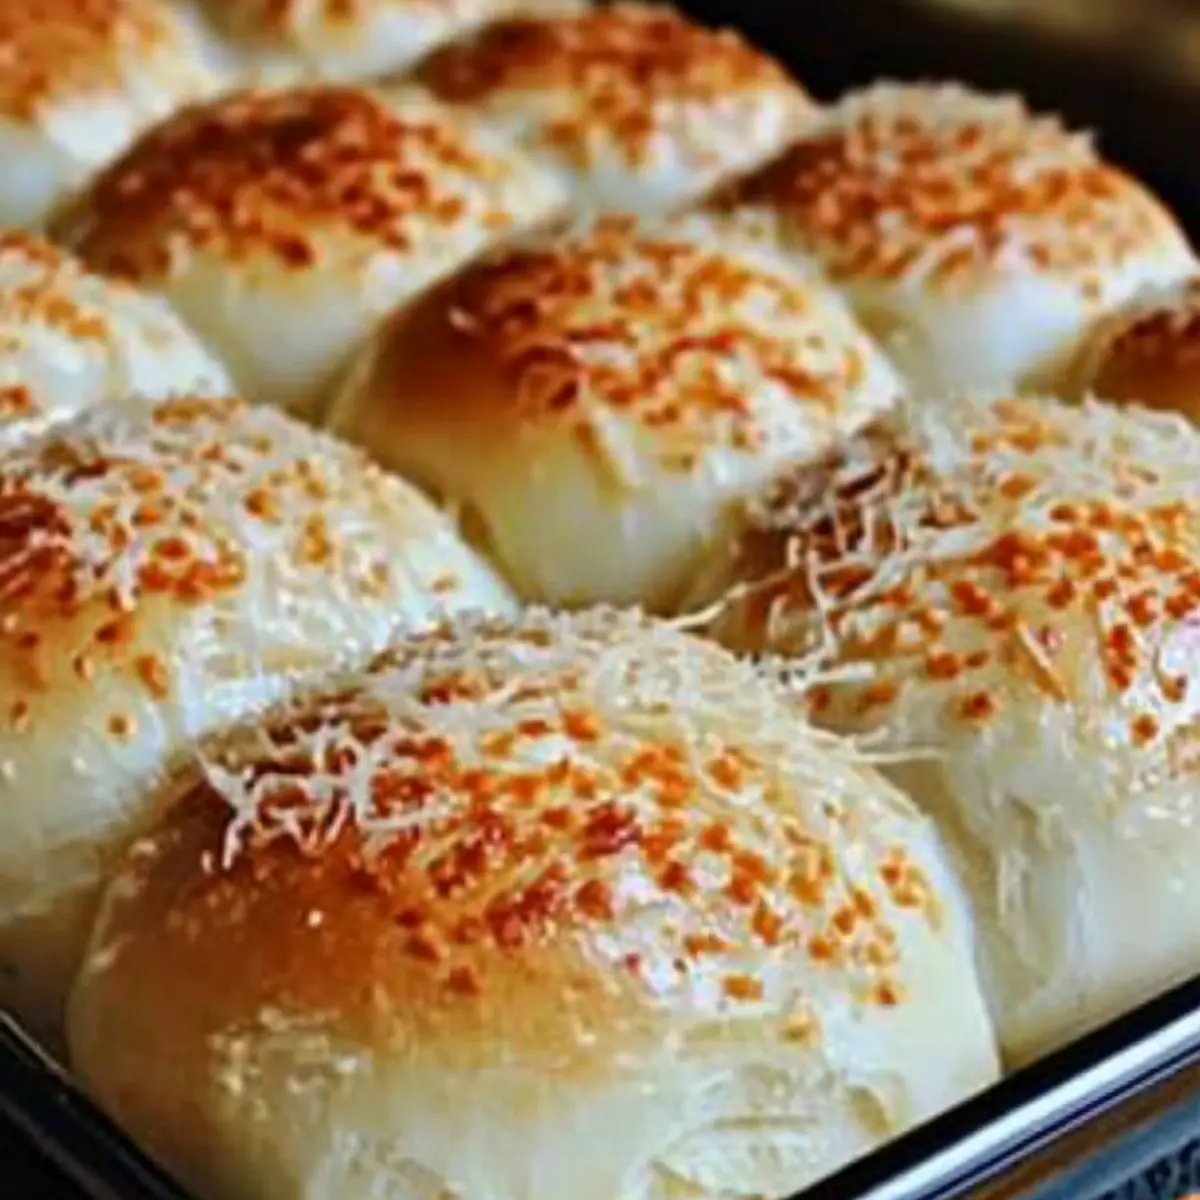
Once the rolls have risen, take your garlic butter mixture and generously brush it over the top of each roll. Make sure each roll is well-coated to fully infuse the garlicky goodness. After glazing the rolls, sprinkle 2 tablespoons of grated Parmesan cheese evenly on top to create a delightful crust.
Step 6: Bake the Rolls
Place the prepared baking pan in your preheated oven and bake for 15-20 minutes. Keep a close eye on them, and look for a beautiful golden brown color as a sign of doneness. The smell of the baking garlic rolls will be utterly irresistible!
Step 7: Cool and Serve
Once baked to perfection, remove the garlic rolls from the oven and let them cool slightly in the pan. After about 5 minutes, transfer them onto a wire rack. This allows the steam to escape, keeping your rolls fluffy. Serve warm alongside your favorite meal and watch them disappear!
Garlic Rolls Variations & Substitutions
Feel free to mix things up! Creative variations and substitutions can turn your garlic rolls into something truly unique.
- Herbed Variation: Add fresh parsley, thyme, or oregano to the garlic butter for an aromatic twist. The combination of herbs amplifies that comforting flavor we all love.
- Cheesy Pull-Apart: Swap out the Parmesan for mozzarella cheese for a gooey, cheesy pull when you tear into each roll. The melty goodness creates an unforgettable experience at the table.
- Whole Wheat Option: Use whole wheat dinner rolls instead of white for a healthier twist. They bring a nutty flavor that pairs beautifully with garlic and butter.
- Spicy Kick: Mix in a pinch of red pepper flakes or a dash of cayenne pepper into the garlic mixture for a bit of heat. It’ll add a zesty flavor your taste buds will adore!
- Pesto Infusion: Brush the rolls with pesto instead of garlic butter for a fresh, flavorful variation. The basil notes in pesto bring a delightful brightness to the rolls.
- Garlic Herb Rolls: Mix in finely chopped rosemary or dill to the garlic butter for a fragrant finish. These herbs complement the garlic perfectly, creating a aromatic treat.
- Sweet Twist: Drizzle with honey before baking for a sweet take on garlic rolls. The sweet-savory balance creates a delicious contrast that is utterly delightful.
- Flavor-Fusion Rolls: For an exciting flavor twist, try adding a squeeze of lemon juice to the garlic butter. The citrus notes brighten the rolls and add freshness to every bite.
Explore these variations next time you make your garlic rolls, and don’t forget—they pair beautifully with dishes like Breakfast Rolls Savory or Garlic Butter Shrimp!
Make Ahead Options
These 4-Ingredient Garlic Rolls are a fantastic option for meal prep, allowing you to save time and stress during busy weeknights. You can prepare the rolls up to 24 hours in advance by greasing the pan and arranging the thawed dinner rolls inside, then covering and refrigerating them overnight. This way, they’ll be ready to rise the next day! When you’re ready to bake, simply let them sit at room temperature for about 30 minutes to ensure they relax before adding the garlic butter and Parmesan. This method helps maintain their fluffy texture, ensuring you serve them fresh with just as much flavor. Enjoy warm, and you’ll have delicious garlic rolls ready with minimal last-minute effort!
Expert Tips for Garlic Rolls
• Thaw Completely: Ensure the frozen dinner rolls are completely thawed before letting them rise. This is crucial for achieving fluffy garlic rolls.
• Check Rising Environment: If the rolls don’t rise, make sure your location is warm and draft-free. A cozy kitchen spot works wonders for the dough!
• Garlic Freshness Matters: For the best flavor, always use fresh garlic. Dried options can work, but won’t deliver the same punch in your garlic rolls!
• Customize with Herbs: Consider adding Italian herbs like oregano or parsley to the butter for an extra layer of flavor in your garlic rolls.
• Perfect Baking Time: Keep an eye on the rolls while baking. Overbaking can dry them out, while underbaking can result in doughy centers; aim for a golden brown.
How to Store and Freeze Garlic Rolls
Airtight Container: Store leftover garlic rolls in an airtight container at room temperature for up to 2 days. This keeps them soft and fresh for your next meal.
Freezer Storage: For longer preservation, individually wrap the rolls in plastic wrap and place them in a zip-top bag; they can be frozen for up to a month.
Reheating: To enjoy the garlic rolls again, reheat them in the oven at 350°F (175°C) for about 10 minutes, until warmed through and crispy on the outside.
Thawing Tips: If frozen, allow the garlic rolls to thaw in the refrigerator overnight before reheating for the best texture and flavor.
What to Serve with 4-Ingredient Garlic Rolls
These warm, garlicky bites are a delightful centerpiece that can elevate the entire dining experience.
- Creamy Mashed Potatoes: The buttery richness of mashed potatoes balances the flavor of garlic, creating a comforting duo.
- Classic Caesar Salad: Crisp romaine lettuce with creamy dressing and crunchy croutons offers a vibrant contrast to the warm rolls.
- Roasted Chicken: Juicy, herb-infused chicken pairs beautifully with the savory garlic rolls, making for a satisfying meal.
- Spaghetti Aglio e Olio: This simple, garlicky pasta complements the rolls, enhancing the overall garlic experience with a touch of spice.
- Grilled Vegetables: The smoky char from grilled veggies adds a delightful texture and flavor contrast against the fluffy rolls.
- Italian Wedding Soup: With its delicious broth and savory meatballs, this soup pairs perfectly, as the rolls soak up the flavors beautifully.
- Chardonnay or Pinot Grigio: A glass of these crisp wines refreshes the palate and enhances the rich flavors of the garlic rolls.
- Chocolate Lava Cake: End your meal on a sweet note with a warm, molten chocolate cake that provides delightful indulgence after savory bites.
4-Ingredient Garlic Rolls Recipe FAQs
How do I know if my garlic is fresh?
Absolutely! Fresh garlic should be firm, with tight skin and no dark spots. If you notice any sprouting or soft spots, it’s best to choose another bulb for your garlic rolls for optimal flavor.
How should I store leftover garlic rolls?
After enjoying your garlic rolls, store any leftovers in an airtight container at room temperature for up to 2 days. This will keep them soft and delightful. If you want to prolong their shelf life, you can freeze them!
Can I freeze garlic rolls?
Very! To freeze, individually wrap the garlic rolls in plastic wrap and place them in a zip-top bag. They’re good for up to a month in the freezer. When you’re ready to enjoy them, just thaw them in the refrigerator overnight and reheat in the oven for that fresh-baked taste.
What should I do if my rolls don’t rise?
If your rolls aren’t rising, check the environment—they need a warm, draft-free area. If it’s too cold, you can create warmth by placing them near a preheated oven or turning on a light in your kitchen. They should double in size within about 1.5 to 2 hours!
Is there a dairy-free option for the garlic rolls?
Yes! Simply substitute the melted butter with olive oil and omitting the grated Parmesan cheese will make this recipe dairy-free. Your garlic rolls will still be deliciously flavorful!
Are these garlic rolls suitable for pets?
It’s best to avoid sharing garlic rolls with pets. While garlic is safe in small amounts for humans, it can be toxic to dogs and cats. Always keep them away from your furry friends for their safety!
Irresistible Garlic Rolls: Soft, Buttery Perfection at Home
Ingredients
Equipment
Method
- Preheat your oven to 350°F (175°C).
- Lightly grease a 9x13-inch baking pan.
- Cover the rolls with a clean kitchen towel and let them rise until nearly doubled in size, about 1.5 to 2 hours.
- Combine melted butter and minced garlic in a small mixing bowl.
- Brush the garlic butter mixture over the top of each roll and sprinkle with grated Parmesan cheese.
- Bake for 15-20 minutes until golden brown.
- Let them cool slightly in the pan, then transfer to a wire rack.
Leave a Reply