
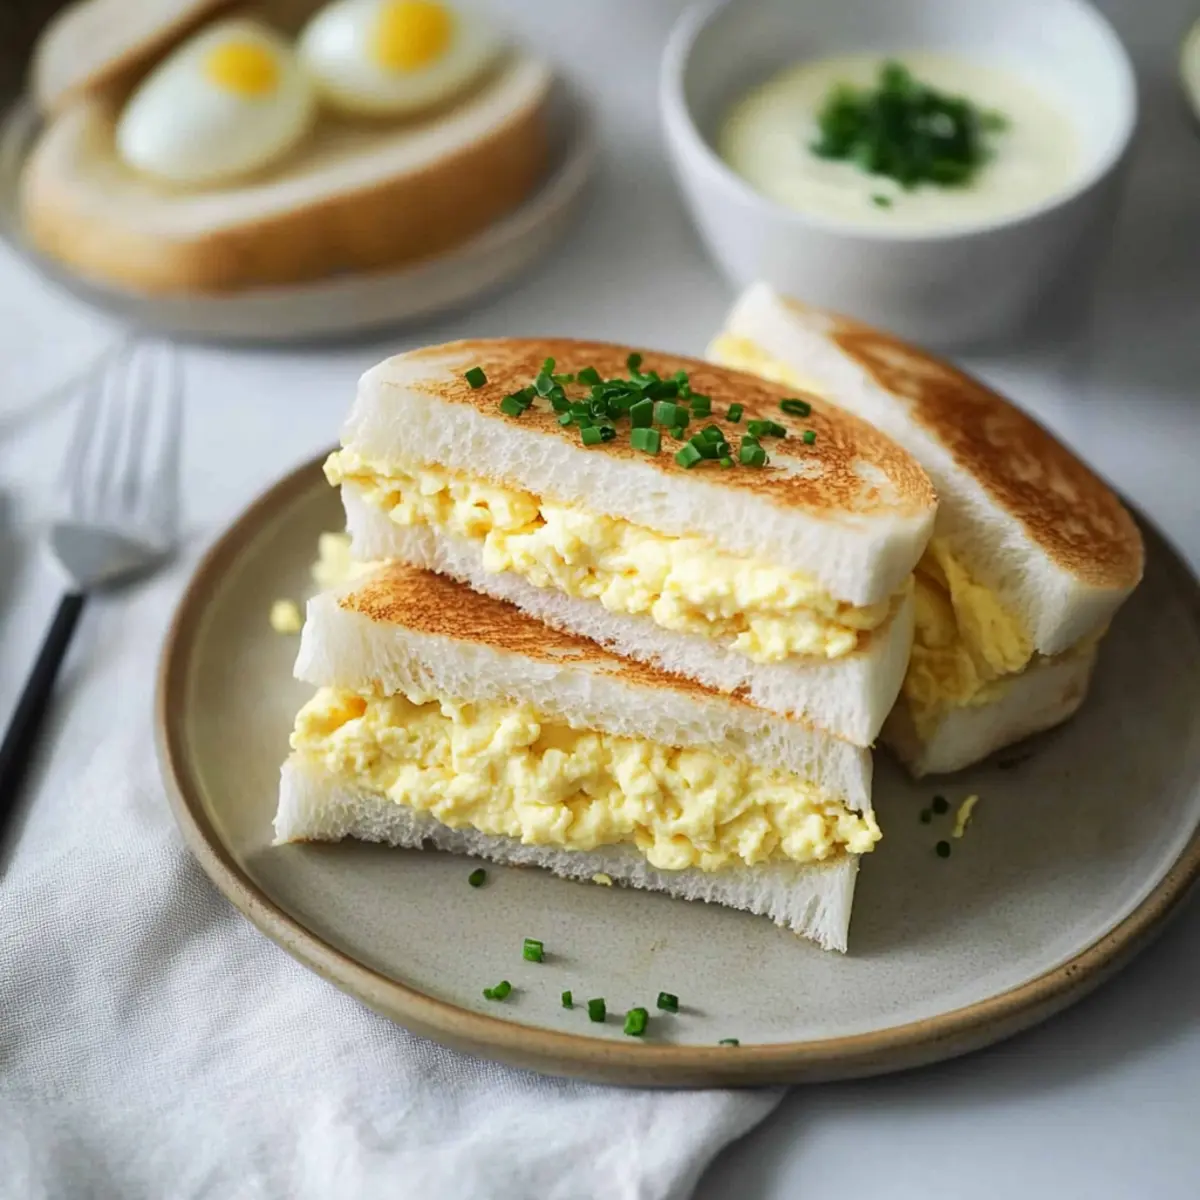
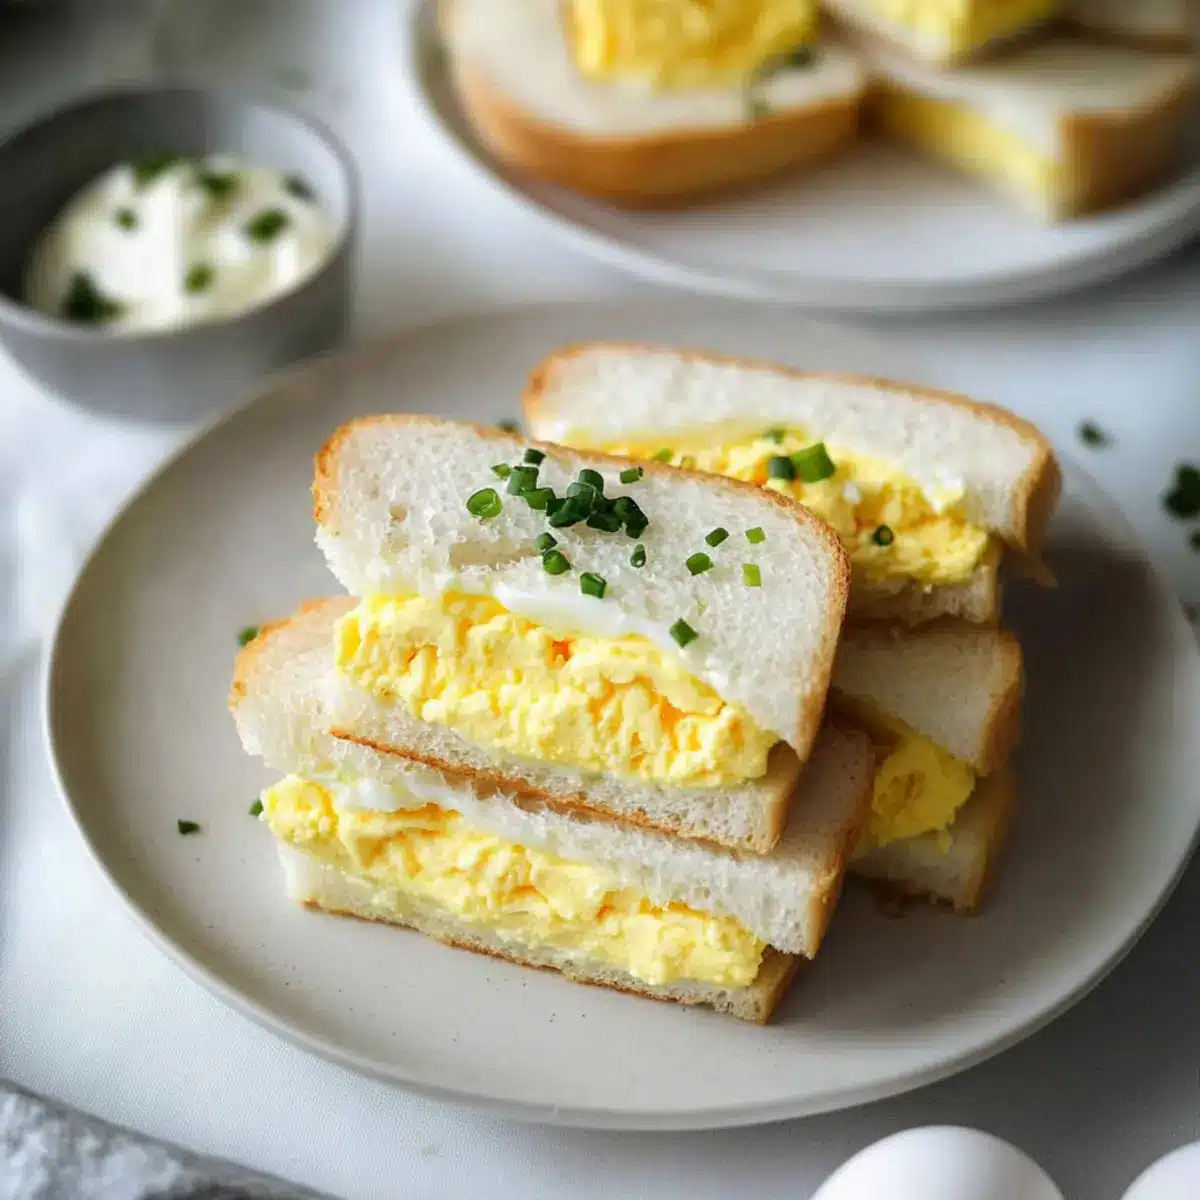
As I took a bite of my first ever Japanese Egg Sandwich, or Tamago Sando, I was transported to cozy Tokyo cafés where this delightful snack reigns supreme. Nestled between fluffy shokupan, the recipe offers a rich and buttery egg mayo filling that perfectly balances softness and flavor. Not only is this dish a wholesome solution for busy days, but it also elevates the notion of a simple sandwich into something truly gourmet. Whether you’re looking for a quick lunch or a light meal that will impress your loved ones, this Tamago Sando is here to save the day. Ready to discover the secret to crafting this comforting yet sophisticated egg salad sandwich?

Why is Tamago Sando so special?
Comforting, Creamy Filling: Each bite of the Tamago Sando features a delightful blend of buttery egg mayo that melts in your mouth.
Fluffy Shokupan Bread: The soft, pillowy texture of shokupan elevates this sandwich, providing a unique twist on the classic egg salad sandwich.
Quick & Easy to Prepare: This delicious dish comes together in just a few simple steps, making it perfect for busy weeknights.
Customizable Delight: Don’t hesitate to get creative—add fresh veggies or spices to make it your own, just like with this Chicken Bacon Ranch version.
Ideal for Any Occasion: This versatile sandwich shines whether enjoyed as a quick snack or a light lunch for guests. You’ll find it pairs perfectly with a side of pickles!
Savor the uniqueness of this Japanese egg sandwich recipe that promises to turn repetitive meals into moments of delight!
Japanese Egg Sandwich Ingredients
For the Filling
- Large-sized eggs – Room temperature eggs yield better results when boiled.
- Whole milk – Adds creaminess to the egg filling; substitute with any milk of choice for a lighter option.
- Kewpie Japanese Mayonnaise – Essential for the authentic taste; sweeter and richer than regular mayonnaise, key to the Japanese egg sandwich flavor.
- White granulated sugar – Enhances the sweetness of the filling; substitute with honey or omit for less sweetness.
- Salt – Balances the flavors; Diamond Crystal brand is preferred for its texture.
- Black pepper – Adds a slight spice; optional based on preference.
For the Bread
- Shokupan (Japanese milk bread) – This soft, pillowy bread is key to the sandwich; use crustless for authenticity.
- Unsalted butter – Used for spreading on bread to enhance flavor; olive oil can be a substitute for a dairy-free option.
For Garnish
- Chives – Provide a fresh garnish for the egg filling; optional for added flavor.
Step‑by‑Step Instructions for Japanese Egg Sandwich Recipe
Step 1: Boil the Eggs
Start by placing large-sized eggs in a pot and cover them with cold water. Bring the water to a rolling boil over high heat. Once boiling, reduce the heat slightly and set a timer for 9 minutes for hard-boiled eggs and 7 minutes 30 seconds for one medium-boiled egg. After the time is up, promptly transfer the eggs to an ice bath to cool for about 5 minutes, making them easier to peel.
Step 2: Prepare the Filling
Once the eggs are cooled, gently peel them under running water to remove the shells. Slice the hard-boiled eggs in half and place the yolks in a medium bowl. Thoroughly mash the yolks and then mix in whole milk, Kewpie mayonnaise, sugar, salt, and a dash of black pepper until well combined. Chill this creamy egg filling in the refrigerator for around 10 minutes while you prepare the bread.
Step 3: Get the Bread Ready
Take slices of shokupan and carefully trim off the crusts using a sharp knife. Use room temperature unsalted butter to generously spread a layer on one side of each slice. The butter will enhance the flavors and provide a rich texture to your Japanese egg sandwich. Set the prepared slices aside, buttered side down, as you assemble the sandwiches.
Step 4: Assemble the Sandwiches
Begin by placing the halves of the medium-boiled egg down on two of the buttered slices, cut side facing up. Take the chilled egg filling you prepared earlier and spread a generous portion on either side of the egg halves to cover them completely. Position another slice of the buttered shokupan on top to create a delightful stack. Repeat this process with the remaining ingredients to make a second sandwich.
Step 5: Slice and Serve
Using a sharp knife, carefully cut each sandwich in half diagonally or into quarters to showcase the beautiful filling. The soft layers of shokupan and creamy filling should be evident. Serve these Japanese Egg Sandwiches immediately for the best taste, perhaps with a side of pickles or a fresh salad to complement your gourmet snack!

Make Ahead Options
These Japanese Egg Sandwiches (Tamago Sando) are perfect for busy home cooks looking to save time! You can prepare the creamy egg filling up to 24 hours in advance; simply mash the boiled eggs and mix with milk, Kewpie mayo, sugar, salt, and pepper. To maintain freshness, store the filling in an airtight container in the refrigerator. The shokupan bread can also be sliced and buttered ahead of time—just keep the slices covered to prevent them from drying out. When you’re ready to serve, assemble the sandwiches by layering the filling and medium-boiled egg halves; this way, you’ll enjoy delicious homemade Tamago Sando with minimal effort!
Japanese Egg Sandwich Variations
Get ready to customize your Tamago Sando! Each delightful twist can elevate your experience even further.
- Dairy-Free: Swap out whole milk with coconut milk for a creamy, dairy-free option that adds a hint of sweetness.
- Avocado Twist: Replace Kewpie mayonnaise with mashed avocado for a vibrant, healthier filling that brings a rich creaminess.
- Crunchy Surprise: Add finely diced cucumbers or bell peppers to the filling for a refreshing crunch that elevates the texture.
- Herb Infusion: Mix in fresh dill or parsley with the egg filling to provide a fragrant herbal lift that brightens every bite.
- Spicy Kick: Incorporate a teaspoon of sriracha or a dollop of wasabi in your egg mixture for a zesty heat that awakens your senses.
- Colorful Veggies: Layer in thinly sliced tomatoes or radishes for extra freshness and a pop of color, making the sandwich even more enticing.
- Asian Twist: Try adding a few drops of soy sauce to the egg filling for an umami boost, effortlessly combining flavors.
- Lemon Zest: A teaspoon of lemon zest in the egg mixture enhances the overall flavor and adds a refreshing brightness that rounds out the dish beautifully.
Don’t forget to pair your Japanese Egg Sandwich with some delicious sides! You might enjoy these savory dishes like Lemon Garlic Shrimp or the delightful Moist Banana Bite for a well-rounded meal.
What to Serve with Japanese Egg Sandwich (Tamago Sando)
Elevate your Tamago Sando experience with delightful sides that complement its rich flavors and buttery goodness.
- Fresh Side Salad: A crisp mix of greens and veggies adds a refreshing crunch, cutting through the richness of the sandwich.
- Japanese Pickles (Tsukemono): These tangy bites provide a zesty contrast, enhancing the overall flavor profile of your meal.
- Miso Soup: A warm, savory bowl of miso soup offers comforting warmth and completes a wholesome Japanese-inspired lunch.
- Fruit Salad: Bright, juicy fruits like citrus and berries provide a sweet and refreshing balance to the creamy filling.
- Sweet Potato Chips: Crispy and slightly sweet, they add a delightful crunch that contrasts beautifully with the soft sandwich.
- Iced Matcha Latte: This creamy beverage provides a mellow note, harmonizing with the flavors of the sandwich while offering a café vibe at home.
- Green Tea: Light and aromatic, pairing green tea with the Tamago Sando promotes a soothing, wholesome dining experience.
- Sesame Rice Balls (Onigiri): These compact and flavorful bites offer an alternative texture and flavor, complementing the sandwich’s rich filling.
- Japanese Cheesecake: Light and fluffy, this dessert is a perfect sweet finish, concluding your meal with an air of indulgence.
How to Store and Freeze Japanese Egg Sandwich
Fridge: Keep any leftover Japanese egg sandwich tightly wrapped in plastic wrap or aluminum foil for up to 1 day. This helps maintain its creamy filling and prevents the bread from drying out.
Freezer: Ideally, avoid freezing the sandwiches since the bread may become soggy upon thawing. However, if needed, wrap tightly and freeze for up to 2 weeks; thaw overnight in the fridge before consuming.
Reheating: If you’ve refrigerated it, when ready to enjoy, eat cold or gently warm in the microwave for about 15-20 seconds to enhance the experience.
Expert Tips for Japanese Egg Sandwich
Perfect Egg Peeling: Use slightly older eggs for easier peeling; they come off the shell without tearing your whites.
Timely Boiling: To achieve the perfect soft-boiled egg texture, adhere strictly to your boiling times—9 minutes for hard-boiled and 7 minutes 30 seconds for medium.
Authentic Kewpie Mayo: Don’t skimp on Kewpie Japanese mayonnaise; it’s essential for the signature flavor of this egg salad sandwich. American mayo lacks that unique richness.
Room Temperature Eggs: Start with eggs at room temperature before boiling. This helps ensure even cooking and a delightful filling consistency.
Flavor Balance: Taste your egg filling before finalizing; adjust seasoning like salt and sugar to achieve your preferred sweetness and savoriness.
Keep it Fresh: Serve the Japanese egg sandwich immediately for best flavor and texture; wrap leftovers tightly to maintain freshness.
Japanese Egg Sandwich Recipe FAQs
What type of eggs should I use for the Tamago Sando?
Using large-sized eggs at room temperature is best for boiling, as they yield better results. If you can get them a few days to a week old, they will be easier to peel after boiling.
How should I store my leftover Japanese Egg Sandwich?
To store leftovers, wrap them tightly in plastic wrap or aluminum foil and place them in the fridge. They are best consumed within 1 day to maintain texture and flavor. If stored properly, they will stay fresh and creamy.
Can I freeze the Japanese Egg Sandwich?
While it’s not recommended due to the bread potentially becoming soggy, you can freeze the sandwiches wrapped tightly for up to 2 weeks. Thaw them overnight in the fridge and enjoy cold or gently warm them in the microwave for about 15-20 seconds.
What should I do if my egg filling is too dry?
If your filling seems dry, you can always add a splash more of whole milk or Kewpie mayonnaise to reach your desired creaminess. This small step energizes the flavors and keeps it luscious. Just remember to blend it well before serving!
Is there a substitute for Kewpie mayonnaise if I can’t find it?
Absolutely! If Kewpie mayo isn’t available, you can use regular mayonnaise, but be aware that it will slightly change the flavor profile of the sandwich. For a richer taste, consider mixing in a bit of sugar to mimic Kewpie’s sweetness. Alternatively, avocado can also create a creamy filling!
Are there any dietary considerations for this recipe?
Yes! While the Japanese Egg Sandwich is hearty, always be cautious of allergies, particularly with eggs and dairy products. For a lighter option, you can use dairy-free milk and substitute butter with olive oil. Always check ingredient labels to accommodate any dietary restrictions!
Savory Japanese Egg Sandwich Recipe for a Luxurious Snack
Ingredients
Equipment
Method
- Boil the eggs by placing them in a pot, covering with cold water, then bringing to a boil. Reduce heat and boil for 9 minutes for hard-boiled.
- Transfer boiled eggs to an ice bath for 5 minutes. Peel under running water and mix yolks in a bowl with milk, mayonnaise, sugar, salt, and pepper.
- Trim the crusts off shokupan slices and spread butter on one side of each slice. Set aside, butter side down.
- Assemble sandwiches by placing egg halves on two buttered slices, spreading egg filling on either side and topping with another buttered slice.
- Slice each sandwich in half diagonally or into quarters and serve immediately, preferably with a side of pickles.
Leave a Reply