
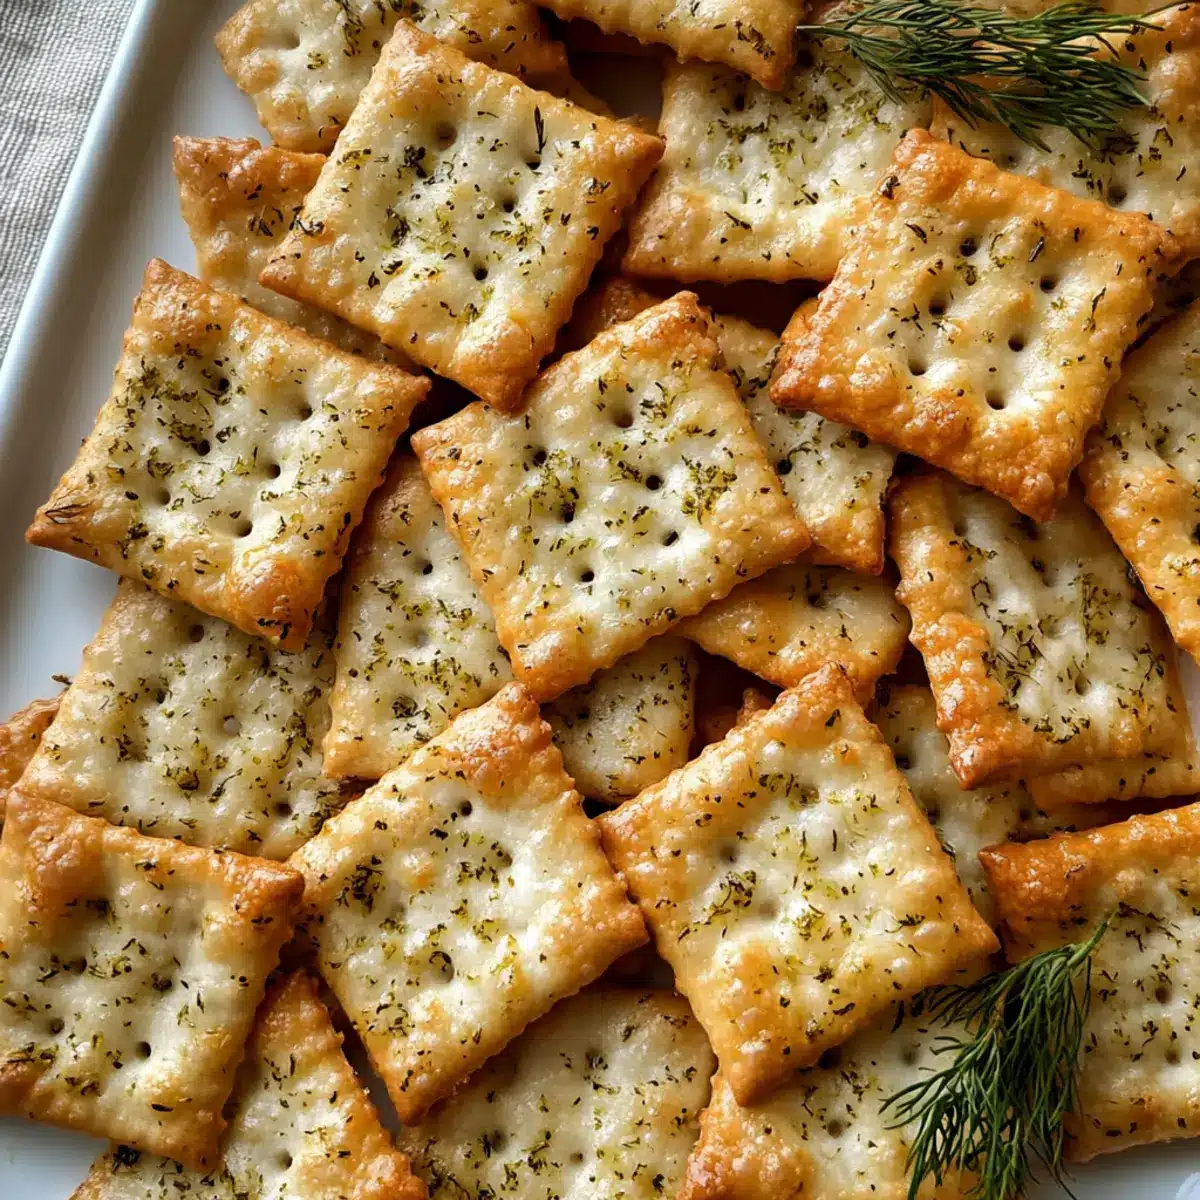
As I rummaged through my pantry one evening, the uneaten box of saltines caught my eye, begging for a makeover. That’s when I decided to create my addictive Dill Pickle Saltines—a snack that effortlessly transforms basic crackers into a bold, tangy delight. This no-bake recipe is not only a breeze to whip up, but it also allows for customization, whether you crave a touch of heat or a sprinkle of cheese. With just a handful of pantry staples, you’ll have a crunchy treat ready in no time, perfect for game nights or a cozy get-together with friends. Are you ready to elevate your snack game with these simple and satisfying crackers?
Why are Dill Pickle Saltines irresistible?
Addictive Flavor: The tangy dill pickle seasoning combined with garlic and black pepper creates a flavor explosion that will have you reaching for more.
Quick and Easy: With no baking involved, this recipe requires just minutes of prep and pantry ingredients. Perfect for those spontaneous snack cravings!
Customizable: Whether you prefer them spicy with red pepper flakes or cheesy with Parmesan, these saltines can be tailored to suit any palate.
Crowd-Pleasing Snack: Impress your friends at gatherings or game nights with a unique snack that’s bound to become a favorite. Serve them alongside dips or veggies for a delightful platter.
Make Ahead: Prep these crackers days in advance; they only get better with time as the flavors meld and deepen. Store in an airtight container for ultimate convenience!
Elevate your snack game with these easy and addictive Dill Pickle Saltines, perfect for any occasion!
Dill Pickle Saltines Ingredients
• Get ready to gather pantry staples for this delicious no-bake snack!
For the Crackers
- Saltine Crackers – The crisp base for your tangy delight; any classic saltine will do!
- Vegetable Oil – Helps the seasoning stick; can also use canola or light olive oil for a neutral flavor.
For the Seasoning
- Dry Dill Seasoning Mix – The key flavor contributor that provides that signature dill pickle taste; homemade is a fun option too!
- Garlic Powder – Adds savory richness; adjust according to how garlicky you want the saltines to be.
- Onion Powder – Enhances the overall flavor; feel free to omit if you prefer a cleaner taste.
- Dried Dill (optional) – For extra dill flavor; great if you can’t get enough of that zesty goodness!
- Black Pepper – Adds a subtle kick; modify the amount based on your taste preference.
- Red Pepper Flakes (optional) – Perfect for spice lovers; increases the heat level as desired.
With these simple ingredients, you’re all set to create your own batch of mouth-watering Dill Pickle Saltines that are bursting with flavor!
Step‑by‑Step Instructions for Dill Pickle Saltines
Step 1: Prepare the Container
Start by choosing a large mixing container, such as a zip-top bag or a lidded bowl. This will be your workspace for tossing the crackers. Ensure it’s clean and dry, as this helps the seasonings stick better. This is a vital first step to make your Dill Pickle Saltines pop with flavor!
Step 2: Add the Crackers
Carefully place the saltine crackers into your container, keeping them intact to maintain that irresistible crunch. About half to three-quarters of the container works well, allowing space for the coating. This step ensures every cracker will soak in the delicious dill pickle flavor while staying perfectly crispy.
Step 3: Mix the Seasonings
In a separate mixing bowl, whisk together the vegetable oil, dry dill seasoning mix, garlic powder, onion powder, black pepper, and optional red pepper flakes if you enjoy some heat. Whisk until all ingredients are well combined and have formed a smooth mixture. This seasoned oil will bring your Dill Pickle Saltines to life!
Step 4: Coat the Crackers
Pour the seasoned oil over the saltine crackers in the container, ensuring an even distribution. Seal the container tightly with the lid or zip the bag closed. This motion will help the oil adhere to every cracker, enhancing the flavor absorption and creating that tangy, tasty snack we all love.
Step 5: Toss Gently
Gently toss the crackers every few minutes to ensure they are evenly coated and to prevent breakage. This step should take about 10 minutes. The goal is to carefully mix without crushing the saltines, ensuring that each cracker is surrounded by the delightful dill pickle flavor.
Step 6: Allow to Rest
Let the coated crackers rest in the container for at least 1 hour at room temperature. For the best flavor, leave them overnight if you can. This resting period allows the saltines to soak up the flavors beautifully, giving your Dill Pickle Saltines an even more addictive taste.
Step 7: Serve and Enjoy
Once they’ve rested, your Dill Pickle Saltines are ready to serve! Enjoy them directly from the container, or make them part of a vibrant snack spread with veggies and dips. Each bite will deliver that tangy crunch, perfect for sharing at gatherings or cozy nights in!
What to Serve with Dill Pickle Saltines
Create a delightful snacking experience with a variety of tasty pairings to enhance your Dill Pickle Saltines.
-
Creamy Hummus: This smooth dip offers a rich contrast to the crunchy saltines, perfect for scooping. Try flavored hummus like roasted red pepper for a zesty twist!
-
Fresh Vegetable Platter: Crisp, colorful veggies such as carrots, cucumbers, and bell peppers complement the tangy flavor, providing a refreshing crunch in every bite.
-
Savory Deli Meats: Pair your saltines with thinly sliced turkey or salami for satisfying protein that balances the tanginess and adds hearty texture.
-
Cheddar Cheese Cubes: Sharp cheddar’s creaminess wonderfully offsets the salty crunch of the crackers, making for a delicious and satisfying bite.
-
Tasty Salsa: A zesty tomato salsa can bring a burst of flavor that pairs nicely with the seasoning in your saltines, offering a delightful texture contrast as well.
-
Sweet Pickle Relish: Emphasize the dill flavor by serving these saltines alongside sweet pickle relish for a tangy-sweet combo that will delight your taste buds.
-
Crisp White Wine: A light and fruity white wine like Sauvignon Blanc complements the saltines’ tangy taste while adding a refreshing touch to your snack spread.
-
Chocolate-Covered Pretzels: For a sweet treat, serve chocolate-covered pretzels for a delightful juxtaposition of flavors that contrast beautifully with your crunchy Dill Pickle Saltines.
Elevate your snacking experience by mixing and matching these delicious sides, ensuring a satisfying blend of flavors and textures that will leave your guests asking for more!
Make Ahead Options
These Dill Pickle Saltines are fantastic for those busy weeknights when time is tight! You can prepare them up to 3 days in advance, allowing the flavor to deepen and develop. To make ahead, follow the usual steps to mix and coat the crackers, then allow them to rest in the container for at least 1 hour, or ideally overnight. After they’ve rested, simply store them in an airtight container at room temperature; they’ll remain just as delicious and crispy. When it’s time to serve, you can garnish with extra herbs or spices for that fresh appeal—effortlessly elevating your snacking experience with minimal fuss!
Expert Tips for Dill Pickle Saltines
-
Rest Time Matters: Allow the crackers to rest for at least 1 hour but ideally overnight. This allows the flavors to fully absorb and intensify, enhancing your Dill Pickle Saltines.
-
Gentle Tossing: Be gentle when tossing the crackers to avoid breakage. A soft mixing motion ensures you maintain their crunchiness while achieving an even coating.
-
Flavor Customization: Don’t hesitate to experiment! Increasing red pepper flakes for heat or adding Parmesan cheese for a savory twist can take your Dill Pickle Saltines to the next level.
-
Keep Containers Dry: Always start with a clean and dry container for mixing. Excess moisture can hinder the seasoning from adhering properly, resulting in a less flavorful snack.
-
Storage Tips: Store your seasoned crackers in an airtight container at room temperature. They taste even better after a day, making this a great make-ahead option for gatherings.
Dill Pickle Saltines: Customization Options
Get ready to unleash your creativity and make this recipe truly your own with delightful twists!
-
Spicy Kick: Add more red pepper flakes or a dash of cayenne pepper for a fiery twist. Adjust the heat level to suit your taste buds, creating a spicy snack that adds excitement to any gathering.
-
Cheesy Delight: Incorporate powdered Parmesan cheese into the seasoning mix for a savory, cheesy flavor. Sprinkle a generous amount directly on the crackers for a deliciously indulgent variant that works fantastically with dips.
-
Citrusy Zing: Zest up your crackers by adding lemon zest to the seasoning mix. This bright tanginess enhances the overall flavor profile, giving your Dill Pickle Saltines a refreshing twist that will surprise your guests!
-
Ranch Flavor: Turn these crackers into ranch-flavored delights by skipping the dill seasoning. Instead, replace it with ranch seasoning mix for a classic taste that pairs beautifully with veggies and creamy dips.
-
Herb Medley: Experiment by blending other dried herbs, such as thyme or oregano, into the mix. This adds a sophisticated and aromatic layer to your crackers, making them perfect for an upscale snacking experience.
-
Sweet & Spicy: For a playful variation, add a touch of brown sugar to the seasoning mix. The balance of sweet and spicy creates an intriguing flavor that you absolutely won’t expect, but will thoroughly enjoy!
-
Crunchy Toppings: Top your crackers with sesame seeds or everything bagel seasoning for an added crunch and flavor burst. These toppings provide an enjoyable texture that elevates the humble saltine to a gourmet snack.
-
Creamy Kick: Try spreading a layer of cream cheese on top of the crackers before adding the seasoning. This addition brings an extra richness that pairs perfectly with the tangy flavor, making each bite a creamy delight.
Feel free to explore these variations to find your favorite combination! Your homemade Dill Pickle Saltines will shine with personality, ensuring they become a staple in your snack repertoire.
Storage Tips for Dill Pickle Saltines
Room Temperature: Store your Dill Pickle Saltines in an airtight container at room temperature for up to 1 week. This ensures they stay crunchy and tasty!
Make-Ahead: Feel free to prepare these crackers days in advance; they often taste even better after resting for a day as the flavors meld beautifully.
Reheating: There’s no need for reheating, but if they lose their crunch, try placing them in a preheated oven at 200°F for a few minutes to revive their crispiness.
Avoid Moisture: Keep your storage container dry and free from moisture to maintain the quality of the Dill Pickle Saltines and prevent them from becoming soggy.
Dill Pickle Saltines Recipe FAQs
What type of saltines should I use?
You can use classic saltine crackers for this recipe, but oyster crackers work wonderfully too! They both provide that satisfying crunch with the tangy flavor of dill pickle seasoning.
How long can I store my Dill Pickle Saltines?
Store your Dill Pickle Saltines in an airtight container at room temperature for up to 1 week. They taste even better after resting for a day as the flavors meld, creating a more intense pickle taste!
Can I freeze Dill Pickle Saltines?
Absolutely! To freeze your Dill Pickle Saltines, first, allow them to cool completely. Then, place them in an airtight freezer bag or container, ensuring you remove as much air as possible. They can stay frozen for up to 3 months. To enjoy, simply thaw them at room temperature before serving.
What if my crackers break while I’m tossing them?
If some crackers break while you’re tossing, don’t worry! Just be gentle and use a light mixing motion. To prevent future breakage, consider using a larger container, which allows for more space and less crowding while tossing.
Are Dill Pickle Saltines safe for pets?
It’s best to keep these Dill Pickle Saltines away from pets. The seasonings, especially garlic and onion powder, can be harmful to them. Stick to traditional pet treats for your furry friends!
Can I adjust the seasoning to suit my dietary needs?
Of course! Feel free to skip the onion powder if you’re sensitive to it, and you can substitute the black pepper with a non-spicy alternative. You can also make a gluten-free version using gluten-free crackers to accommodate dietary restrictions.
Dill Pickle Saltines: Your New Favorite No-Bake Snack
Ingredients
Equipment
Method
- Start by choosing a clean, dry mixing container.
- Carefully place the saltine crackers into the container.
- In a separate bowl, whisk together the vegetable oil and seasonings.
- Pour the seasoned oil over the saltine crackers.
- Gently toss the crackers to evenly coat them.
- Let the coated crackers rest in the container for at least 1 hour.
- Serve and enjoy!
Leave a Reply