
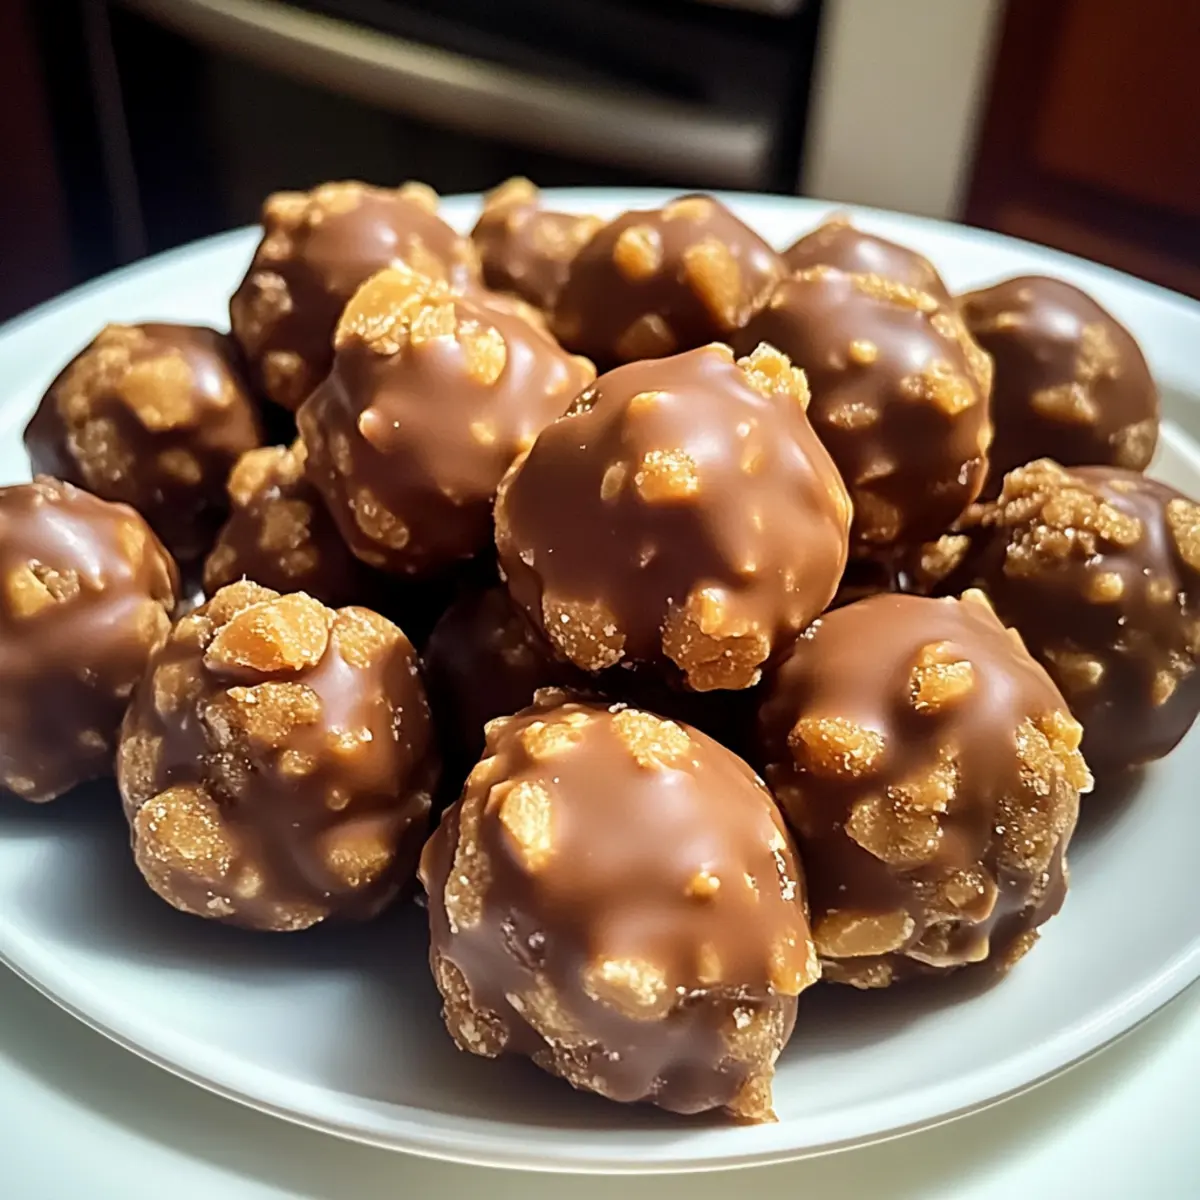
As I rummaged through my pantry, I stumbled upon the trifecta of delight: graham crackers, peanut butter, and those delightful Butterfinger bars. In that moment, I just knew I needed to whip up some no-bake Butterfinger Balls, because who can resist a quick dessert that smacks of nostalgia and chocolatey goodness? These little treats deliver on flavor and simplicity, making them perfect for last-minute cravings or joyous celebrations with friends and family. They’re not just quick to assemble; they also pair effortlessly with any gathering, serving as a sweet symbol of shared joy. Are you ready to indulge in these creamy, crunchy bites of bliss that will have your guests reaching for seconds? Let’s dive into this delicious creation together!
Why Are Butterfinger Balls So Irresistible?
Indulgent Flavors: The delightful mix of peanut butter and chocolate wraps your taste buds in a warm embrace. Each bite delivers a perfect harmony of sweet and salty flavors, bringing back a rush of nostalgia.
No-Bake Convenience: With minimal effort, you can prepare these treats in no time. Perfect for those who crave something delicious without spending hours in the kitchen!
Crowd-Pleasing Treat: Ideal for parties or movie nights, these Butterfinger Balls are sure to impress everyone from kids to adults. They disappear faster than you can say “party treat!”
Customizable Delight: Easily swap Butterfinger bars with your favorite candy for a personal twist. How about trying Snickers for a luscious variation?
Stored for Later: These bites can be made ahead and stored effortlessly. They last in the fridge for weeks, making spontaneous cravings a breeze to satisfy!
Get ready to bring joy into your home with these Butterfinger Balls. They’re the ultimate treat for sharing, indulging, and celebrating!
Butterfinger Balls Ingredients
• Discover the perfect combination for delectable treats!
For the Dough
- Softened Butter – Adds richness and helps bind the ingredients; use conventional brands for the best texture.
- Vanilla Extract – Enhances flavor and aroma; no substitutions needed for this classic touch.
- Peanut Butter – The creamy flavor base that makes it irresistible; use conventional varieties for consistent results.
- Powdered Sugar – Sweetens the mixture and stabilizes texture; ensure smooth incorporation to avoid lumps.
- Graham Cracker Crumbs – Provides structure and crunch; feel free to substitute with other cookie crumbs if desired.
- Crushed Butterfinger Bars – Adds that signature flavor and crunch; alternative candies can be used if preferred.
For the Coating
- Chocolate Bark or Chocolate Chips – Creates a sweet and crispy shell; melting wafers are an easy option too.
Optional Garnishes
- Additional Crushed Butterfinger Bars – Perfect for a tasty decorative touch.
- Festive Sprinkles – Add fun and color for celebrations!
- Coarse Sea Salt – Offers a delightful contrast to sweetness and enhances flavor.
Dive into making your Butterfinger Balls today, and prepare to be everyone’s favorite host!
Step‑by‑Step Instructions for Butterfinger Balls
Step 1: Prepare the Dough
In a mixing bowl, combine 1 cup of softened butter and 1 cup of creamy peanut butter. Use an electric mixer on medium speed to blend them together until completely smooth and creamy, about 2-3 minutes. This mixture forms the base for your Butterfinger Balls, so ensure there are no lumps for a delightful texture.
Step 2: Add Flavor
Next, pour in 1 teaspoon of vanilla extract into the peanut butter mixture. Mix it on low speed until the vanilla is fully incorporated, usually around 1 minute. This step elevates the flavor profile, introducing a warm aroma that makes your Butterfinger Balls even more irresistible.
Step 3: Sweeten
Gradually add 2 cups of powdered sugar to the bowl while mixing on low speed to avoid a cloud of sweetness. Mix for about 2-3 minutes, scraping the sides with a spatula to ensure everything is well combined. The mixture should be thick and slightly sticky, creating a well-balanced sweetness for your treat.
Step 4: Bring in Texture
Gently fold in 1 ½ cups of graham cracker crumbs and 1 cup of crushed Butterfinger bars with a spatula. Make sure to mix until everything is just combined without over-mixing; this will help maintain the crunchy texture in your Butterfinger Balls. You should be able to see bits of candy and crumbs throughout the mix.
Step 5: Shape the Balls
Using a cookie scoop or your hands, scoop out about 1 to 1½ tablespoons of the mixture and roll them into balls. Place each ball on a parchment-lined baking sheet, ensuring they are spaced apart. Repeat until all the mixture has been shaped, and you see a beautiful array of sweet morsels ready to chill.
Step 6: Chill
Cover the baking sheet with plastic wrap or foil and place it in the freezer for about 30 minutes. This chilling step is crucial, as it helps the Butterfinger Balls firm up, making them easier to handle when it’s time to coat them in chocolate.
Step 7: Melt Chocolate
In a microwave-safe bowl, add 1 ½ cups of chocolate bark or chocolate chips. Microwave on medium power in 30-second intervals, stirring between each to ensure even melting. After about 1-2 minutes, the chocolate should be smooth and silky, perfect for coating your Butterfinger Balls.
Step 8: Coat the Balls
Carefully dip each chilled Butterfinger Ball into the melted chocolate using a fork, ensuring they are fully coated. Allow any excess chocolate to drip off before returning them to the parchment-lined baking sheet. If desired, leave a little of the peanut butter exposed for a beautiful finish.
Step 9: Decorate
While the chocolate coating is still soft, sprinkle additional crushed Butterfinger bars, colorful sprinkles, or coarse sea salt on top for a delicious and decorative touch. This step adds personality and flair to your Butterfinger Balls while complementing their irresistible flavor.
Step 10: Finish
Let the chocolate coating set completely at room temperature or place them in the refrigerator for quicker results, about 15-20 minutes. Once the coating is firm, your Butterfinger Balls are ready to be served, delighting everyone with their beautiful presentation and delectable taste!
Expert Tips for Butterfinger Balls
-
Use Conventional Peanut Butter: Always opt for conventional peanut butter; natural ones can lead to oily mixtures that won’t hold together well.
-
Perfect Chocolate Coating: For a smoother finish, consider using chocolate bark instead of chips; chocolate chips can be trickier to melt properly.
-
Avoid Overheating Chocolate: Melt chocolate in short intervals, stirring frequently; overheating can cause lumps that ruin your coating for these Butterfinger Balls.
-
Firmness Is Key: Make sure to chill the balls adequately; they should be firm to the touch before coating, which helps maintain their shape.
-
Mix and Match: Feel free to experiment with different candy bars in your Butterfinger Balls; Snickers or Milky Way can add a delightful twist!
Make Ahead Options
These Butterfinger Balls are a fantastic choice for meal prep enthusiasts! You can prepare the dough up to 24 hours in advance; simply mix all the ingredients and shape them into balls. Store them tightly covered in the refrigerator to prevent drying out. Alternatively, you can freeze the shaped balls for up to 3 months—just be sure to place them in an airtight container. When you’re ready to indulge, thaw them overnight in the fridge and coat them in chocolate before serving. This way, you’ll have delightful treats ready to brighten any occasion with minimal effort!
What to Serve with No-Bake Butterfinger Balls?
Elevate your gathering with delightful pairings that enhance the sweet, creamy goodness of your Butterfinger Balls.
-
Classic Vanilla Ice Cream: The creamy texture and mild flavor provide a perfect contrast to the rich chocolate and peanut butter.
-
Fresh Fruit Platter: Juicy strawberries and sliced apples add a refreshing balance to the sweetness, encouraging a burst of flavor with each bite.
-
Crunchy Pretzels: Their salty crunch complements the sweetness of the Butterfinger Balls beautifully, creating a delightful contrast in taste and texture.
-
Chocolate Milkshake: Indulge your guests with a creamy chocolate shake, its rich flavor echoing the dessert’s chocolate coating while providing a fun, nostalgic treat.
-
Whipped Cream Topping: Serve these Butterfinger Balls with a dollop of whipped cream for an extra layer of creaminess, enhancing the indulgence of each bite.
-
Decaf Coffee: A smooth coffee helps balance the sweetness, making it the perfect companion to unwind and enjoy your treat.
No matter what you choose, these pairings will surely make your Butterfinger Balls shine even brighter at any celebration!
Butterfinger Balls: Fun Variations Await!
Feel free to get creative and customize these delightful treats to suit your taste and preferences!
- Dairy-Free: Substitute regular chocolate with dairy-free chocolate chips and use coconut or almond milk-based peanut butter.
- Nut-Free: Replace peanut butter with sun butter or pumpkin seed butter for a tasty alternative that’s allergy-friendly.
- Flavor Boost: Mix in a dash of sea salt or cinnamon to the dough for an extra layer of flavor that enhances the sweetness beautifully.
- Texture Twist: Add chopped nuts like almonds or pecans for a satisfying crunch and additional wholesome goodness!
- Geometric Shape: Instead of balls, press the mixture into a lined baking dish, refrigerate, then cut into bars for a fun twist.
- Spicy Kick: Incorporate a sprinkle of cayenne pepper into the chocolate coating for a surprising and tantalizing heat that balances the sweet.
- Seasonal Decor: Swap toppings for festive or seasonal options, like themed sprinkles or edible glitter during the holidays.
- Chocolate Variety: Experiment with different types of chocolate for coating – try using white chocolate or dark chocolate for a flavor contrast.
With these variations, your Butterfinger Balls can shine in a whole new light, making them perfect for every occasion! If you want to explore more unique flavors, check out our delicious recipes for Chocolate Chip Cookie Truffles or Peanut Butter Brownies as delightful pairings with your sweet creations!
Storage Tips for Butterfinger Balls
- Room Temperature: Store these treats in a cool, dry place for up to 3 days in an airtight container to maintain their freshness and flavor.
- Fridge: Keep your Butterfinger Balls in the refrigerator for optimal taste; they’ll stay delicious for up to 3-4 weeks. Make sure they’re well-wrapped to prevent drying out.
- Freezer: For longer storage, freeze the Butterfinger Balls in a single layer on a baking sheet, then transfer to an airtight container. They can last up to 5-6 months.
- Thawing: When ready to enjoy, simply thaw at room temperature for about 30 minutes. Enjoy the creamy goodness of this no-bake treat!
Butterfinger Balls Recipe FAQs
How do I select the right Butterfinger Bars?
Absolutely! When choosing Butterfinger Bars, look for those that have no dark spots or damage on the wrappers. Fresh bars will ensure your Butterfinger Balls have the best flavor and texture.
What’s the best way to store Butterfinger Balls?
I recommend storing your Butterfinger Balls in an airtight container in the refrigerator. They’ll stay fresh for about 3-4 weeks. Make sure to layer them with parchment paper to prevent sticking, which keeps them looking and tasting great!
Can I freeze Butterfinger Balls?
Yes, you absolutely can! To freeze, first place the Butterfinger Balls on a baking sheet in a single layer and freeze for about 1-2 hours until solid. Then, transfer them to an airtight container, separating layers with parchment paper. They can last up to 5-6 months in the freezer. When you’re ready to indulge, simply thaw them at room temperature for about 30 minutes.
What if my chocolate coating is too thick?
Very! If your chocolate coating seems too thick, try adding a small amount of vegetable oil or shortening to the melted chocolate. This will help thin it out and make it easier to coat your Butterfinger Balls without clumping. Just melt the oil together with the chocolate for a smooth consistency.
Are Butterfinger Balls safe for kids with nut allergies?
While Butterfinger Balls are delicious, they contain peanut butter, which is a common allergen. If you’re preparing these for someone with a nut allergy, consider using sunflower seed butter as a substitute. It closely resembles the texture and flavor of peanut butter without the nuts!
How can I adjust the sweetness level in Butterfinger Balls?
If you prefer a less sweet treat, you can reduce the amount of powdered sugar. Start with 1 cup instead of 2 and taste the dough as you mix. Remember, the crushed Butterfinger Bars add sweetness too, so feel free to adjust to your liking while ensuring the texture remains intact.
Decadent Butterfinger Balls: Irresistible No-Bake Treats
Ingredients
Equipment
Method
- In a mixing bowl, combine softened butter and creamy peanut butter. Use an electric mixer to blend them until smooth, about 2-3 minutes.
- Pour in vanilla extract and mix on low speed until fully incorporated, about 1 minute.
- Gradually add powdered sugar while mixing on low speed. Mix for about 2-3 minutes, scraping sides to combine.
- Fold in graham cracker crumbs and crushed Butterfinger bars gently to avoid over-mixing.
- Scoop out mixture and roll into balls, placing them on a parchment-lined baking sheet.
- Cover the baking sheet and freeze for about 30 minutes.
- In a microwave-safe bowl, add chocolate bark or chips. Microwave in short intervals while stirring until smooth.
- Dip each chilled ball into the melted chocolate, allowing excess to drip off.
- While chocolate is still soft, sprinkle additional crushed Butterfinger bars or sprinkles on top.
- Let the chocolate coating set completely, either at room temperature or in the fridge for about 15-20 minutes.
Leave a Reply