
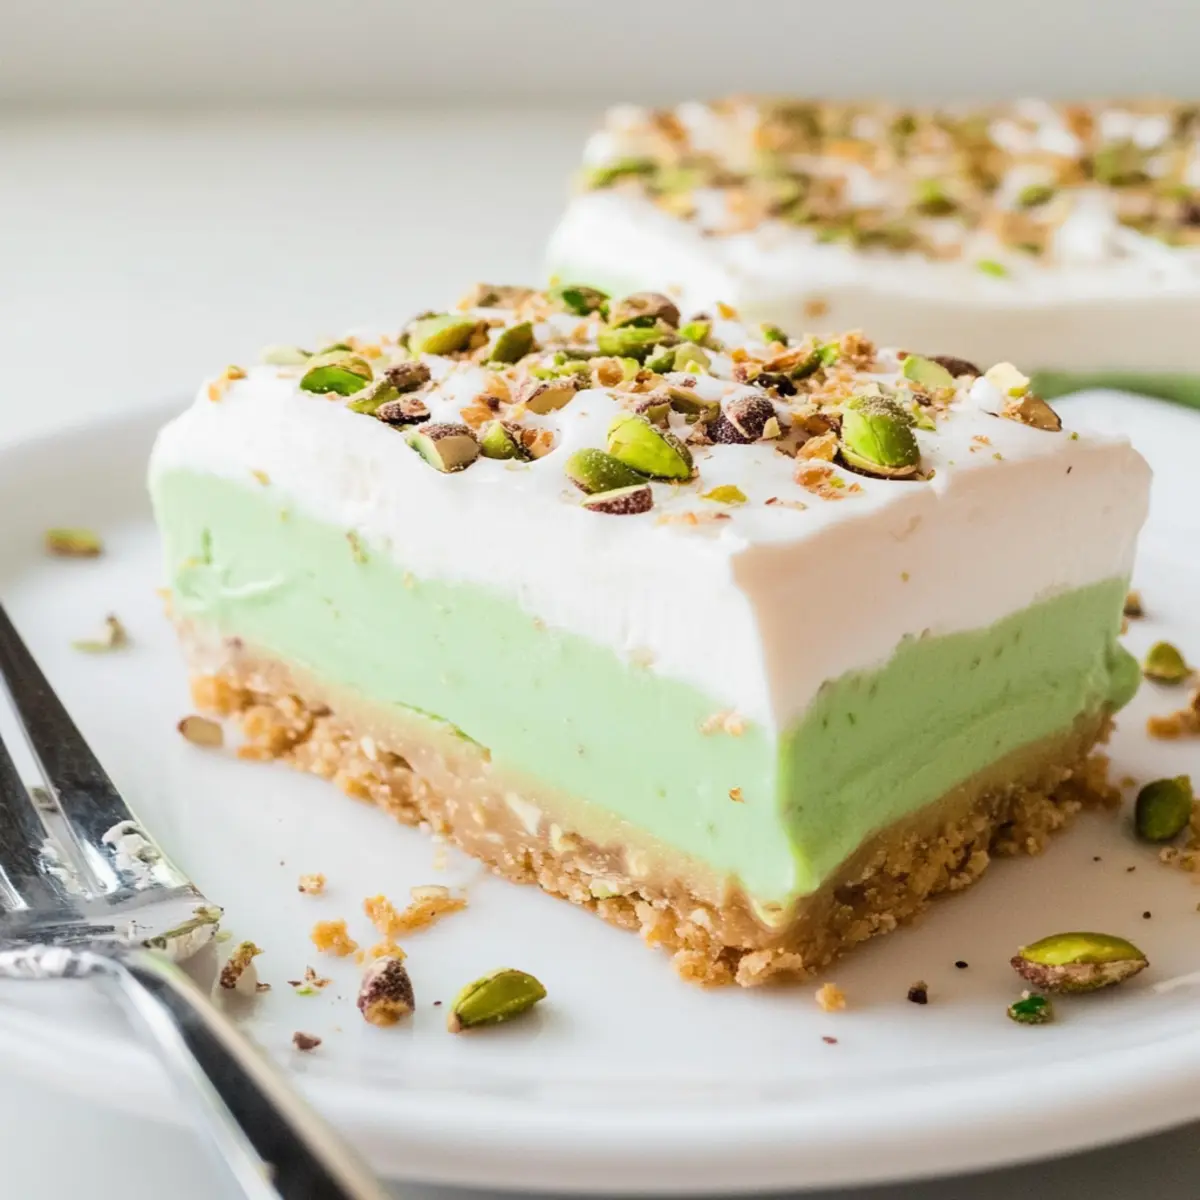
As I rummaged through my pantry, I stumbled upon a forgotten box of pistachio pudding mix and the memories came rushing back. I couldn’t resist the urge to whip up a No-Bake Pistachio Lush—a delightful layered dessert that feels like a sweet hug from the past. Composed of a buttery graham cracker crust, creamy cheesecake layer, and a rich pistachio pudding topping, this dessert is as easy to make as it is to enjoy. It’s perfect for gatherings, not only because it looks stunning on any table but also because it requires minimal chill time, allowing you to impress your guests without spending hours in the kitchen. Curious how a few simple ingredients can come together to create such a creamy masterpiece? Let’s dive into the recipe!
Why Is Pistachio Lush So Special?
Irresistible Layers: Each slice of Pistachio Lush reveals a mesmerizing medley of flavors—think crunchy graham cracker base topped with creamy cheesecake and rich pistachio pudding.
No-Bake Convenience: This dessert is perfect for those busy days when you want a sweet treat without the oven.
Quick Prep Time: With simple steps, you can assemble this showstopper in no time, making it an ideal option for last-minute gatherings.
Endless Customization: Want to switch things up? Try an Oreo crust for a delightful twist or add some fresh fruit for extra flair.
Crowd-Pleasing Delight: Everyone loves a great dessert, and this easy Pistachio Lush will surely impress guests at potlucks and barbeques alike.
More Pastel Goodness: If you’re a fan of creamy desserts, don’t forget to check out my delicious Pistachio Tiramisu Bake for another layer of indulgence!
Pistachio Lush Ingredients
For the Crust
• Graham Cracker Crumbs – This forms a delightful crunchy base; for a different texture, consider using crushed digestive biscuits.
• Unsalted Butter – Essential for binding the crust; make sure it’s melted for an even mix. Coconut oil works as a dairy-free alternative.
For the Cheesecake Layer
• Cream Cheese – Provides a creamy texture; use softened cream cheese for easier mixing; ricotta can lighten this layer.
• Powdered Sugar – Sweetens the cream cheese layer smoothly, as it dissolves better than granulated sugar.
• Vanilla Extract – Adds a rich depth of flavor; opt for pure vanilla for the best taste.
• Whipped Topping – Delivers an airy texture; thawed commercial whipped topping or homemade whipped cream are excellent choices.
For the Pistachio Layer
• Pistachio Instant Pudding – This key ingredient brings unique flavor and structure; regular pudding mix won’t work here.
• Whole Milk – Ensures a creamy consistency for the pudding; consider half and half for extra richness, but low-fat might change the texture.
• Chopped Pistachios – Adds a delightful crunch and enhances nuttiness; to boost flavor, toast them lightly before use.
Feel the creamy goodness of Pistachio Lush as you assemble each layer and watch as it transforms into a stunning dessert that everyone will adore!
Step‑by‑Step Instructions for Pistachio Lush
Step 1: Prep the Crust
In a medium mixing bowl, combine graham cracker crumbs with melted unsalted butter. Stir until the crumbs are evenly coated and resemble wet sand. Press this mixture firmly into the bottom of a 9×13” baking dish to create a smooth, even layer. Ensure the crust is compact, as this will help it hold together when slicing the Pistachio Lush.
Step 2: Make the Cheesecake Layer
In a large mixing bowl, beat the softened cream cheese with powdered sugar and vanilla extract using an electric mixer on medium speed until smooth and creamy, about 3 minutes. Gently fold in 8 ounces of whipped topping until just blended and fluffy. This creamy mixture forms a delightful layer that adds richness to the Pistachio Lush, so be mindful not to overmix.
Step 3: Prepare the Pudding Layer
In a separate bowl, whisk together the pistachio instant pudding mix and cold whole milk. Mix on high speed for 1-2 minutes until the pudding thickens to a creamy consistency. Once thickened, fold in the chopped pistachios, which will enhance the flavor and provide a delightful crunch in your Pistachio Lush.
Step 4: Layer the Dessert
Spread the creamy cheesecake mixture evenly over the prepared crust, smoothing it with a spatula. Next, gently pour the pistachio pudding layer over the cheesecake, ensuring it covers the surface entirely. Use a spatula to smooth the pudding layer for an appealing finish, creating the beautiful layers that make the Pistachio Lush so special.
Step 5: Chill
Cover the dessert with plastic wrap and refrigerate for at least 2 hours. This chilling step allows the flavors to meld beautifully and helps the layers set properly. If time permits, consider chilling it overnight for an even more flavorful experience, ensuring a deliciously firm and refreshing Pistachio Lush.
Step 6: Finish
Just before serving, spread the remaining whipped topping over the chilled pistachio layer, creating a fluffy and airy finish. For an optional touch, sprinkle additional chopped pistachios on top for garnish and crunch. At this point, your stunning Pistachio Lush is ready to be sliced and shared with family and friends!
Expert Tips for Pistachio Lush
-
Cream Cheese Softening: Always soften cream cheese at room temperature for an ultra-smooth blend. If you’re in a hurry, chop it into cubes and microwave for a few seconds—just don’t let it melt!
-
Crust Firmness: Press the graham cracker crust down firmly to prevent crumbling when you slice the Pistachio Lush. A compact base is key for neat, beautiful servings.
-
Chill for Best Flavor: Aim for a minimum chilling time of 2 hours, but overnight is ideal! This allows the layers to set and flavors to meld for a more delicious dessert.
-
Garnish Wisely: Add the chopped pistachios right before serving to keep them crunchy. This simple step elevates the texture and adds delightful flavor.
-
Layer with Care: Be gentle when spreading the layers to keep the distinct layers visible. Using an offset spatula can help achieve a smooth, even spread without disturbing the layers.
How to Store and Freeze Pistachio Lush
Fridge: Store your Pistachio Lush covered in the refrigerator for up to 3 days. This keeps it fresh while allowing the flavors to meld beautifully.
Freezer: For longer storage, freeze the Pistachio Lush for up to 2 months. Wrap it tightly in plastic wrap, then in aluminum foil to prevent freezer burn.
Thawing: When ready to enjoy, transfer the dessert to the fridge to thaw overnight. This ensures a smooth, creamy texture when serving.
Reheating: There’s no need to reheat this dessert; serve it chilled for the best experience!
Pistachio Lush Variations & Substitutions
Feel free to switch things up with these delightful variations that enhance the Pistachio Lush experience!
-
Oreo Crust: Replace graham crackers with crushed Oreo cookies for a delicious chocolatey twist. It’s an indulgent change that pairs wonderfully with the pistachio flavor.
-
Different Pudding Flavors: Try swapping the pistachio instant pudding for vanilla or even chocolate to create unique flavor profiles. Regardless of which you choose, each variation brings its own charm to the table!
-
Fresh Fruit Layers: Add sliced strawberries or raspberries between layers for a fresh and fruity twist. The berries not only add a pop of color but also brighten the overall flavor.
-
Nutty Texture: Sprinkle finely chopped almonds or walnuts into the pudding layer for an added crunch. This touch will elevate the texture and provide a nice contrast to the creamy layers.
-
Dairy-Free Option: Substitute coconut cream for whipped topping and almond milk for whole milk to create a creamy yet dairy-free delight. You’ll still enjoy the lusciousness without the dairy!
-
Extra Sweetness: Enhance the sweetness by adding a drizzle of honey or maple syrup over the whipped topping just before serving. This little touch makes a big difference!
-
Spicy Kick: Add a pinch of cinnamon or nutmeg to the cheesecake mixture for a warm spice hint. It offers a cozy twist that’s perfect for fall gatherings.
-
Elegant Garnishes: Instead of just pistachios, consider using edible flowers or a dusting of cocoa powder over the top as a stunning visual accent. These simple additions can make your Pistachio Lush even more captivating!
For more dreamy layers and flavors, consider checking out my scrumptious Pistachio Tiramisu Bake—another way to indulge in pistachio goodness!
Make Ahead Options
These Pistachio Lush layers are perfect for busy home cooks looking to save time while still delivering a delicious dessert! You can prepare the graham cracker crust and cheesecake layer up to 24 hours in advance; simply press the crust into the dish and mix the cheesecake layer, then refrigerate them separately. For the pistachio pudding layer, make it up to 3 days ahead of time. Just whisk the pudding mix with milk and refrigerate until you’re ready to assemble it. When it’s time to serve, layer everything together, chill for a minimum of 2 hours, and finish with whipped topping. This way, you’ll keep the flavors fresh and enjoy an impressive dessert with minimal last-minute effort!
What to Serve with No-Bake Pistachio Lush
Indulging in layers of creamy delight calls for companions that enhance the experience and satisfy cravings.
- Fresh Fruit Salad: A vibrant mix of seasonal fruits adds a refreshing contrast, balancing the dessert’s sweetness and richness.
- Chocolate Drizzle: A touch of melted chocolate over the top brings a luxurious twist, tying in new flavor notes without overpowering the pistachio.
- Coffee or Espresso: The bold flavors of coffee complement the creamy layers beautifully, making each bite and sip a delightful harmony.
- Whipped Cream Topping: Enhance that indulgent experience with freshly whipped cream on the side for an airy, mocha-like finish that keeps it light.
- Coconut Macaroons: Chewy coconut macaroons add a satisfying texture, pairing wonderfully with the lush creaminess of the dessert.
- Mint Tea: A warm cup of mint tea provides a soothing finish, cutting through the sweetness with its refreshing herbal notes. Taste the harmony as these options elevate your No-Bake Pistachio Lush!
Pistachio Lush Recipe FAQs
How do I choose the best pistachios for my Pistachio Lush?
Absolutely! When selecting pistachios, look for those that are bright green in color and free from any dark spots. They should also be unsalted for the best flavor balance in your dessert. If you’re feeling adventurous, try toasting them lightly before adding to enhance their nuttiness!
How should I store my Pistachio Lush?
Very! Store your Pistachio Lush covered in the fridge for up to 3 days. Keep it tightly wrapped to maintain freshness, and the flavors will continue to meld beautifully. If you want to make it a day in advance, go for it! That’s often when the flavors shine even more.
Can I freeze Pistachio Lush? How?
Absolutely! You can freeze Pistachio Lush for up to 2 months. First, slice the dessert and wrap each piece tightly in plastic wrap, followed by aluminum foil to prevent freezer burn. When you’re ready to enjoy it, simply place it in the fridge to thaw overnight. This way, you’ll have a delightful frozen treat that’s just as creamy when served!
What if my cream cheese layer is lumpy?
If you find yourself with a lumpy cream cheese layer, don’t worry! The most common culprit is under-softened cream cheese. To avoid this, make sure to let the cream cheese sit at room temperature for 30 minutes before mixing. If you’re in a pinch, cube it and microwave on low power for just 10 seconds to soften. Blend again, and it should be smooth!
Can my Pistachio Lush be gluten-free? What substitutes can I use?
Yes, it can! To make your Pistachio Lush gluten-free, simply substitute graham cracker crumbs with gluten-free cookie crumbs or crushed gluten-free cookies. Ensure your pudding mix is also certified gluten-free. With these tweaks, everyone can enjoy this luscious dessert!
Creamy Pistachio Lush: A Dreamy No-Bake Delight
Ingredients
Equipment
Method
- In a medium mixing bowl, combine graham cracker crumbs with melted unsalted butter. Stir until even and press into a 9x13” baking dish.
- Beat softened cream cheese with powdered sugar and vanilla extract until smooth. Fold in whipped topping.
- Whisk together pistachio pudding mix and cold milk until thickened. Fold in chopped pistachios.
- Spread cheesecake mixture over the crust, then pour pistachio pudding layer over it, smoothing with a spatula.
- Cover with plastic wrap and refrigerate for at least 2 hours.
- Spread remaining whipped topping over the pistachio layer and garnish with chopped pistachios before serving.
Leave a Reply