
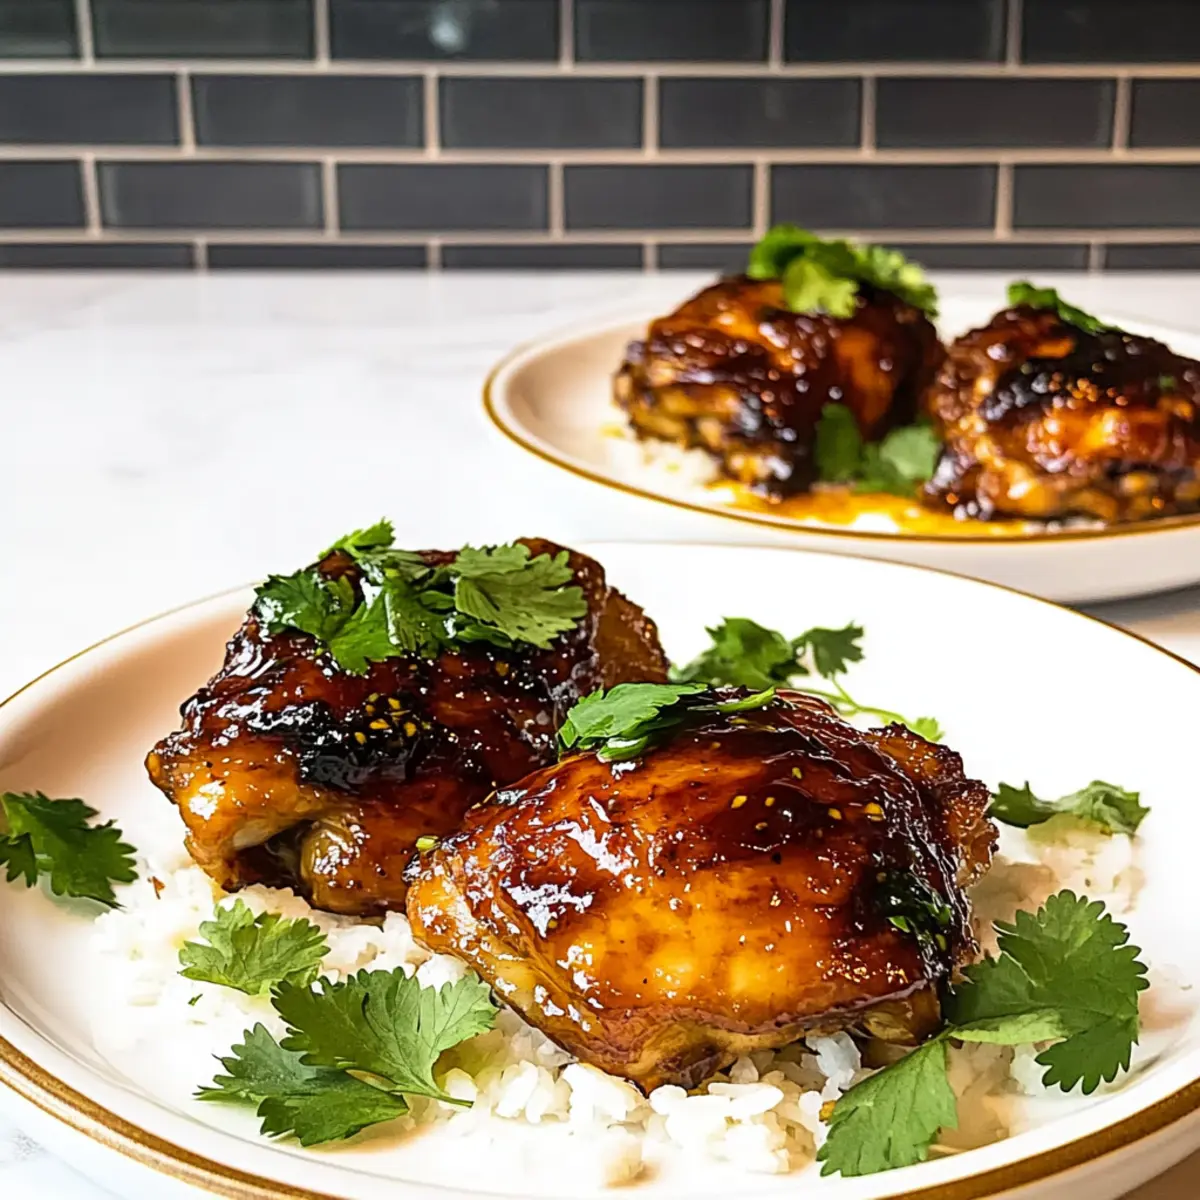
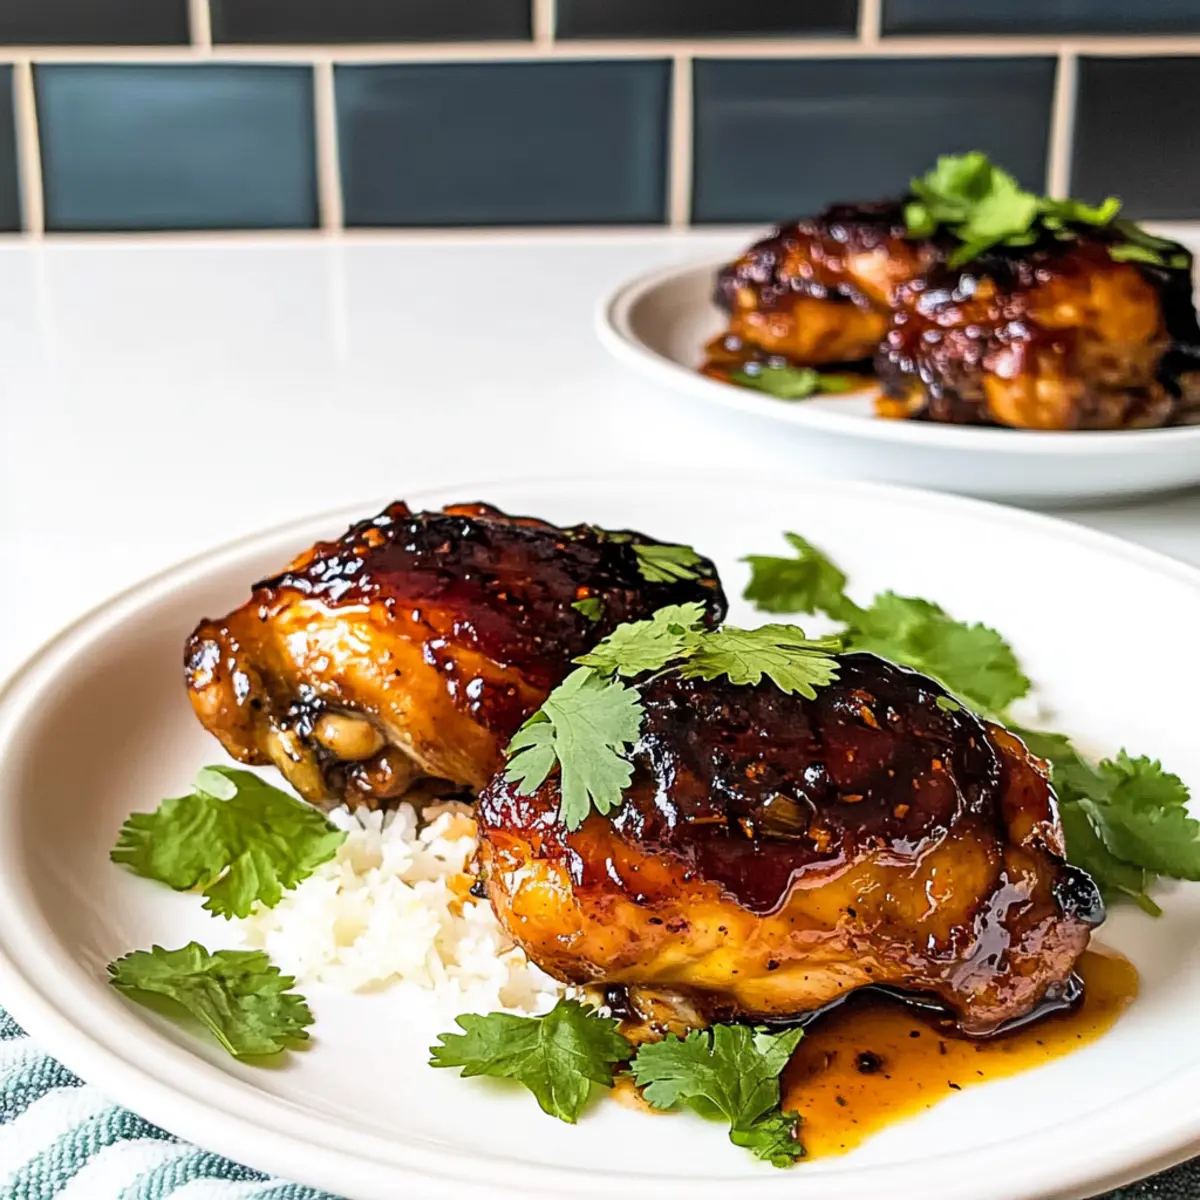
Stepping into my kitchen, the aroma of Sticky Thai Chicken has a way of whisking me away to vibrant street markets in Thailand. It’s more than just a dish; this culinary masterpiece effortlessly marries sweet and spicy flavors, all glistening under a luscious glaze that practically begs for a side of rice. This recipe is perfect for those hectic weeknights, as it comes together in no time and doesn’t require any marinating. You’ll find that this quick weeknight dinner not only saves you from the fast-food rut but also delights the entire family with its juicy chicken thighs and simple presentation. Are you ready to transform your dinner routine with this irresistible dish?
Why is Sticky Thai Chicken a Must-Try?
Convenience at its Finest: This dish comes together in a snap, perfect for those busy weeknights when time is of the essence.
Harmonious Sweet and Spicy Flavor: It beautifully balances sweet and spicy notes, creating a tantalizing taste that dances on your palate.
Juicy, Tender Chicken: The chicken thighs roast to perfection, ensuring each bite is succulent and satisfying, just like your favorite Thai takeout.
One-Pan Wonder: With minimal clean-up required, you can spend less time washing dishes and more time enjoying your meal.
Versatile Pairing: Serve it alongside Coconut Cilantro Rice or fresh salad for a complete culinary experience that your family will love! If you’re inspired, try it with a side of Crispy Chicken Taquitos for a fun twist.
Sticky Thai Chicken Ingredients
Here’s everything you need to create that perfect Sticky Thai Chicken at home.
For the Chicken
- Chicken Thighs (bone-in, skin-on) – Main protein source; these provide rich flavor and crispiness when roasted.
- Salt and Pepper – Essential seasonings to enhance the chicken’s natural flavors; adjust to taste based on your preference.
For the Sticky Sauce
- Red Pepper Flakes – Adds a delightful kick; use more or less depending on your spice tolerance.
- Brown Sugar – Brings sweetness and helps create that sticky glaze; feel free to adjust based on your sweetness preference.
- Fish Sauce – Imparts a rich umami flavor; can substitute with soy sauce for a less salty alternative.
- Soy Sauce – Enhances flavor and provides necessary saltiness; using low-sodium soy sauce is a great way to cut down on salt.
- Ginger (grated) – Freshness and warmth elevate the dish; using fresh ginger produces the best flavor.
For Garnish
- Cilantro – A fresh herb that brightens up the dish; this can be omitted if fresh herbs aren’t your thing.
Optional Helpers
- Cooking Spray – Prevents the chicken from sticking; not necessary if a non-stick skillet is used.
Step‑by‑Step Instructions for Sticky Thai Chicken
Step 1: Preheat the Oven
Begin by preheating your oven to 425°F (220°C). If you choose to use cooking spray for easy cleanup, lightly spray an oven-proof skillet with it now. This ensures the sticky glaze doesn’t stick, allowing you to achieve that perfect finish on your Sticky Thai Chicken.
Step 2: Prepare the Chicken
Take the chicken thighs and trim any excess fat for a cleaner presentation and improved cooking. Pat each thigh dry with paper towels, then season both sides liberally with salt and pepper. This step is key for enhancing the chicken’s natural flavors and ensuring a crispy skin when roasted.
Step 3: Mix the Sauce
In a small bowl, combine the red pepper flakes, brown sugar, fish sauce, soy sauce, and grated ginger. Whisk these ingredients together until well blended. The sticky sauce will be both sweet and spicy, complementing the juicy chicken thighs beautifully. Set aside this mixture for the next step.
Step 4: Coat the Chicken
Place the seasoned chicken thighs in the prepared skillet, skin side facing down. Pour the prepared sticky sauce over the chicken, making sure to evenly coat each piece. Using tongs, gently turn the thighs to ensure they’re well covered in the delicious sauce for maximum flavor and caramelization.
Step 5: Roast the Chicken
Transfer the skillet to the preheated oven and roast the chicken skin side down for 30 minutes. This initial cooking allows the chicken to absorb the flavors of the sticky sauce, while the sugar begins to caramelize, creating that delightful glaze.
Step 6: Flip the Chicken
After 30 minutes, carefully remove the skillet from the oven. Using tongs, turn the chicken thighs over so the skin side is now facing up. Return the skillet to the oven and roast for an additional 15 minutes, allowing the skin to crisp up and the meat to stay tender and juicy.
Step 7: Optional Broiling
For extra caramelization and a beautiful finish, switch the oven to broil for 2-5 minutes once the chicken is fully cooked. Keep a close eye during this step to prevent burning, as the sugar in the glaze can quickly turn from golden to charred.
Step 8: Garnish and Serve
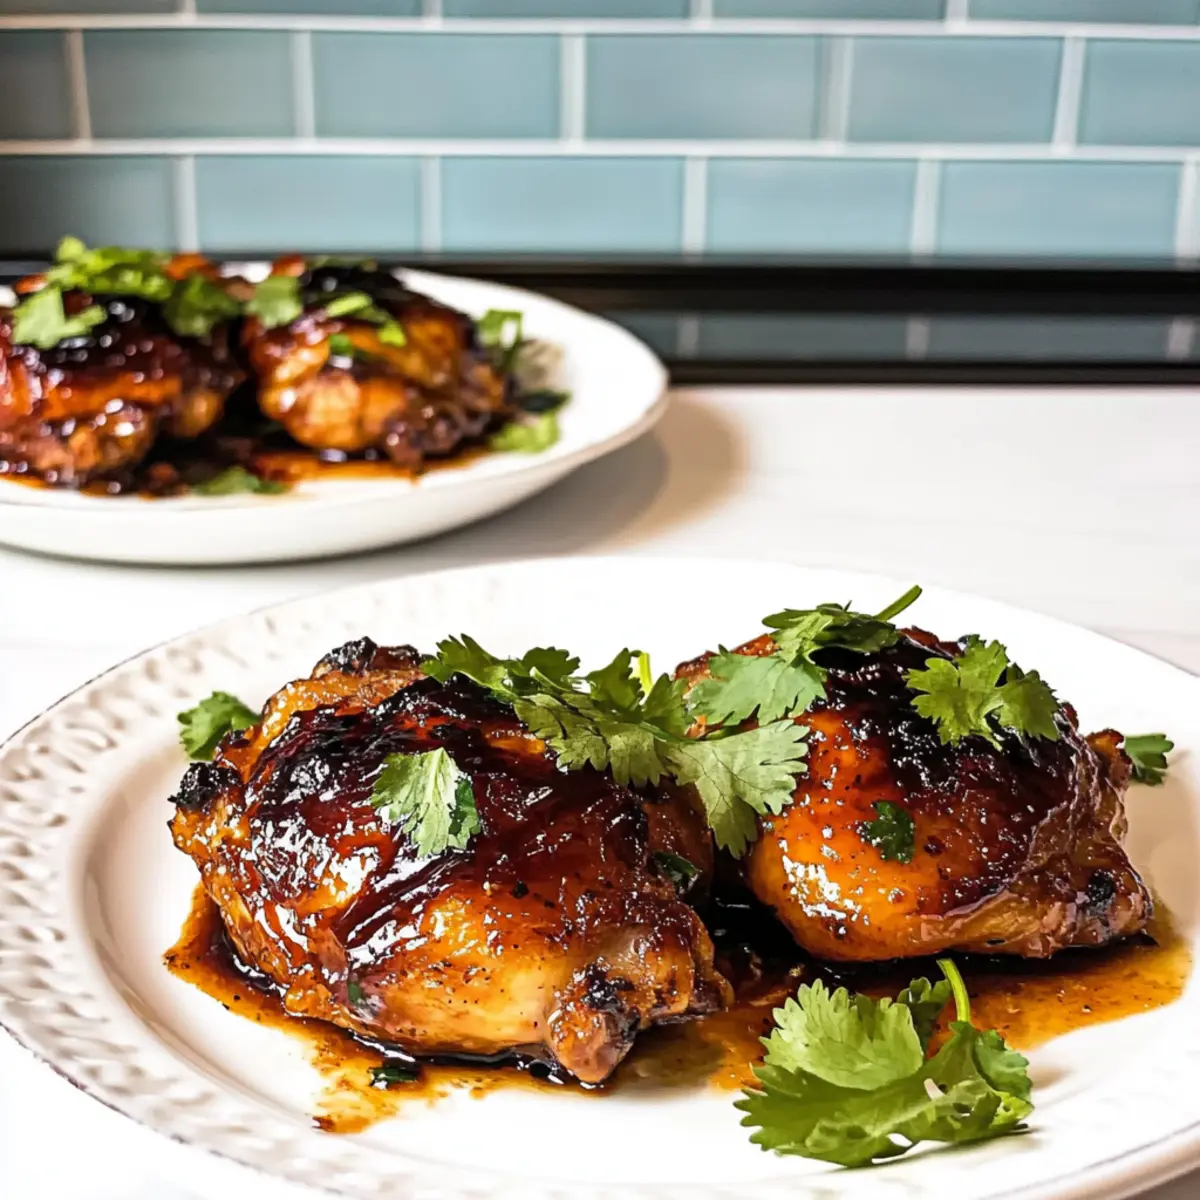
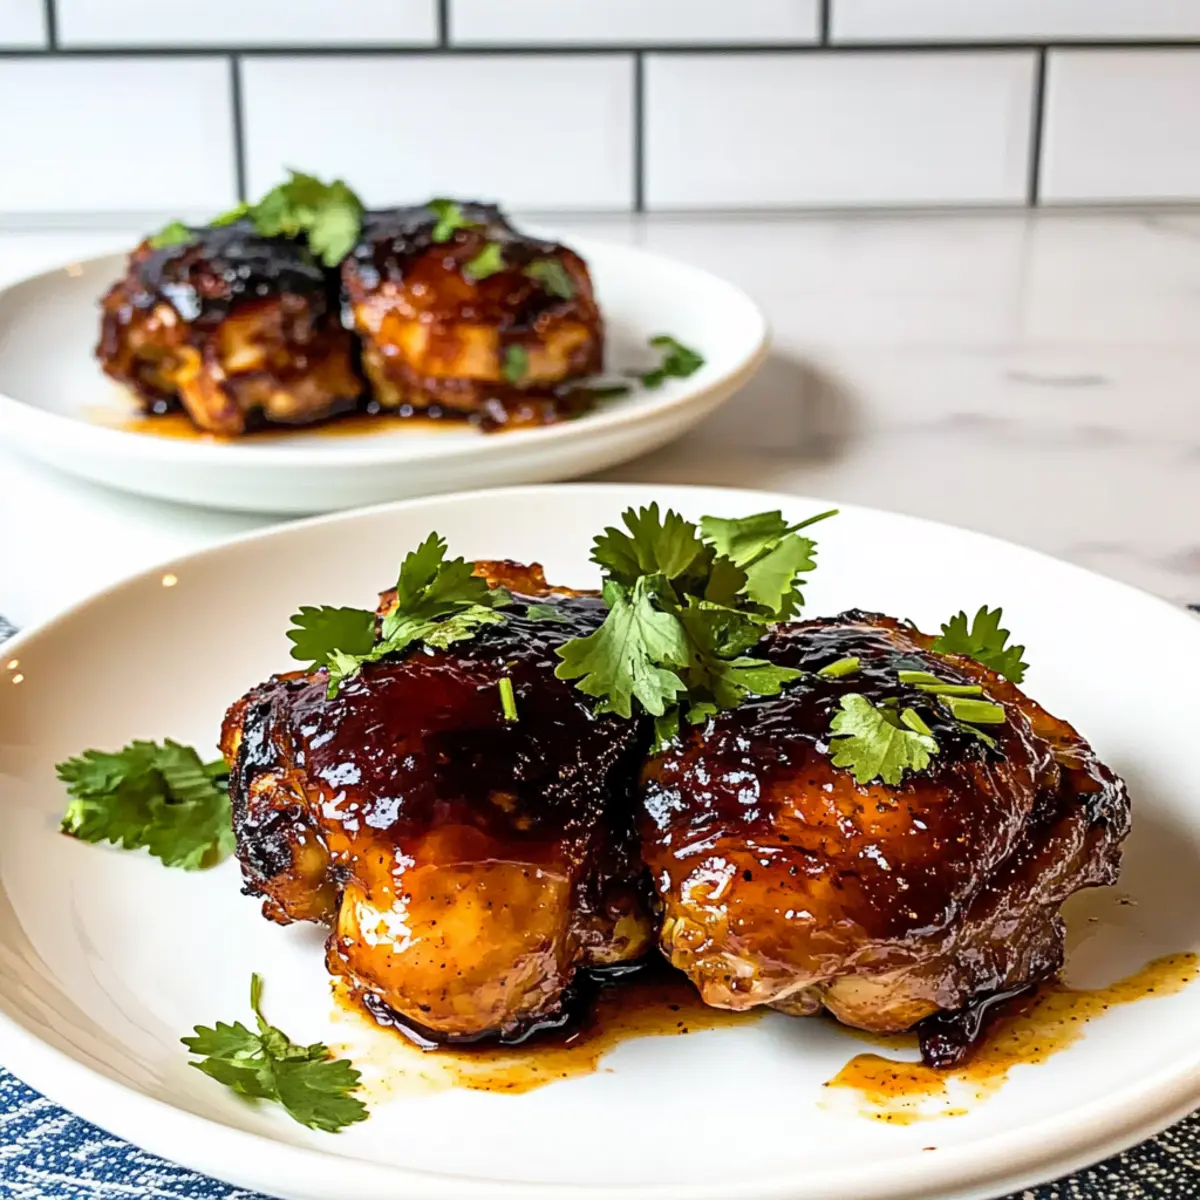
Once the Sticky Thai Chicken has finished broiling, remove it from the oven and let it rest for a few minutes. Optionally, garnish with fresh cilantro before serving. This simple touch adds a burst of color and flavor to your dish, making it even more appetizing. Serve alongside rice or noodles for a delightful meal.
What to Serve with Sticky Thai Chicken
Elevate your dining experience with exciting sides that complement the vibrant flavors of this delightful chicken dish.
-
Steamed Jasmine Rice: Fluffy and aromatic, it soaks up the sticky glaze, creating a comforting, balanced meal.
-
Crispy Vegetable Spring Rolls: Crunchy and light, these add a wonderful texture and freshness, pairing perfectly with the rich chicken. A side of sweet chili sauce can elevate the enjoyment!
-
Garlic Bok Choy: The slight bitterness of bok choy, sautéed with garlic, contrasts beautifully with the sweet and spicy notes of the chicken. Healthy and vibrant, it’s a delightful addition.
-
Coconut Cilantro Rice: Infused with coconut milk and fresh cilantro, this creamy side brings an exotic touch that wonderfully harmonizes with the sticky chicken.
-
Peanut Noodles: Creamy, with a hint of spice, these noodles are a satisfying option that echoes the flavors of Thai cuisine. Garnishing with crushed peanuts adds extra texture.
-
Chilled Cucumber Salad: Refreshing and tangy, this light salad offers a crisp contrast, cutting through the richness of the chicken.
-
Thai Iced Tea: Smooth and sweet, this classic drink is the perfect accompaniment to balance the meal with its refreshing and creamy nature.
-
Mango Sticky Rice: For a sweet finish, this dessert offers a delightful blend of flavors and textures, making it a perfect way to end your meal.
How to Store and Freeze Sticky Thai Chicken
Fridge: Store leftovers in an airtight container for up to 3 days. This will help retain the chicken’s moistness while letting the flavors meld for an even tastier bite!
Freezer: Place cooked Sticky Thai Chicken in a freezer-safe container for up to 3 months. Ensure it’s well-wrapped to prevent freezer burn and preserve its delightful taste.
Reheating: When ready to enjoy, thaw in the fridge overnight and reheat gently in the oven or on the stovetop over low heat to avoid drying it out.
Quick Tip: If you love meal prepping, this dish is perfect to prepare ahead and enjoy throughout the week – just remember to keep the serving size in check!
Expert Tips for Sticky Thai Chicken
-
Perfect Timing: Check for doneness as oven temperatures can vary; the chicken should reach an internal temperature of 165°F for safety.
-
Sauce Consistency: If the glaze seems too thin, simmer it in a small sauce pan until it thickens before adding to the chicken for a stickier outcome.
-
Crispy Skin: To achieve extra crispy skin, finish with the broiler briefly, watching closely to prevent burning due to the sugars in the sticky glaze.
-
Spice Level: Adjust the amount of red pepper flakes to match your family’s spice preference, ensuring everyone enjoys this Sticky Thai Chicken without too much heat.
-
Non-Stick Tools: Using a cast-iron skillet enhances browning and flavor, but be aware that cleaning may require a little extra effort due to the sticky glaze.
-
Meal Prep Ready: This dish can be paired with various sides, such as steamed rice or fresh salad, making it an ideal choice for a quick weeknight dinner that feels special.
Sticky Thai Chicken Variations & Substitutions
Feel free to get creative with your Sticky Thai Chicken and explore these delicious twists and swaps for an even more personalized experience.
-
Dairy-Free: Use coconut aminos instead of soy sauce for a milder, gluten-free option with a hint of sweetness. It’s a great way to enjoy the dish without any dairy.
-
Low-Carb: Serve the chicken with cauliflower rice instead of traditional rice for a lighter, low-carb meal that still delivers on flavor. It’s a fantastic way to enjoy a cozy dinner without the carbs.
-
Add More Heat: Incorporate sliced fresh chilies or a splash of sriracha in the sauce to amp up the heat. This will leave spice lovers delighted as they savor every bite!
-
Sweet & Spicy Pairing: Combine sweet chili sauce with the sticky sauce for an extra punch of flavor. This blend brings a balanced sweetness that takes your dish into a whole new realm of deliciousness.
-
Crispy Twist: Coat chicken thighs with panko breadcrumbs before roasting to add an extra crunchy texture. Each bite will be a delightful contrast to the sticky sauce.
-
Herb Enhancement: Mix fresh basil into the garnish for a fragrant twist that complements the flavor profile perfectly. Aromatic herbs can elevate your dish with freshness!
-
Quick Meal Addition: Pair the chicken with Coconut Cilantro Rice for a refreshing complement that matches beautifully with the sweet and spicy sauce.
-
Extra Depth: Stir in some minced garlic along with the sauce for added depth and flavor. The rich, aromatic essence of garlic will transform each bite!
By incorporating these variations and substitutions, you can make your Sticky Thai Chicken experience truly unique and flavorful. Whether looking for a healthy swap or a new flavor twist, these ideas will help shake up your dinner routine!
Make Ahead Options
Sticky Thai Chicken is an excellent choice for meal prep, perfect for busy home cooks looking to save time during the week! You can season the chicken thighs and prepare the sticky sauce up to 24 hours in advance. Simply store the seasoned chicken in an airtight container in the refrigerator and keep the sauce in a separate container. This not only enhances the flavors but also ensures a seamless cooking experience. When you’re ready to cook, just pop the chicken in the skillet, pour the sauce over, and roast as directed. Trust me, your Sticky Thai Chicken will be just as delicious and ready in a snap!
Sticky Thai Chicken Recipe FAQs
How do I choose the best chicken thighs for this recipe?
Absolutely! Look for chicken thighs that are plump and have a nice layer of fat; this ensures juicy and flavorful meat. The skin should be intact, without any dark spots or discoloration. Fresh is always better, so if you can, opt for thighs that are bright pink and not past their sell-by date.
How should I store the leftovers of Sticky Thai Chicken?
You can store any leftover Sticky Thai Chicken in an airtight container in the fridge for up to 3 days. To reheat, gently warm it in the oven at a low temperature to keep the chicken moist. Perfect for easy leftovers that still taste amazing!
Can I freeze Sticky Thai Chicken? If so, how?
Yes, you can freeze Sticky Thai Chicken! Allow the chicken to cool completely before transferring it to a freezer-safe container or heavy-duty freezer bags. Make sure to remove as much air as possible to prevent freezer burn. It can be stored for up to 3 months. When you’re ready to enjoy it, simply thaw it in the fridge overnight and reheat gently.
What should I do if the chicken is not crispy enough after roasting?
If your chicken doesn’t achieve that desired crispiness, simply switch the oven to broil for 2-5 minutes at the end of cooking. Keep a close eye on it to avoid burning, as the sugars in the glaze can char quickly. You can also try using a cast-iron skillet next time, which promotes better browning.
Is Sticky Thai Chicken suitable for people with food allergies?
Be cautious! This recipe contains soy sauce and fish sauce, which can be problematic for those with soy or fish allergies. You can substitute soy sauce with coconut aminos, and opt for a gluten-free soy sauce if needed. Always check labels and adjust the recipe according to dietary needs.
Can I use skinless chicken thighs in this recipe?
Very much! If you prefer using boneless, skinless chicken thighs, reduce the total cooking time to about 30 minutes (15 minutes per side), ensuring the chicken reaches an internal temperature of 165°F. The sauce will still give you the sweet and spicy flavors you love without the crispy skin. Enjoy experimenting!
Sticky Thai Chicken: Quick, Sweet & Spicy Family Favorite
Ingredients
Equipment
Method
- Preheat your oven to 425°F (220°C) and lightly spray an oven-proof skillet with cooking spray if using.
- Trim excess fat from the chicken thighs and pat dry. Season with salt and pepper.
- Combine red pepper flakes, brown sugar, fish sauce, soy sauce, and grated ginger in a bowl. Whisk until well blended.
- Place chicken thighs skin side down in the skillet and pour the sticky sauce over, ensuring even coverage.
- Roast chicken skin side down for 30 minutes to absorb flavors and caramelize.
- After 30 minutes, flip the thighs to skin side up and roast for another 15 minutes.
- Optionally broil for 2-5 minutes for extra caramelization, keeping an eye on it.
- Let the chicken rest for a few minutes, garnish with cilantro, and serve.
Leave a Reply